
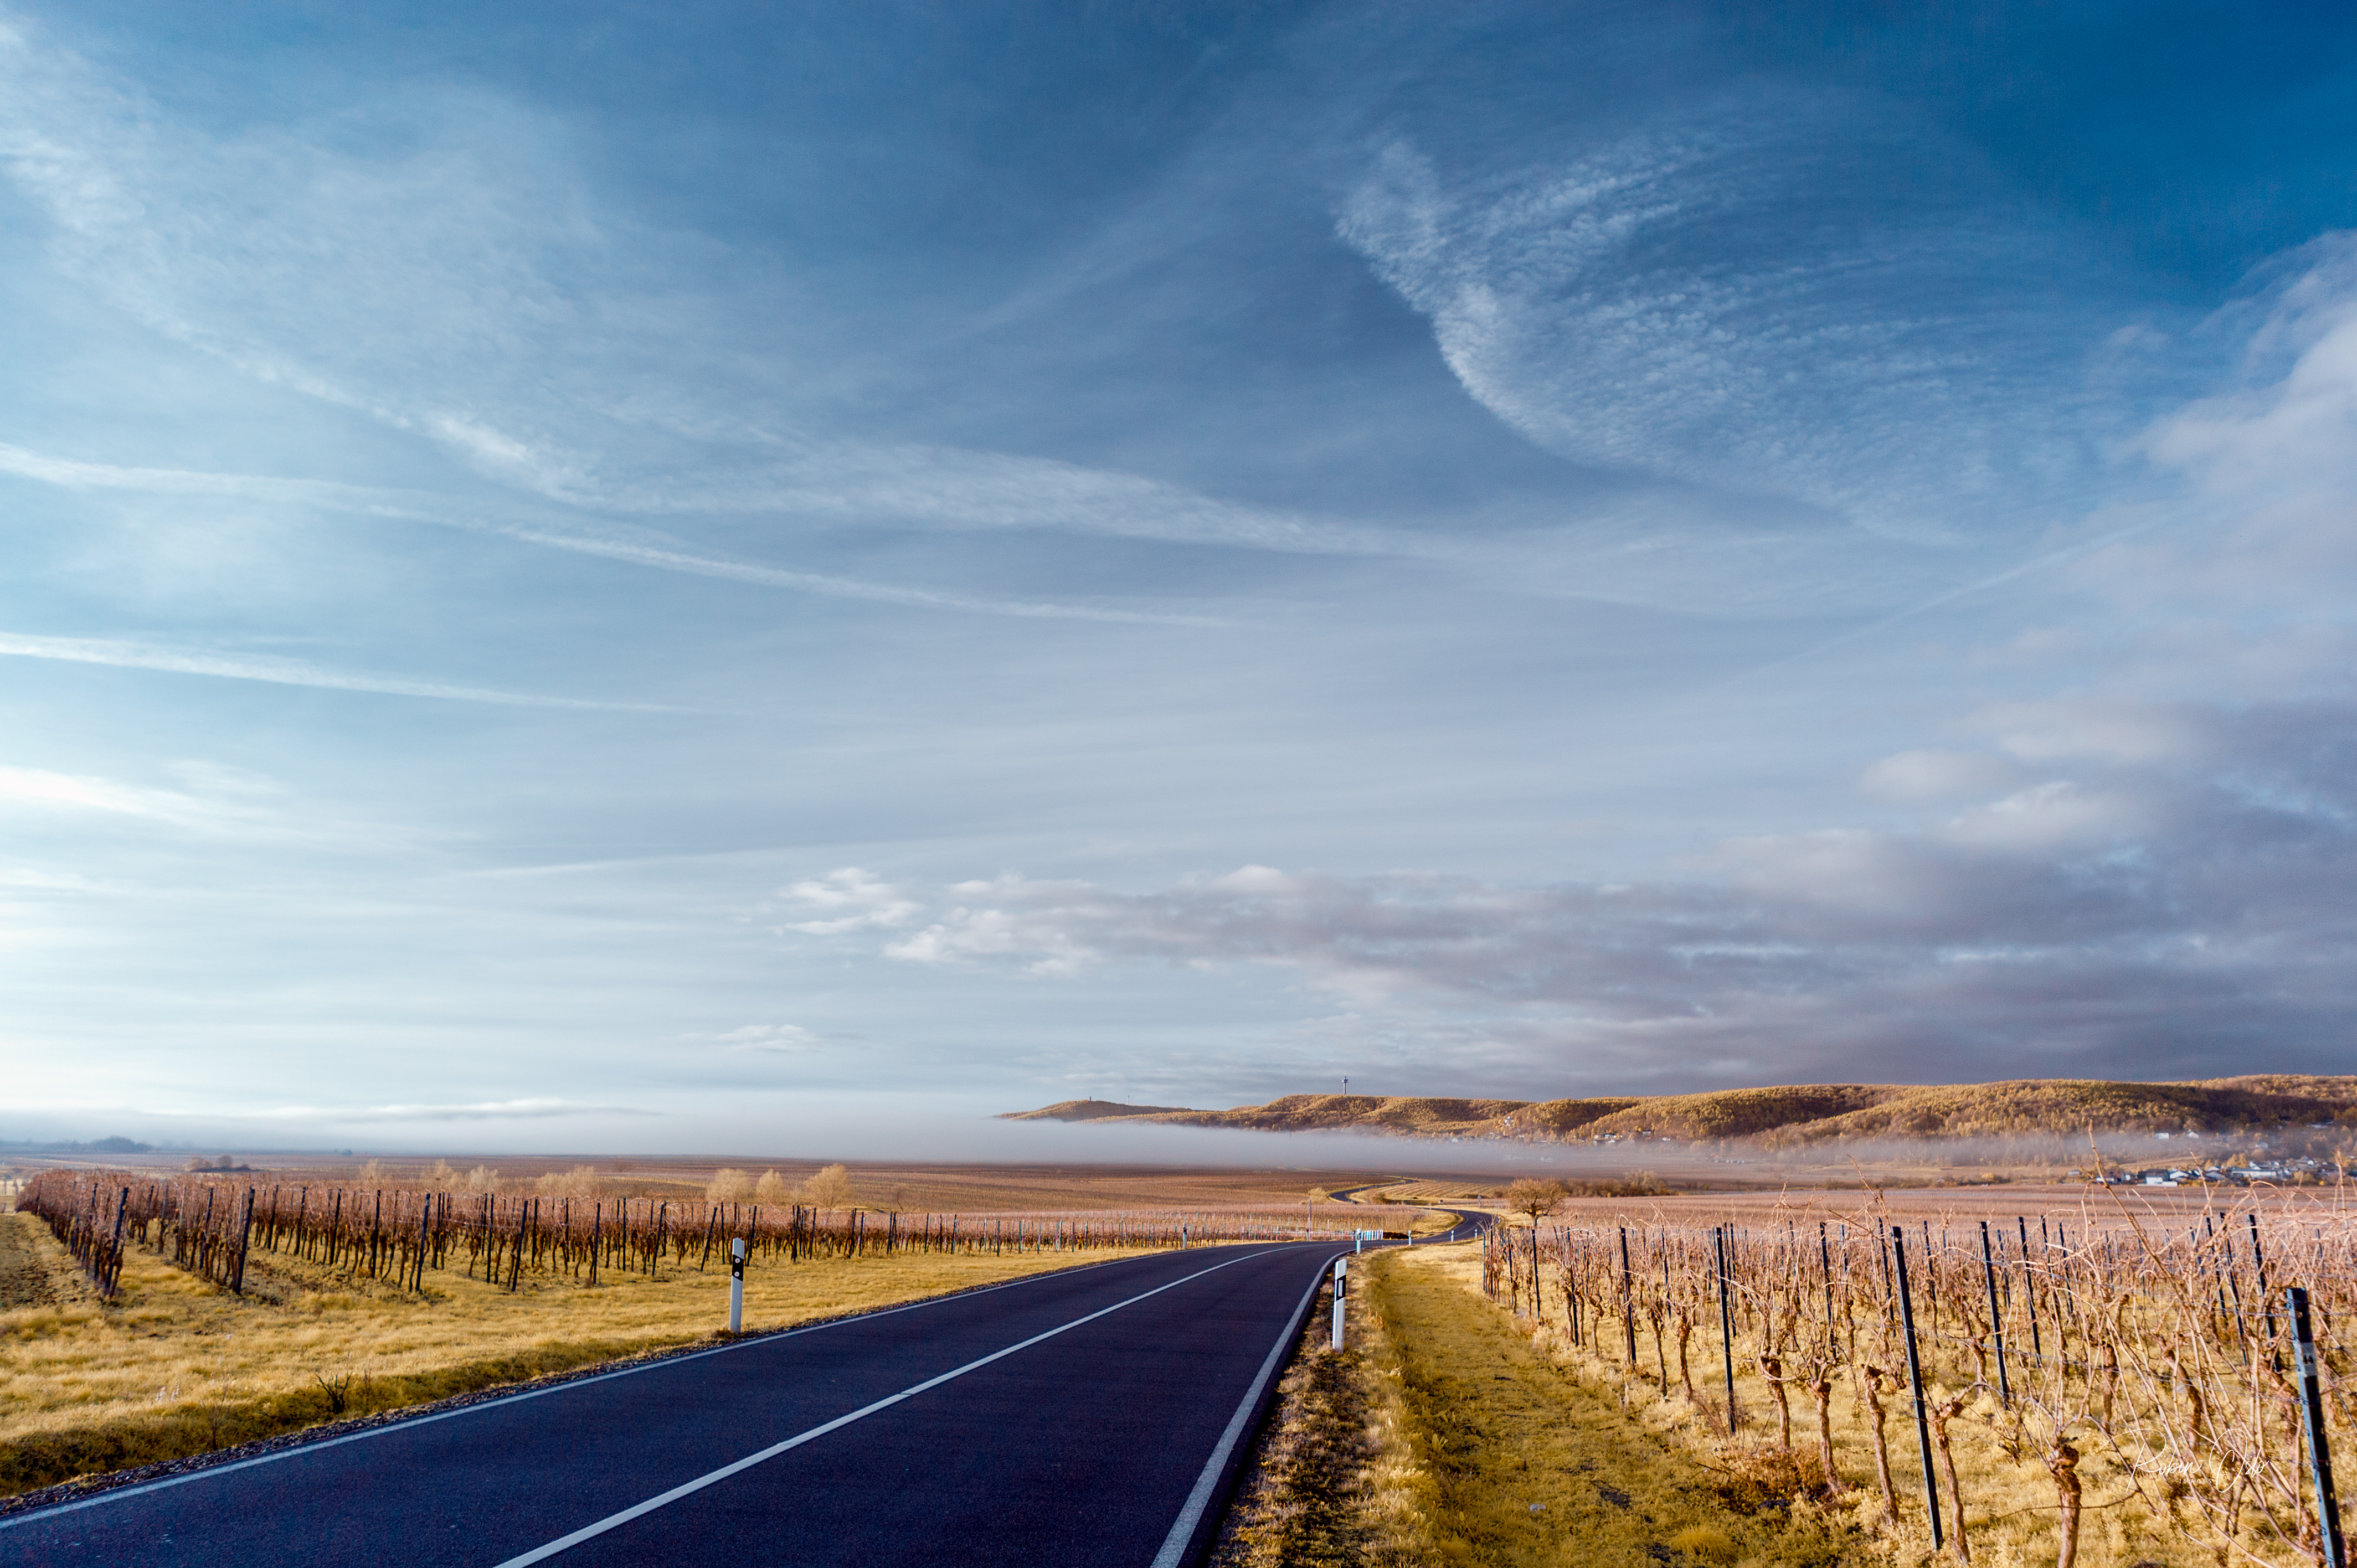
Infrared Photography with a Nikon D700
English Version
How does one come up with the idea of trying infrared photography with a Nikon D700?
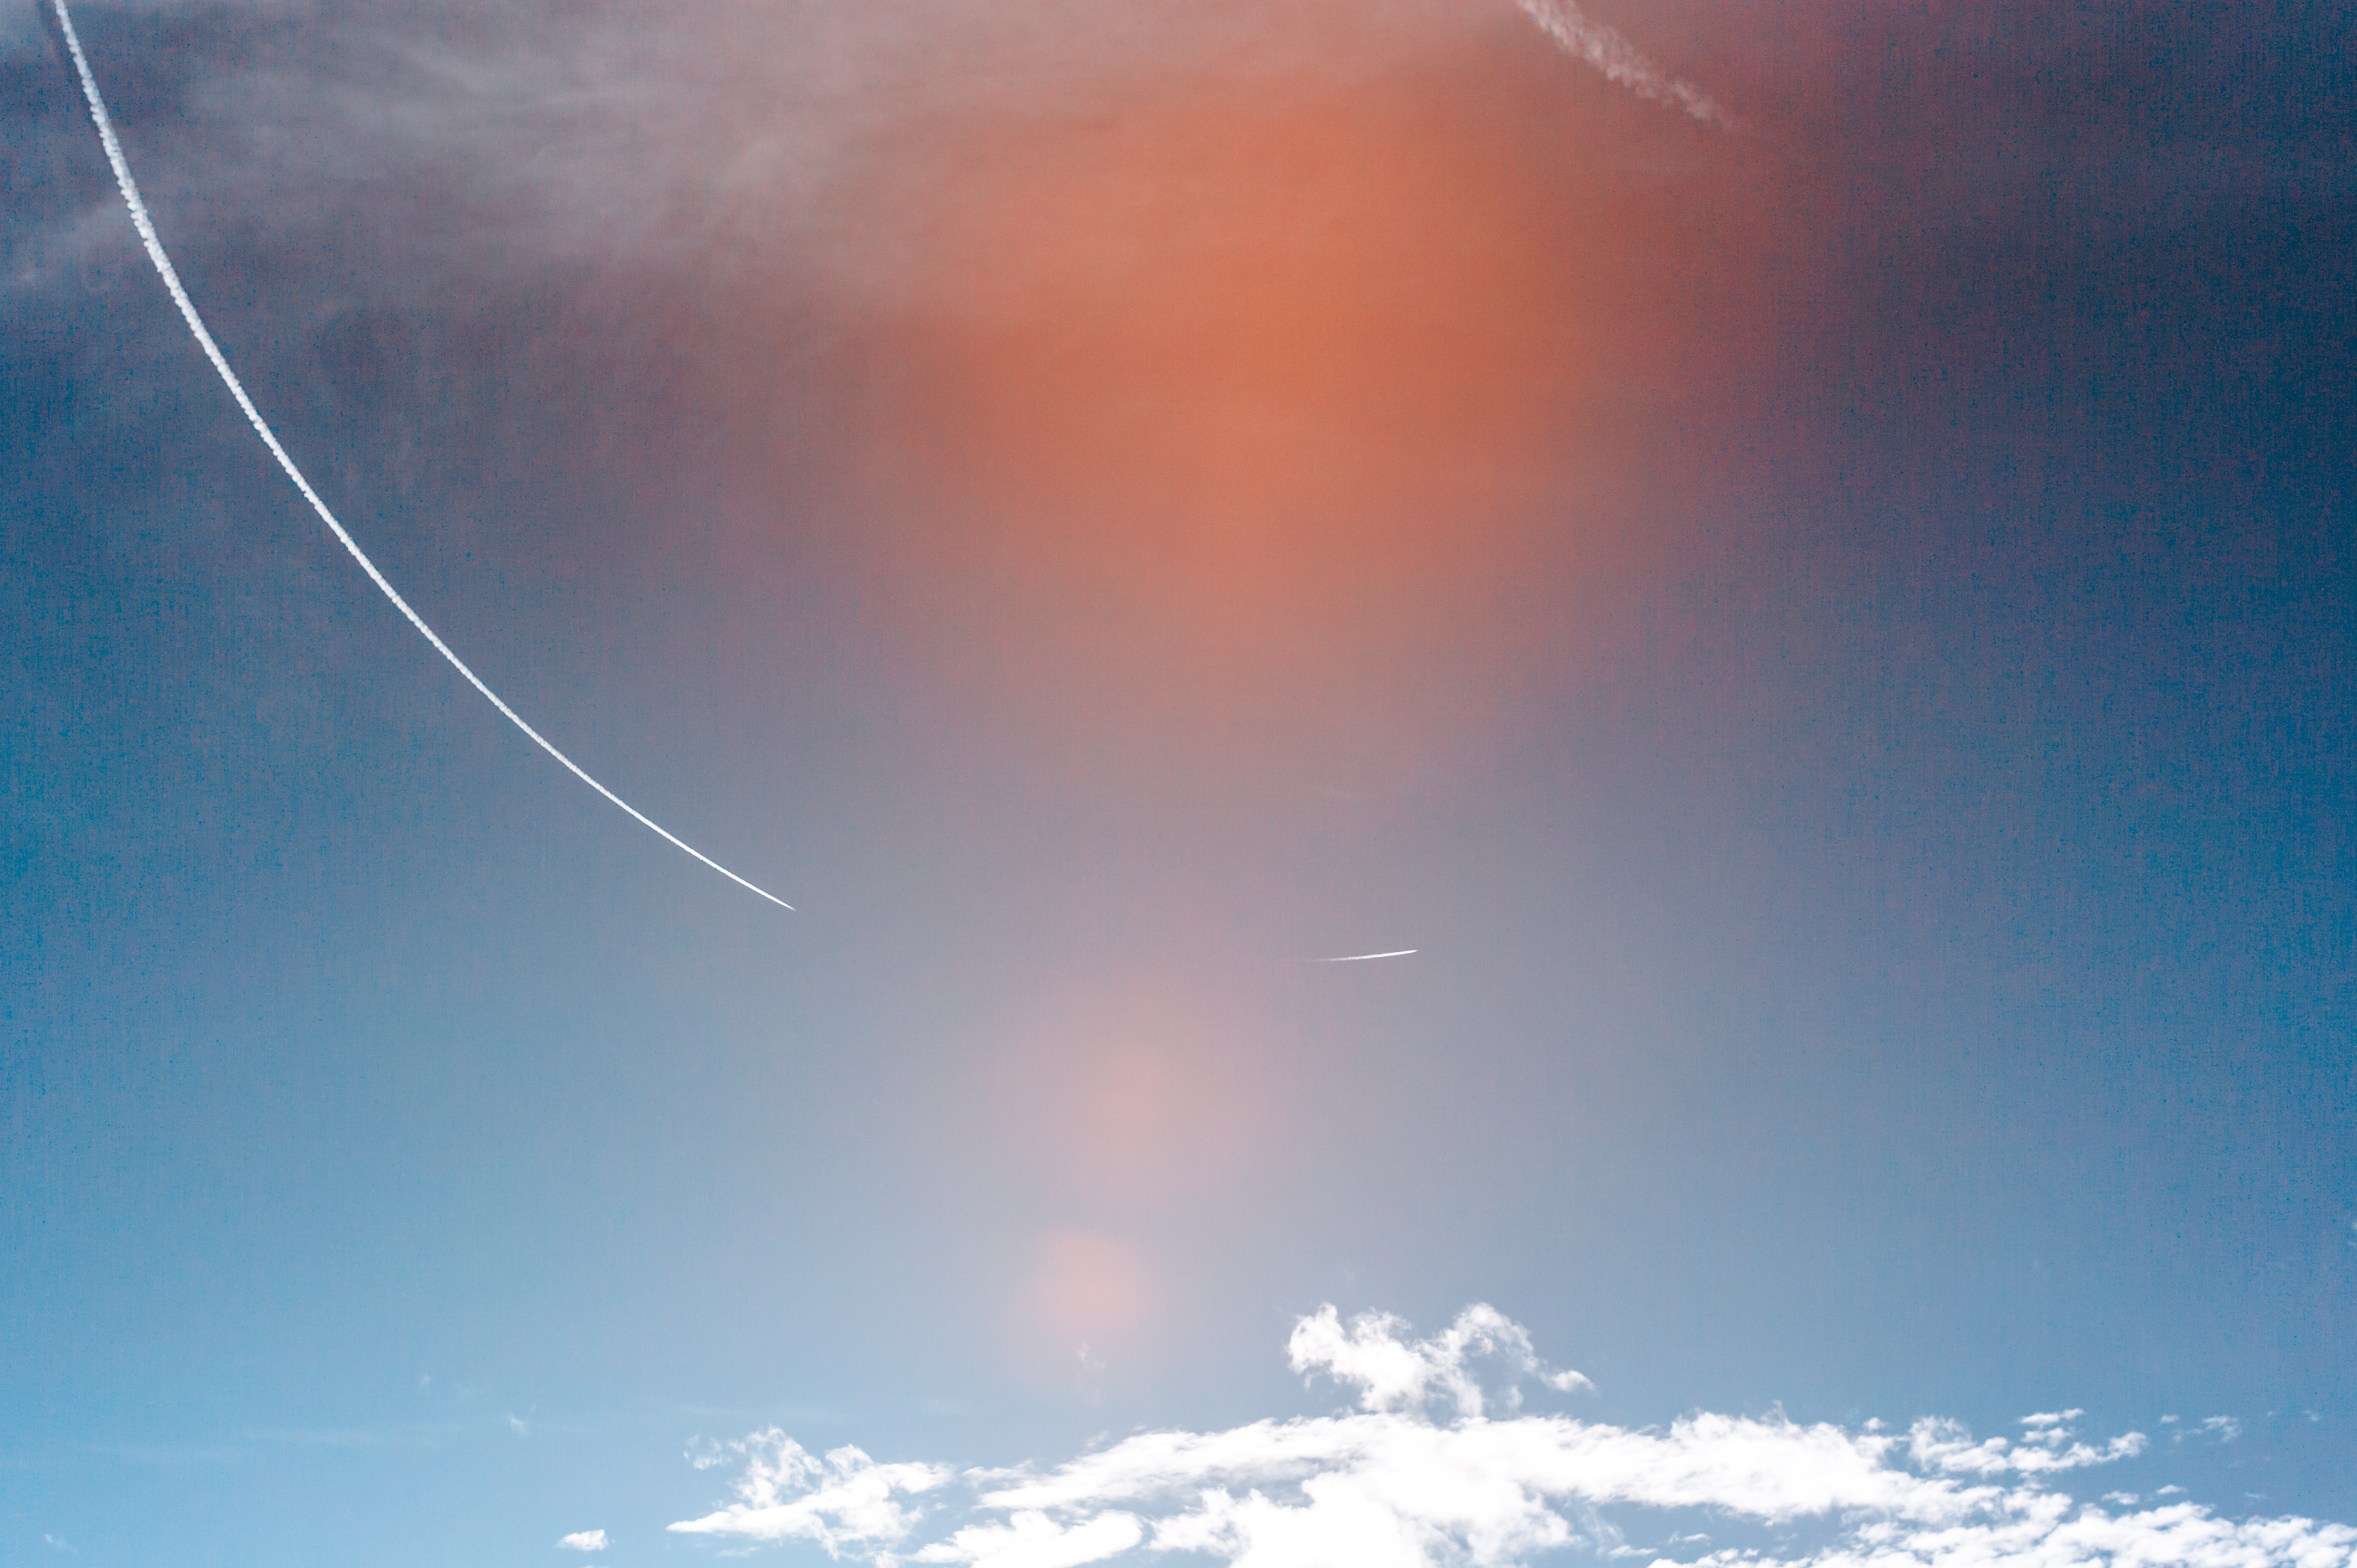
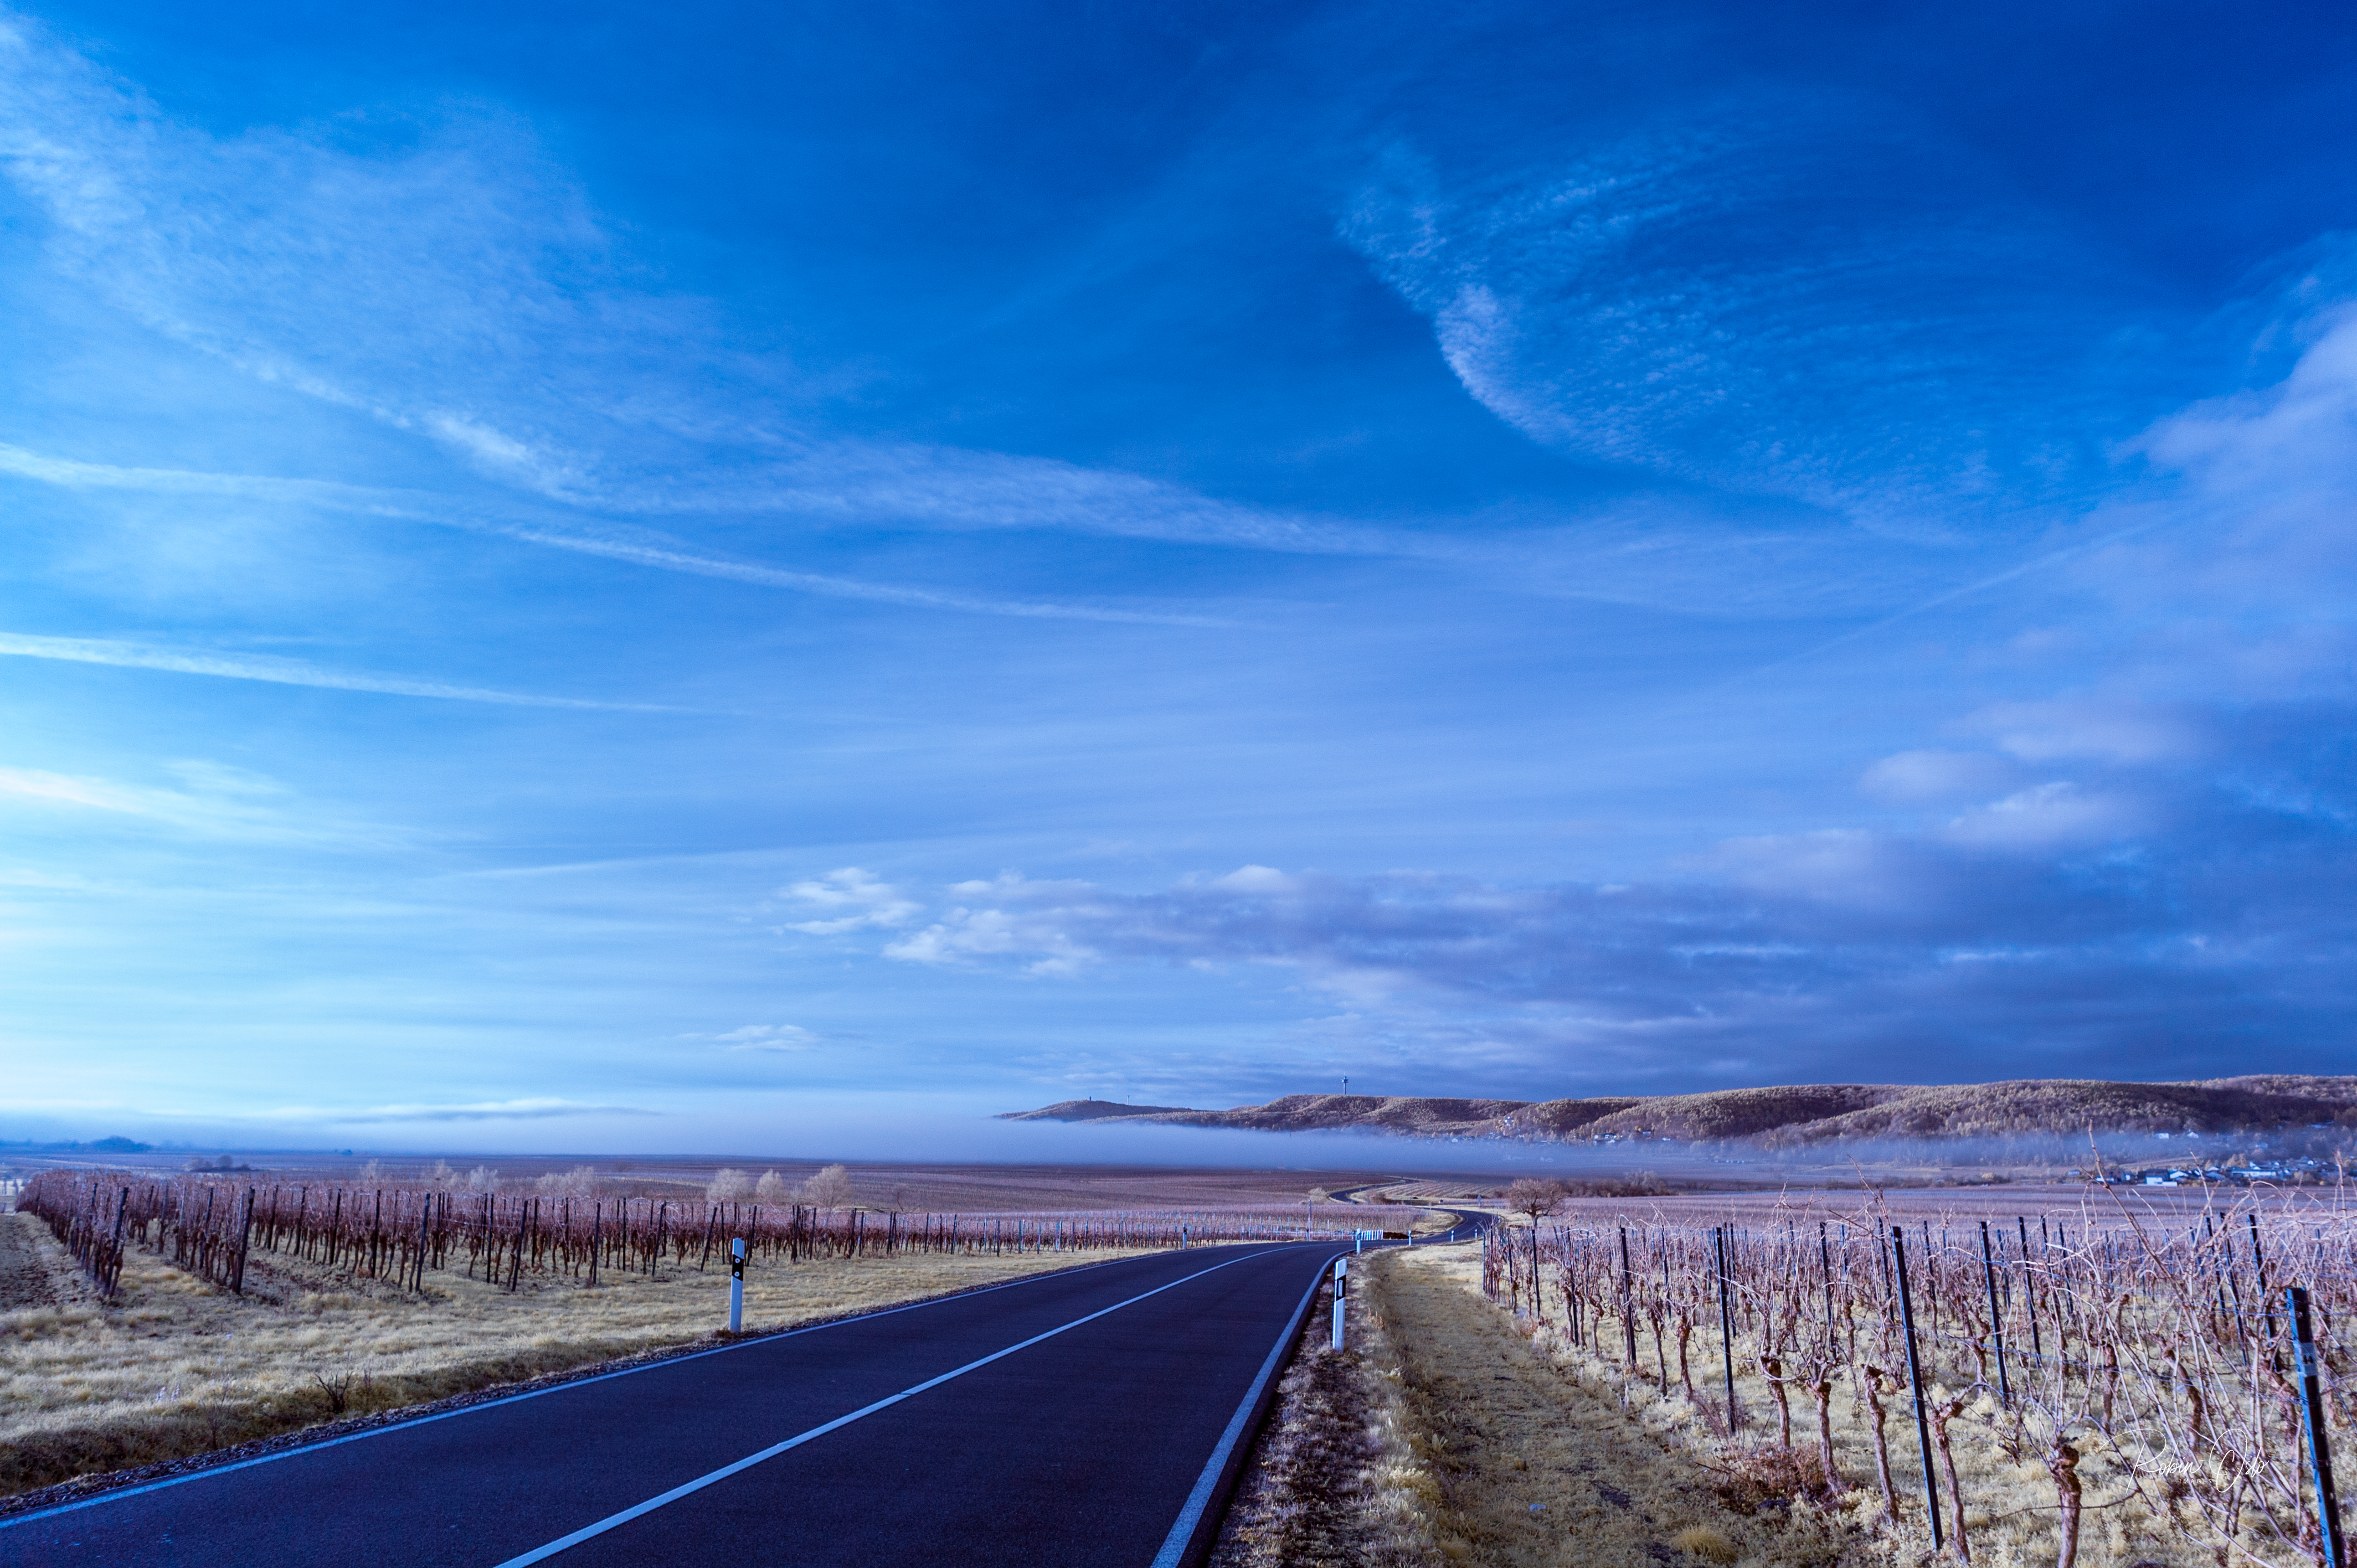
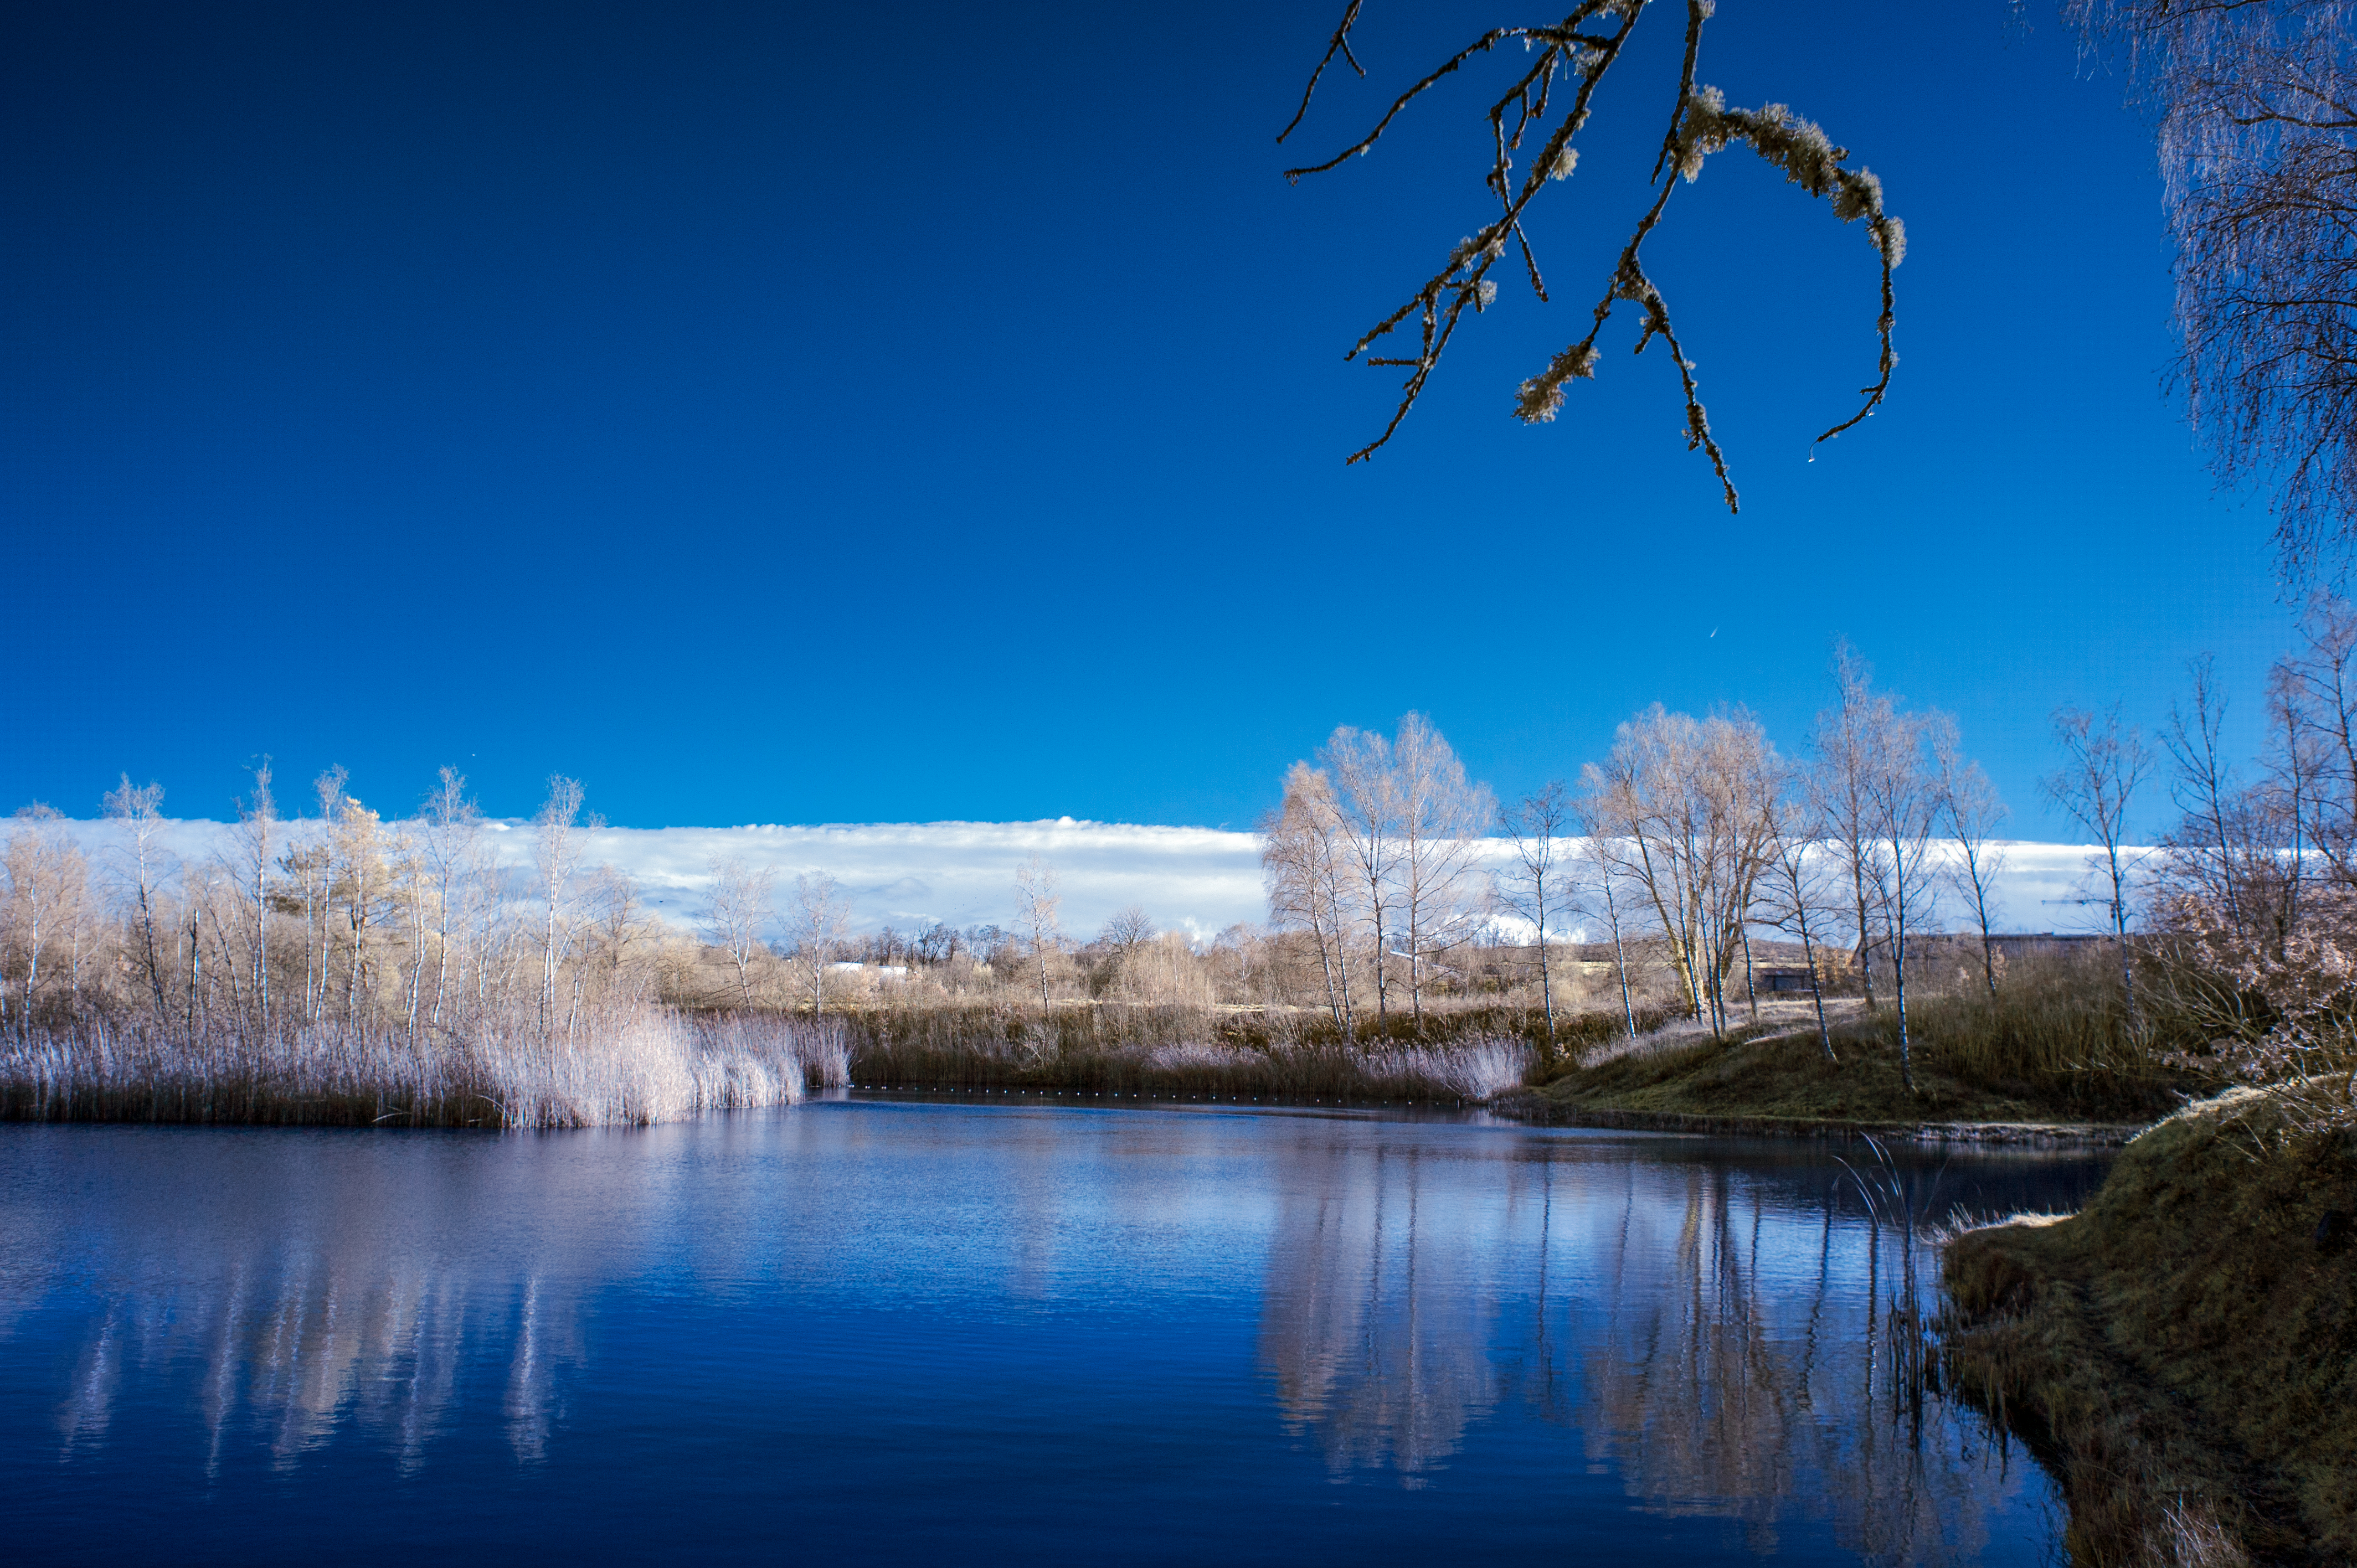
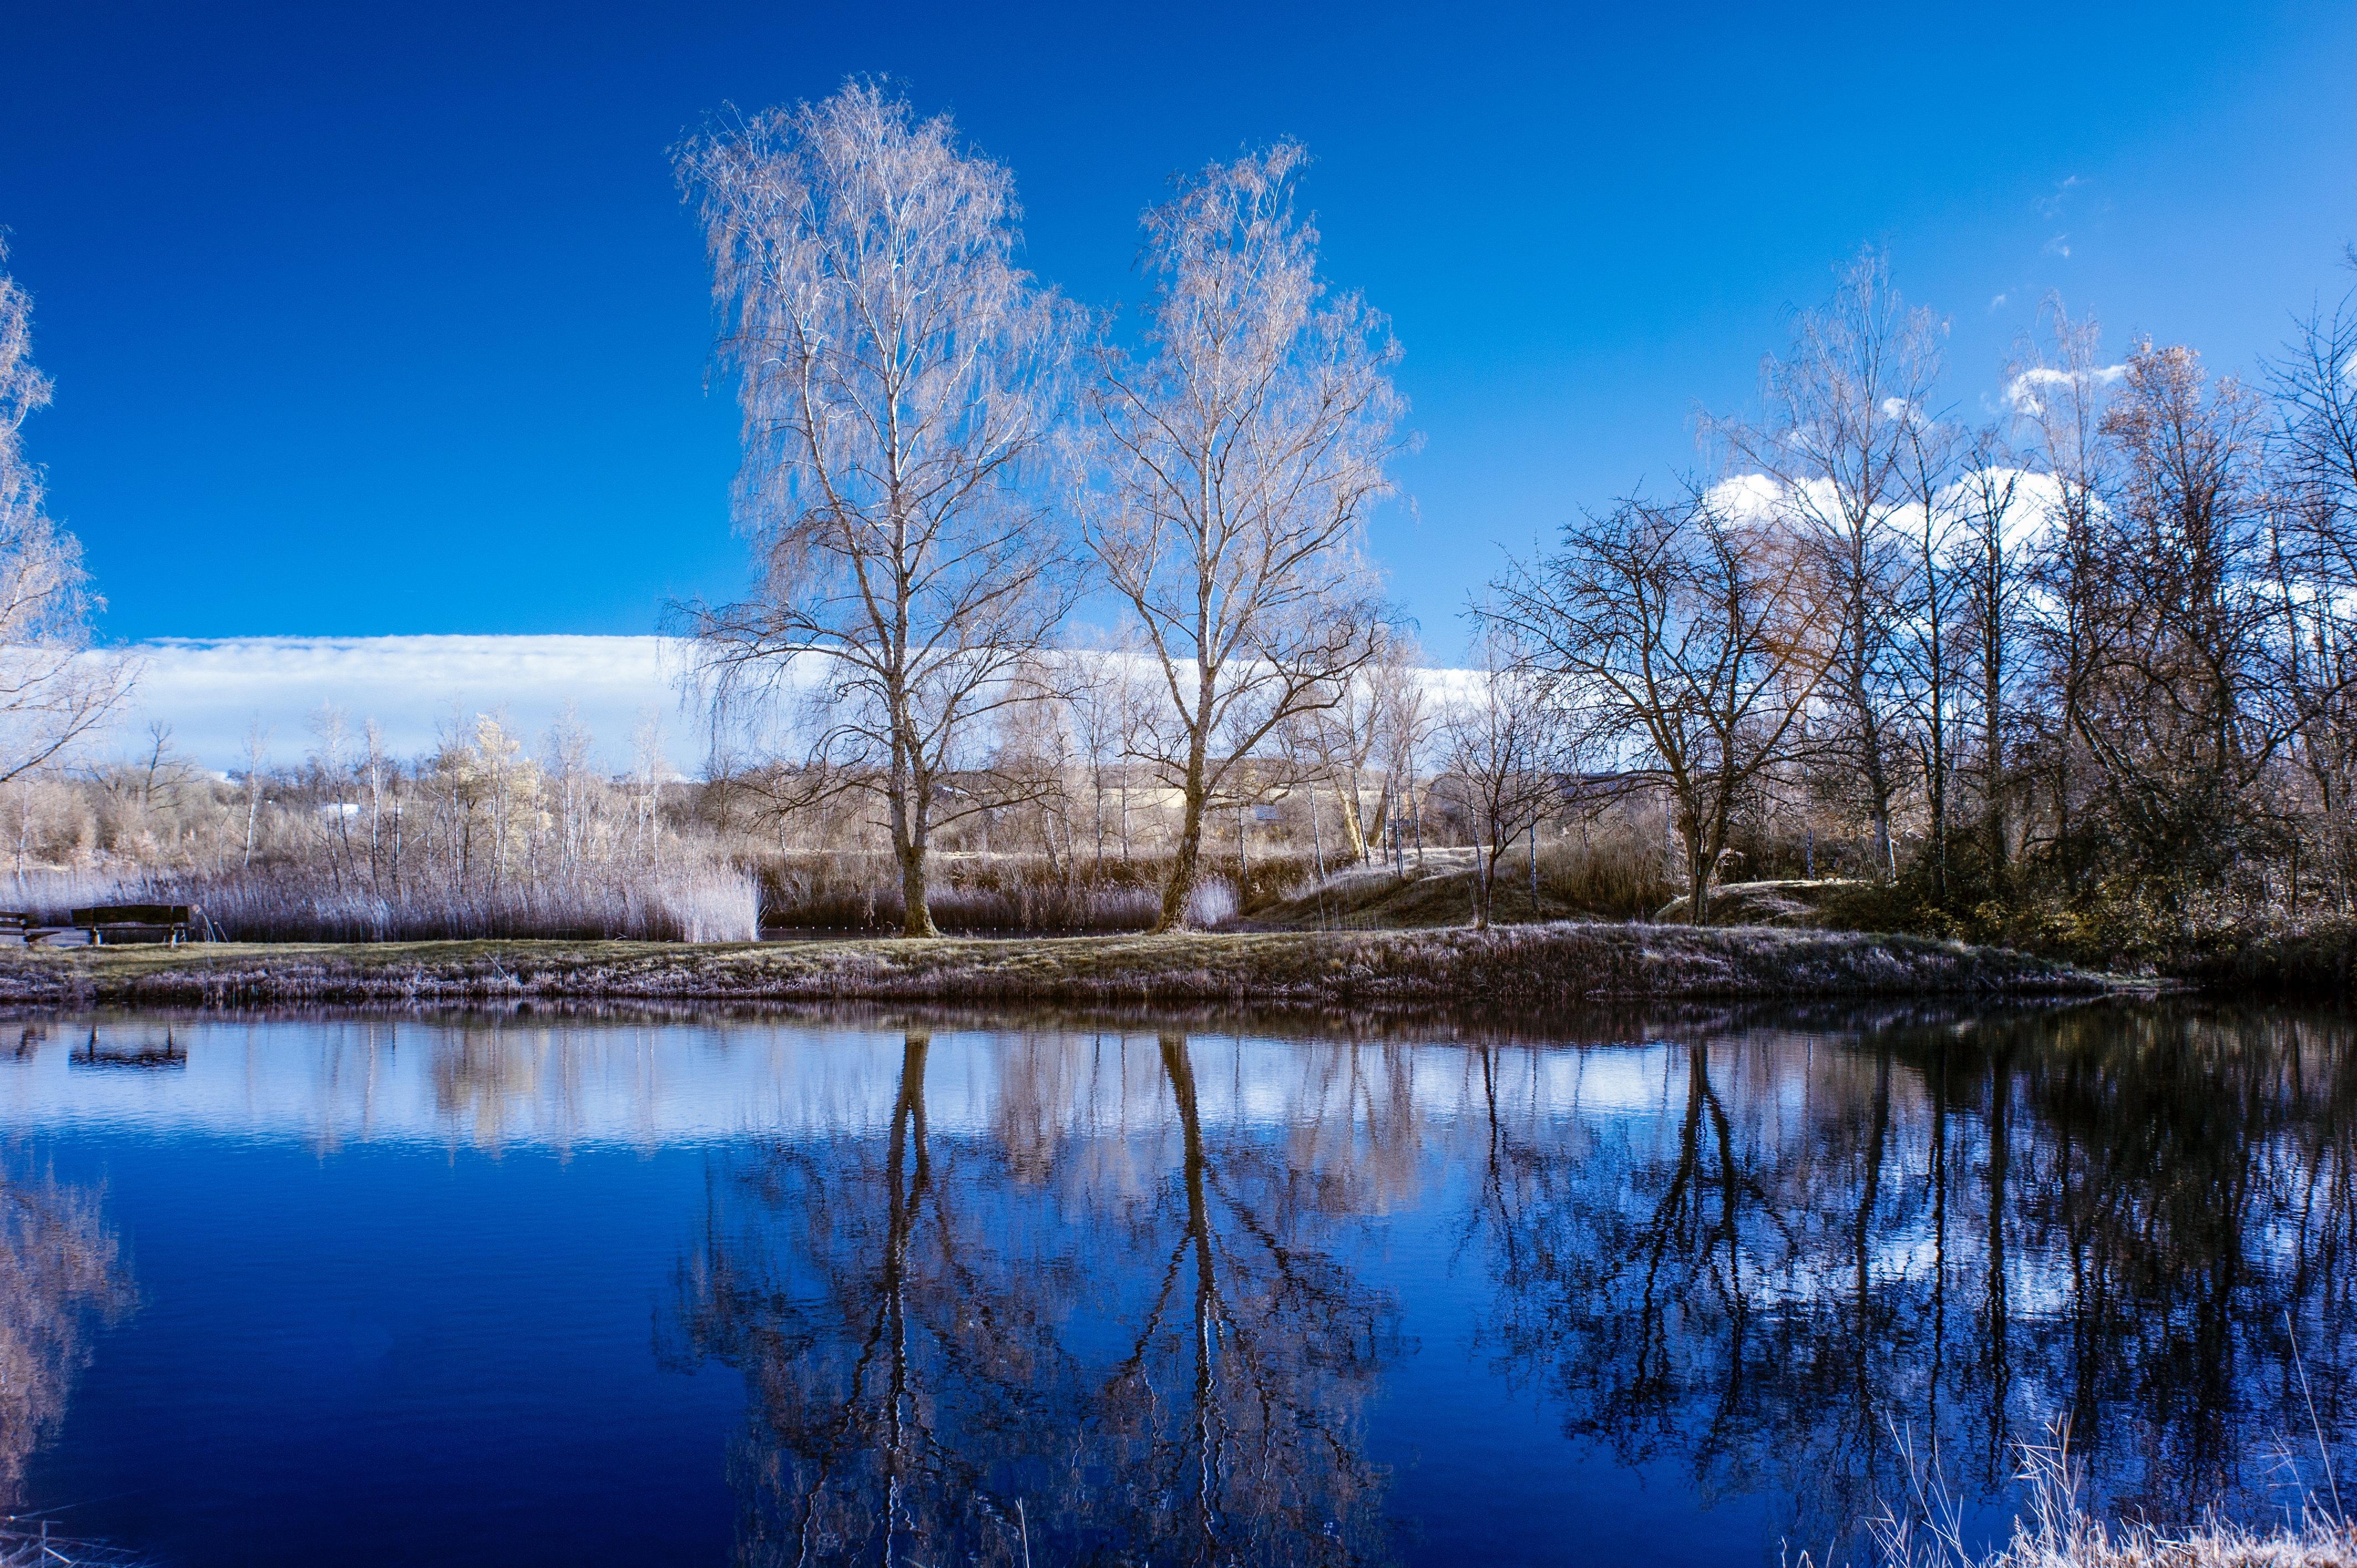
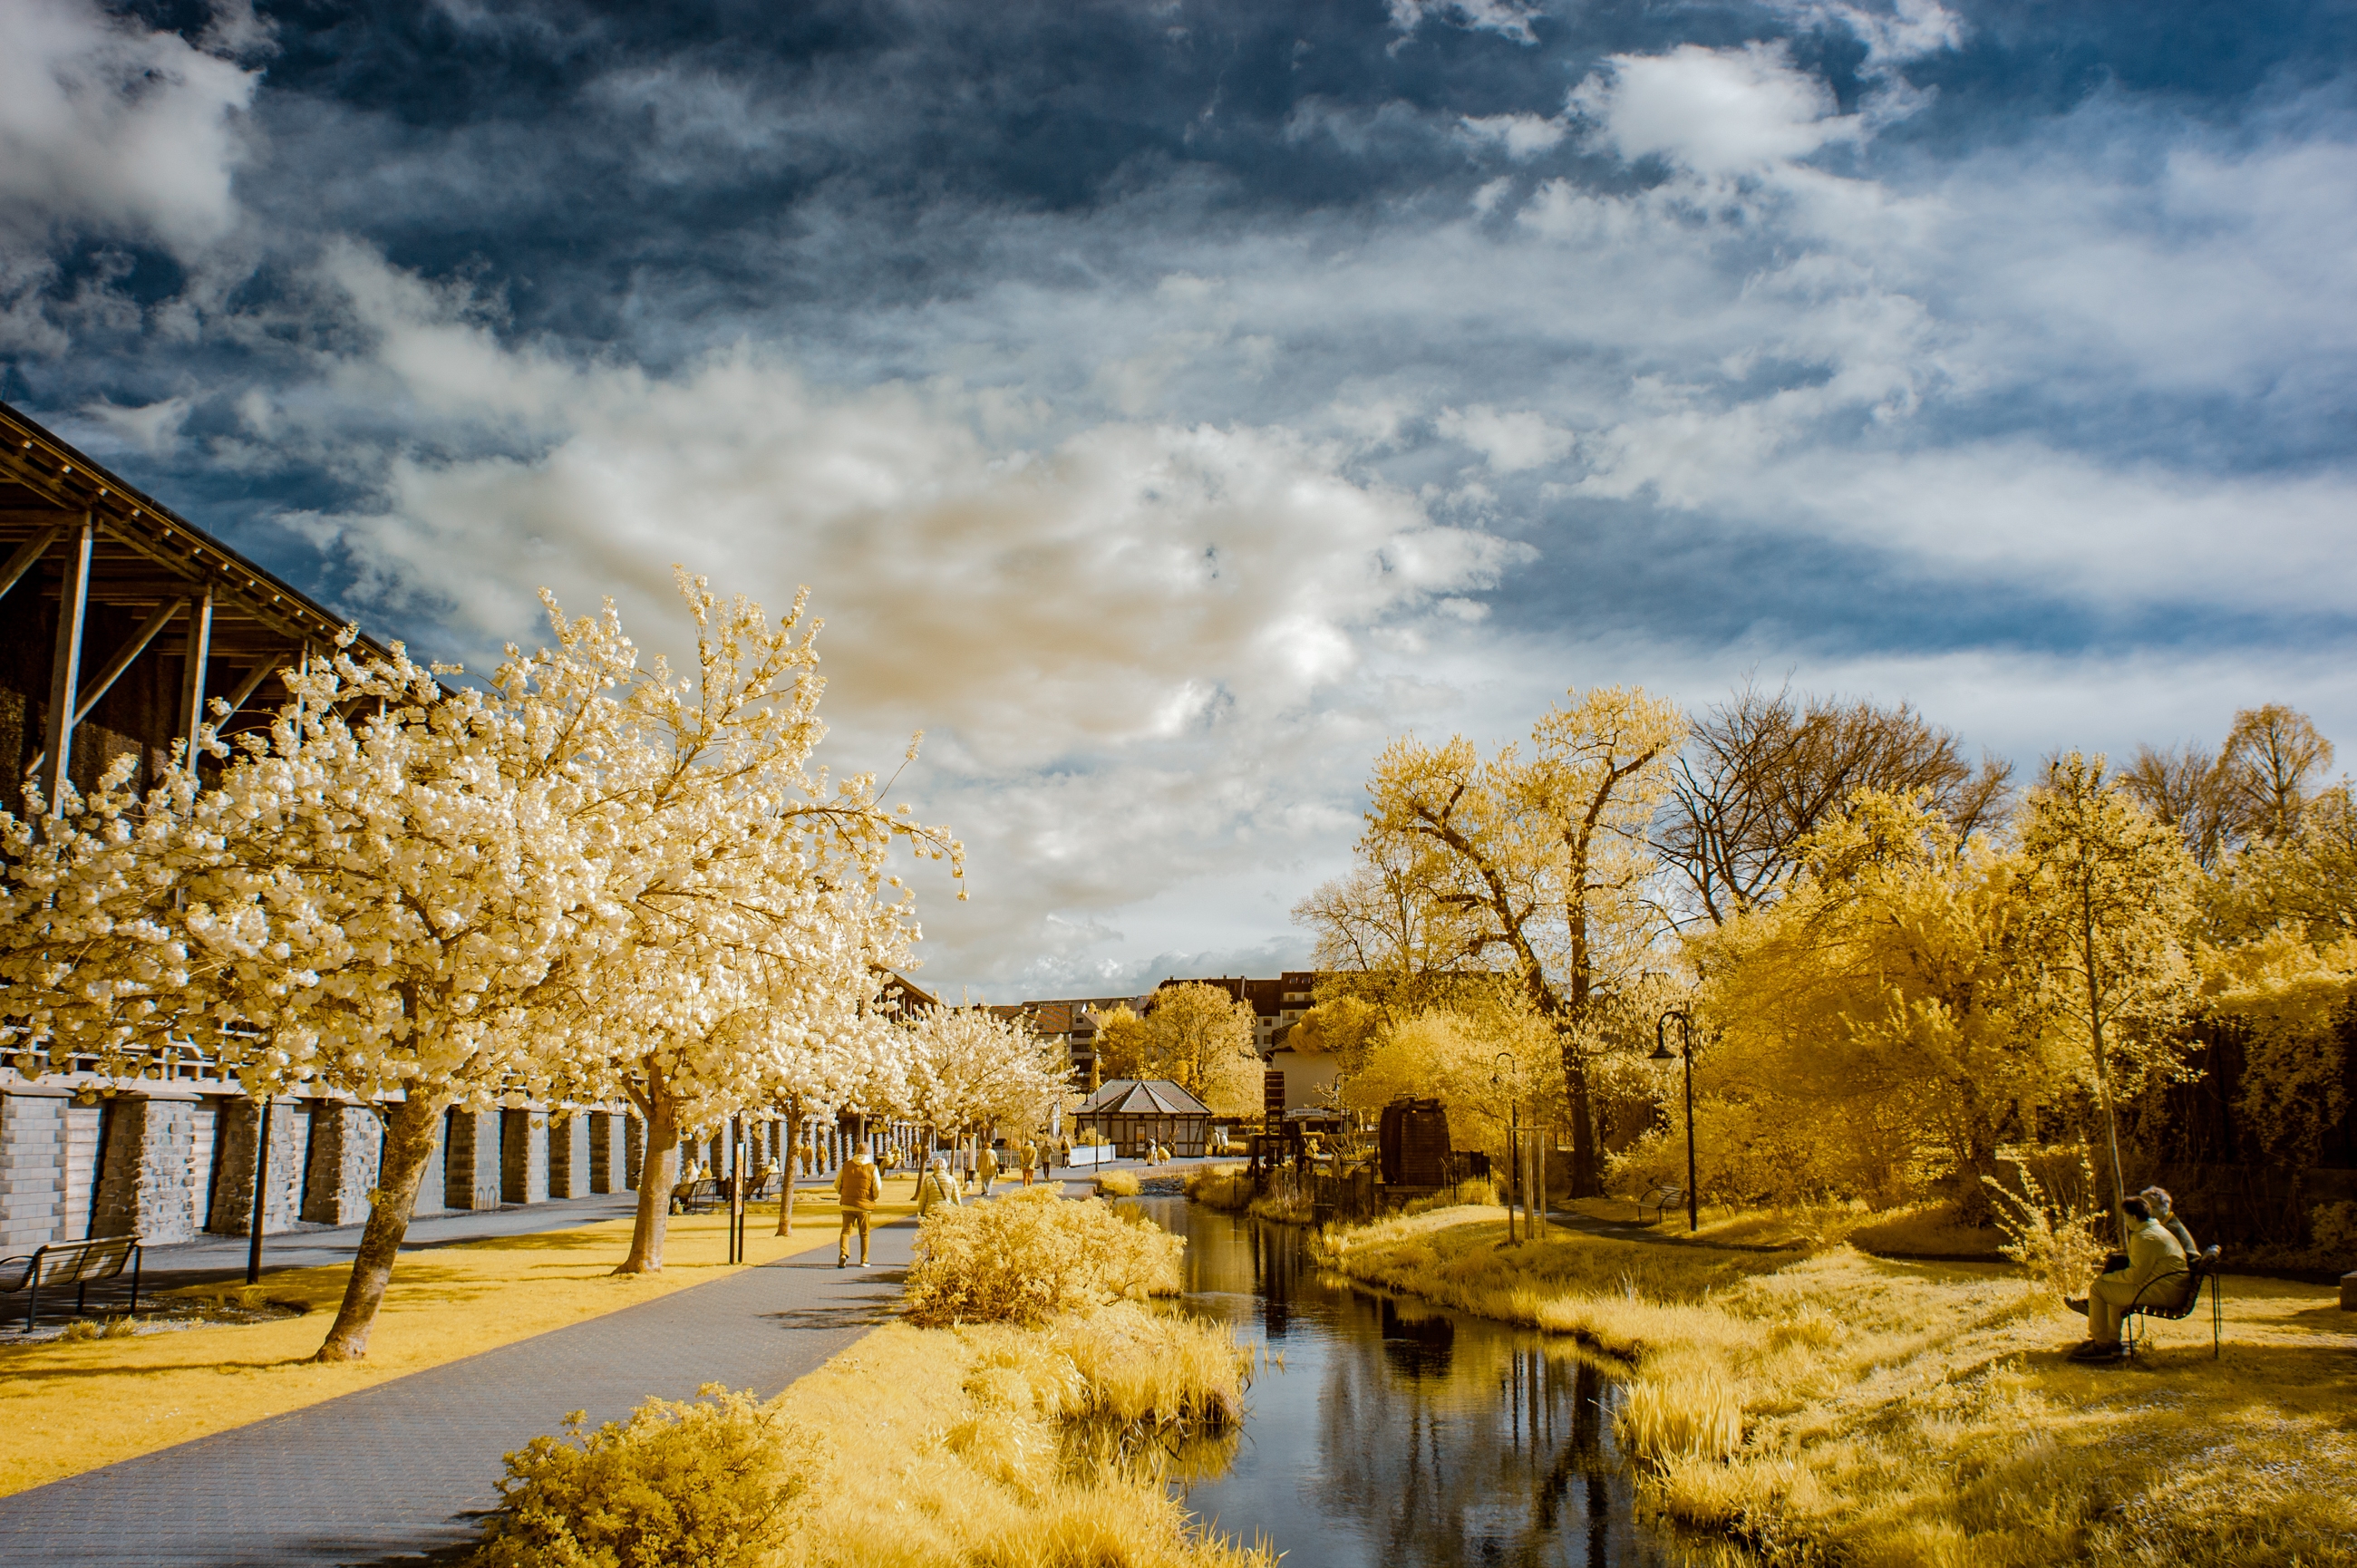
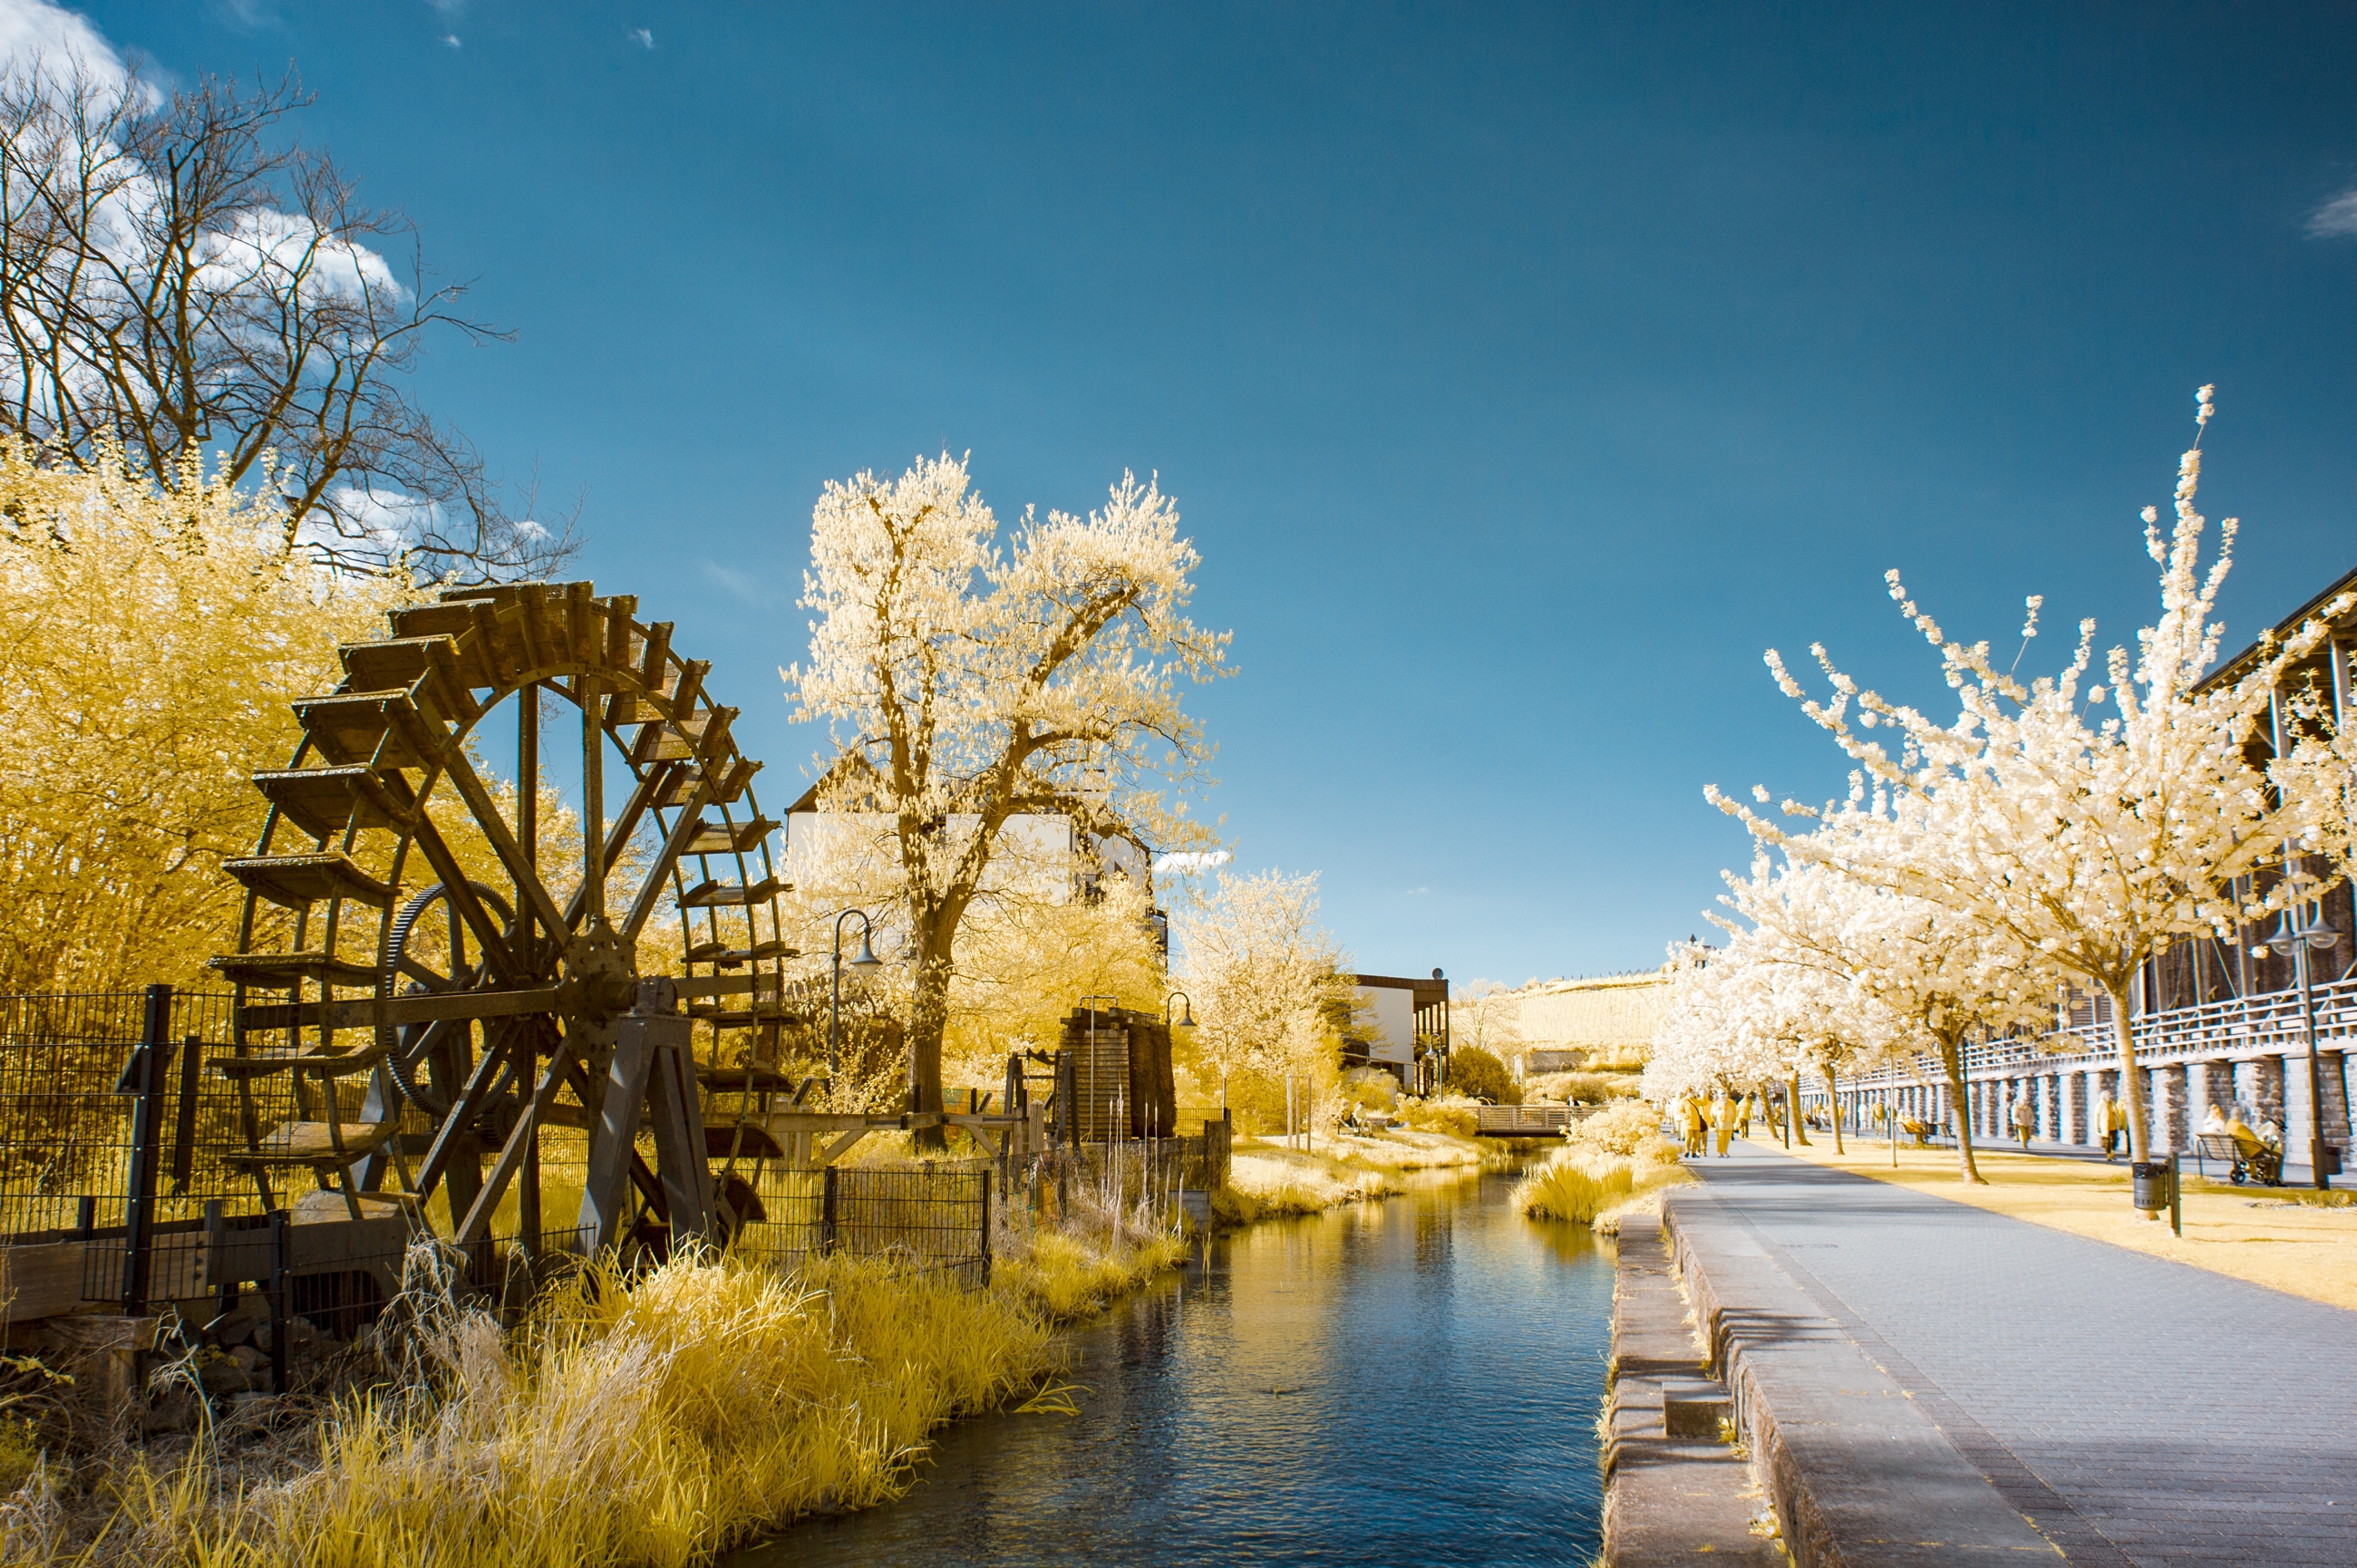
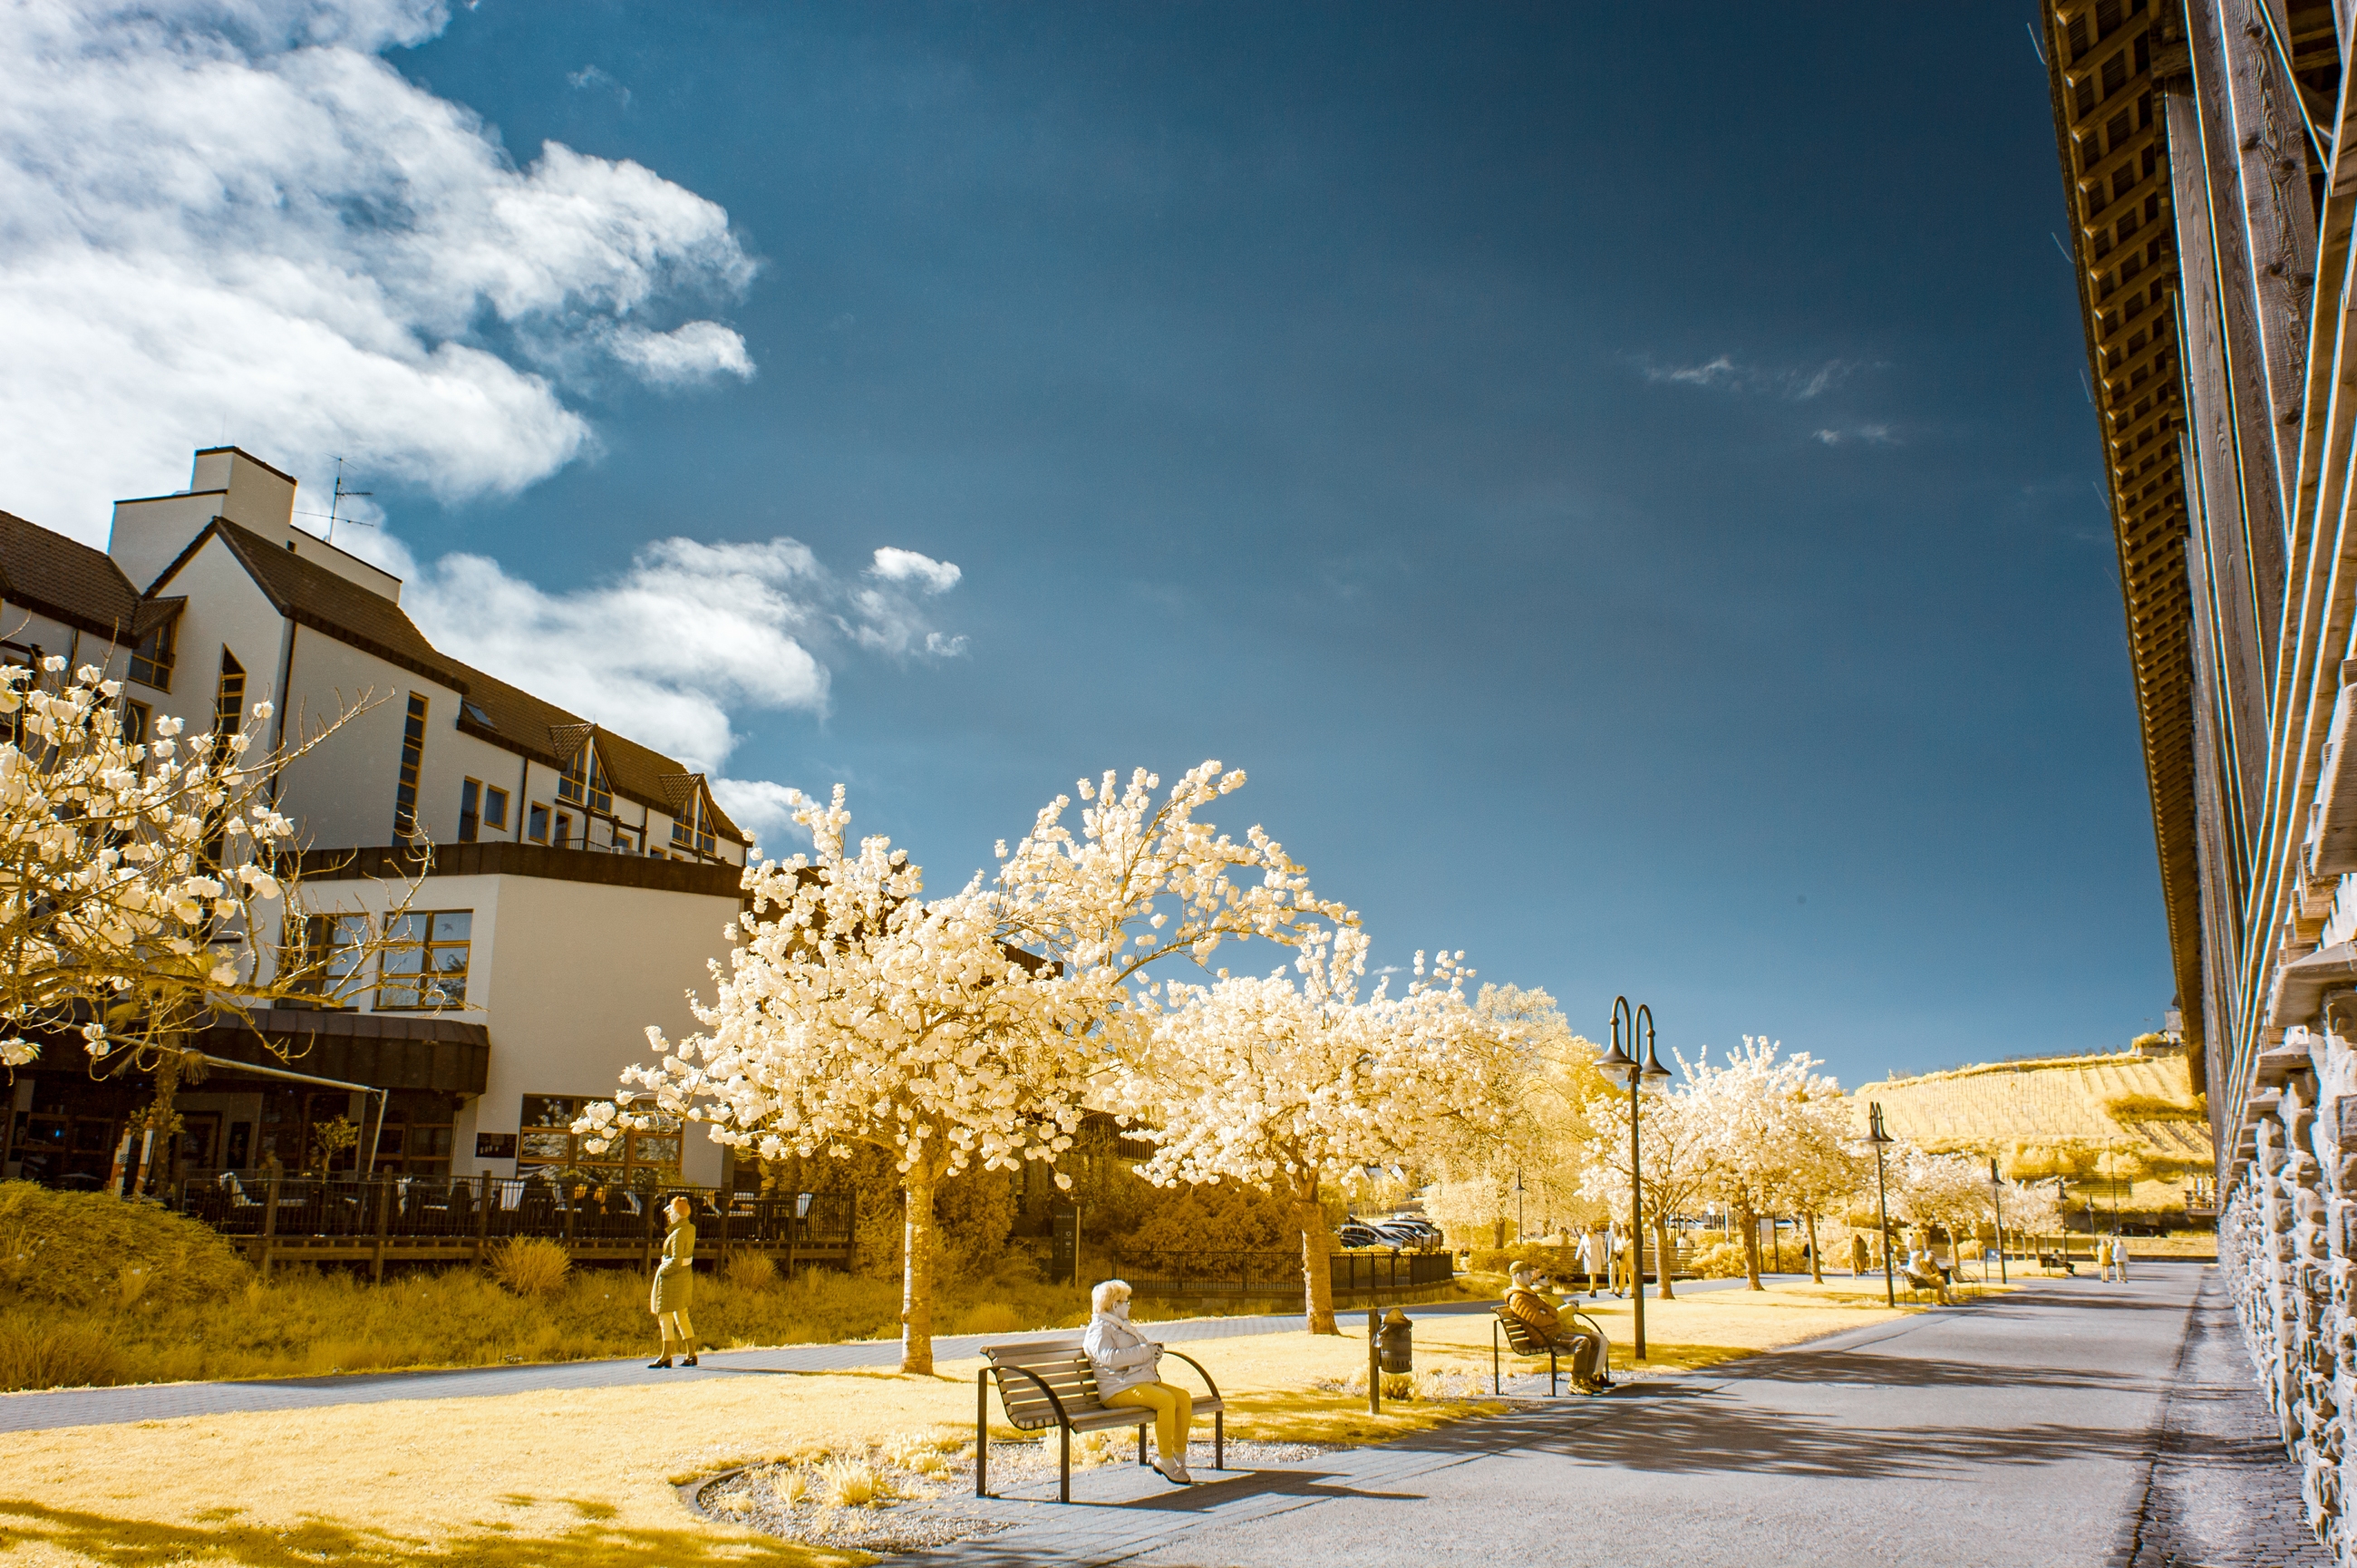
Who isn’t fascinated by the pictures with white or yellow trees, blue skies and filigree clouds? Who has ever heard of the „Wood effect“?

Ex ante
This is a description of my beginnings and the things I learned along the way.
I will not rule out that one or the other will be open to the same genre.
The human eye can detect electromagnetic waves between 400nm (violet) and 700nm (red) wavelength as visible light. Analogue photography, I believe, covers a similar area, except for special film emulsions.
The legendary Kodak Aerochrome comes in mind. You can buy it „inexpensively“ on eBay for €130 and more, a long-expired roll.

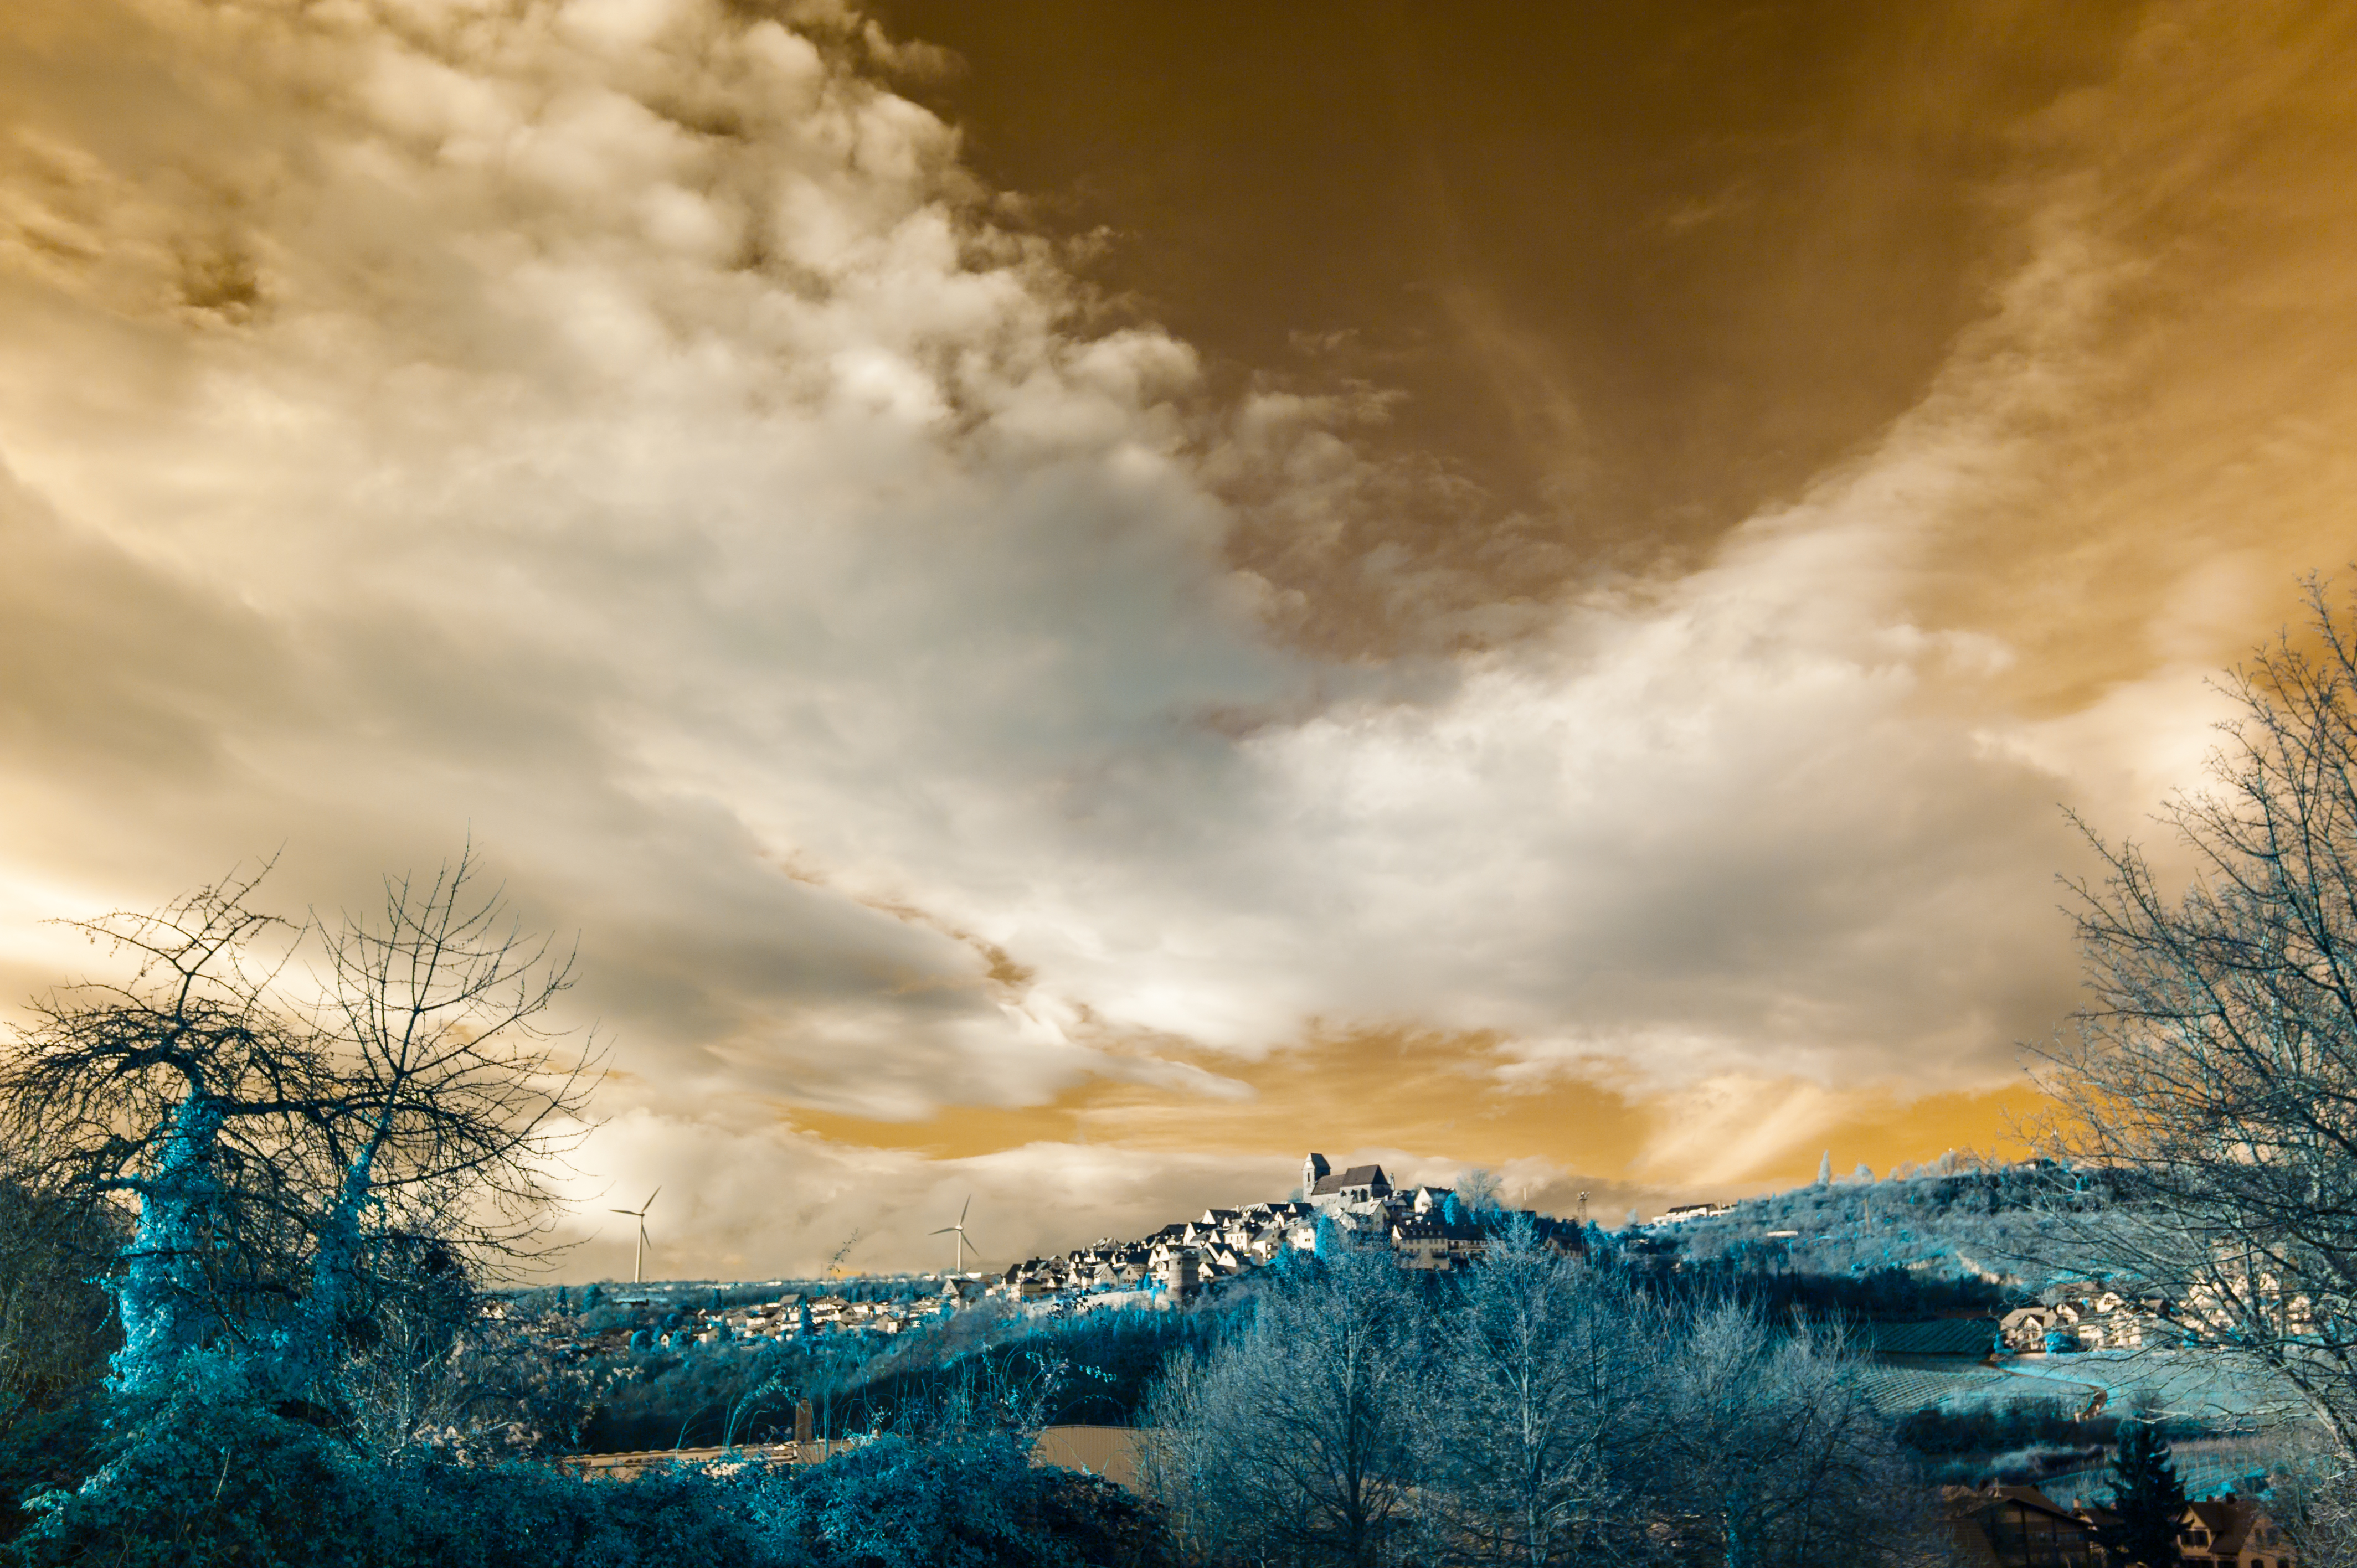
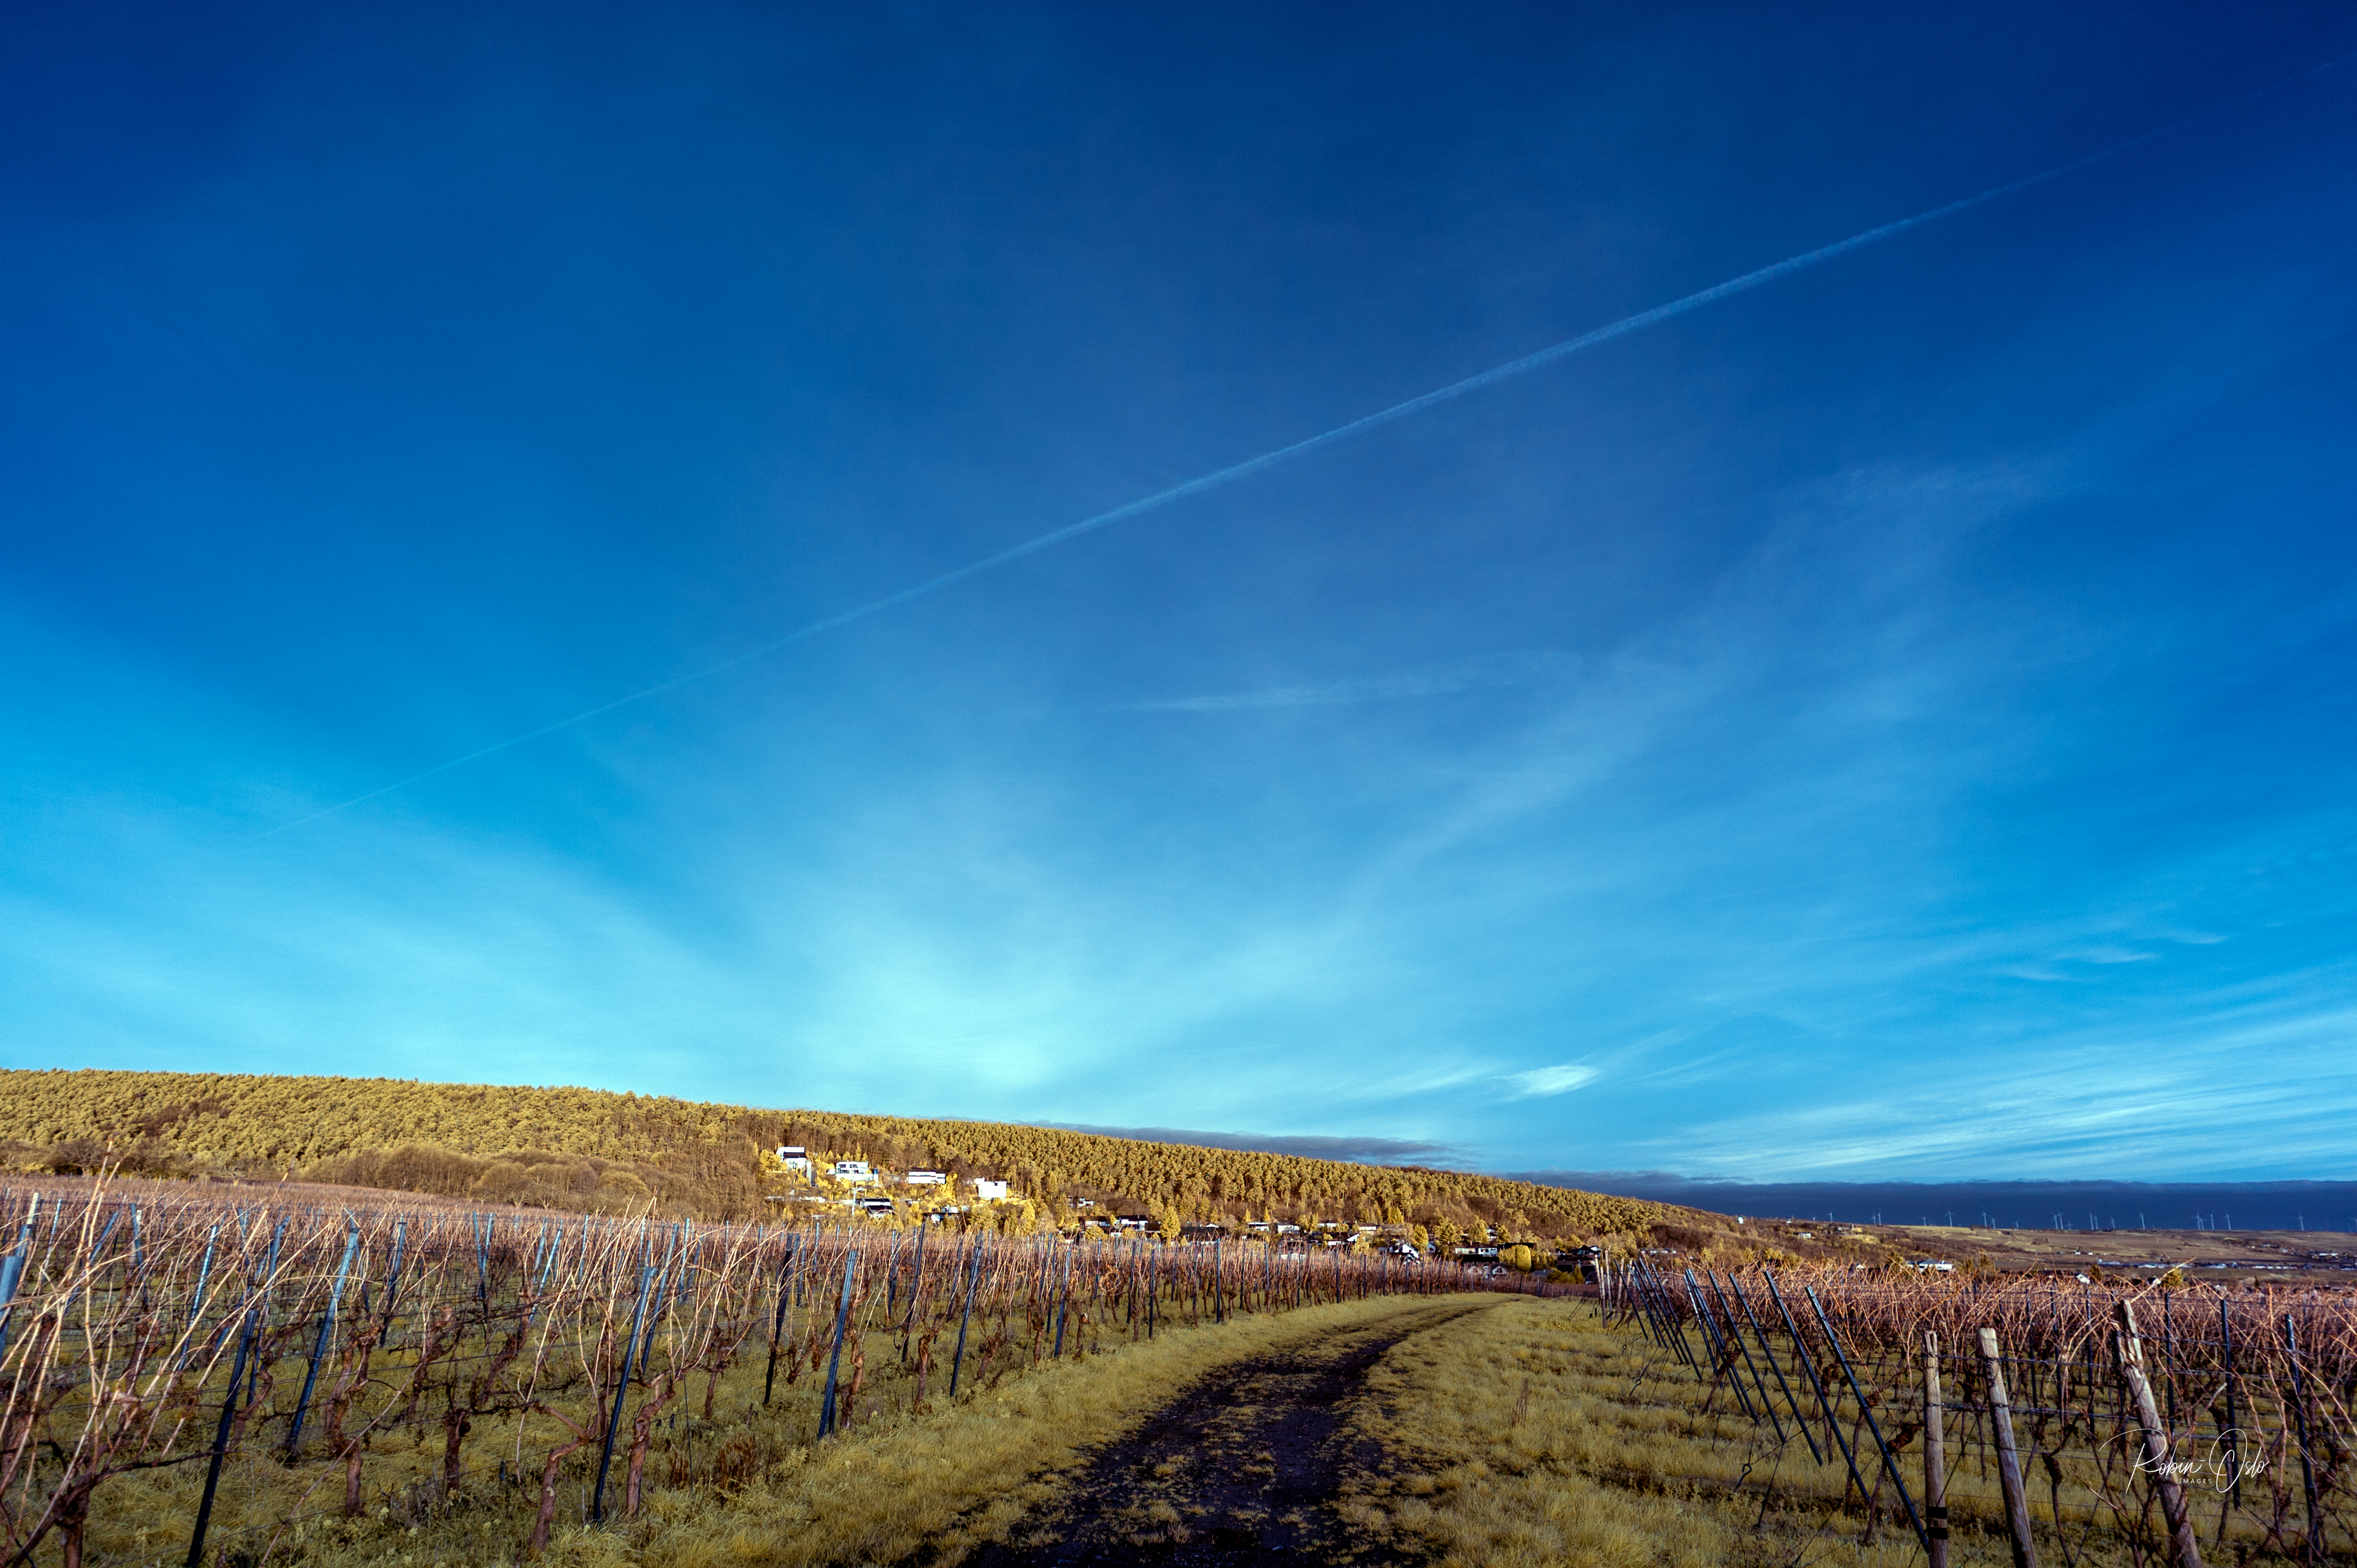
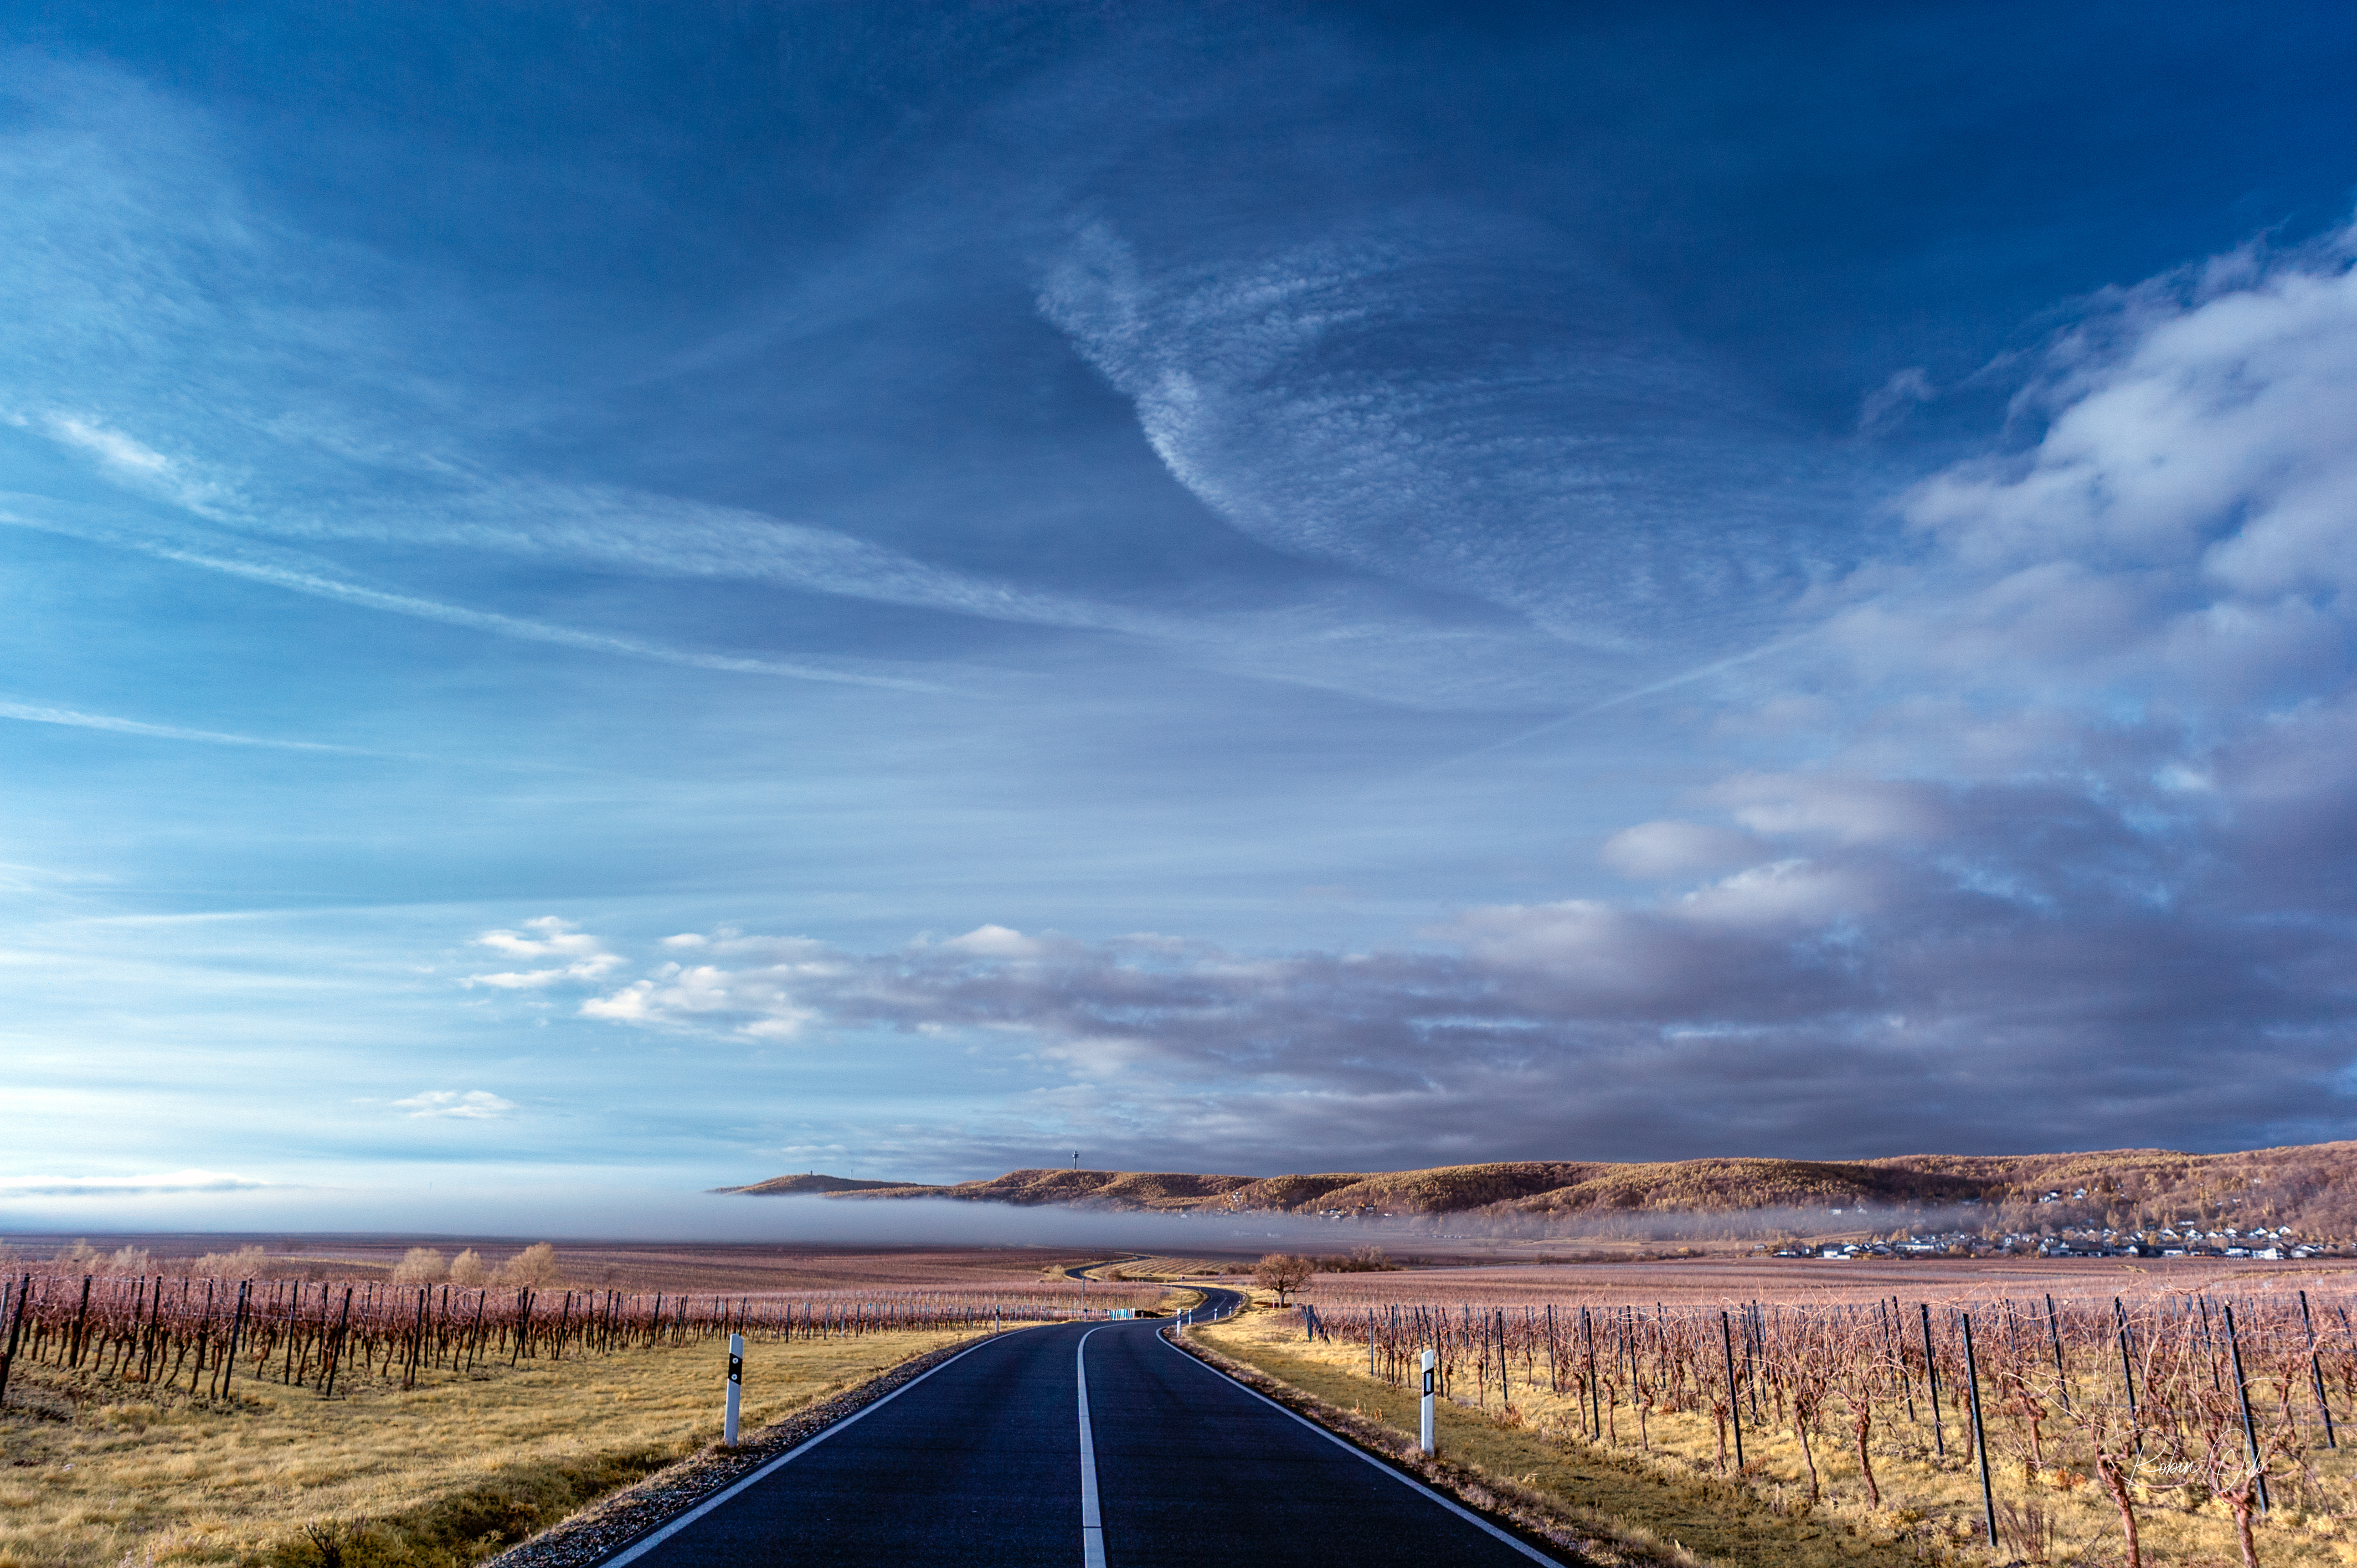
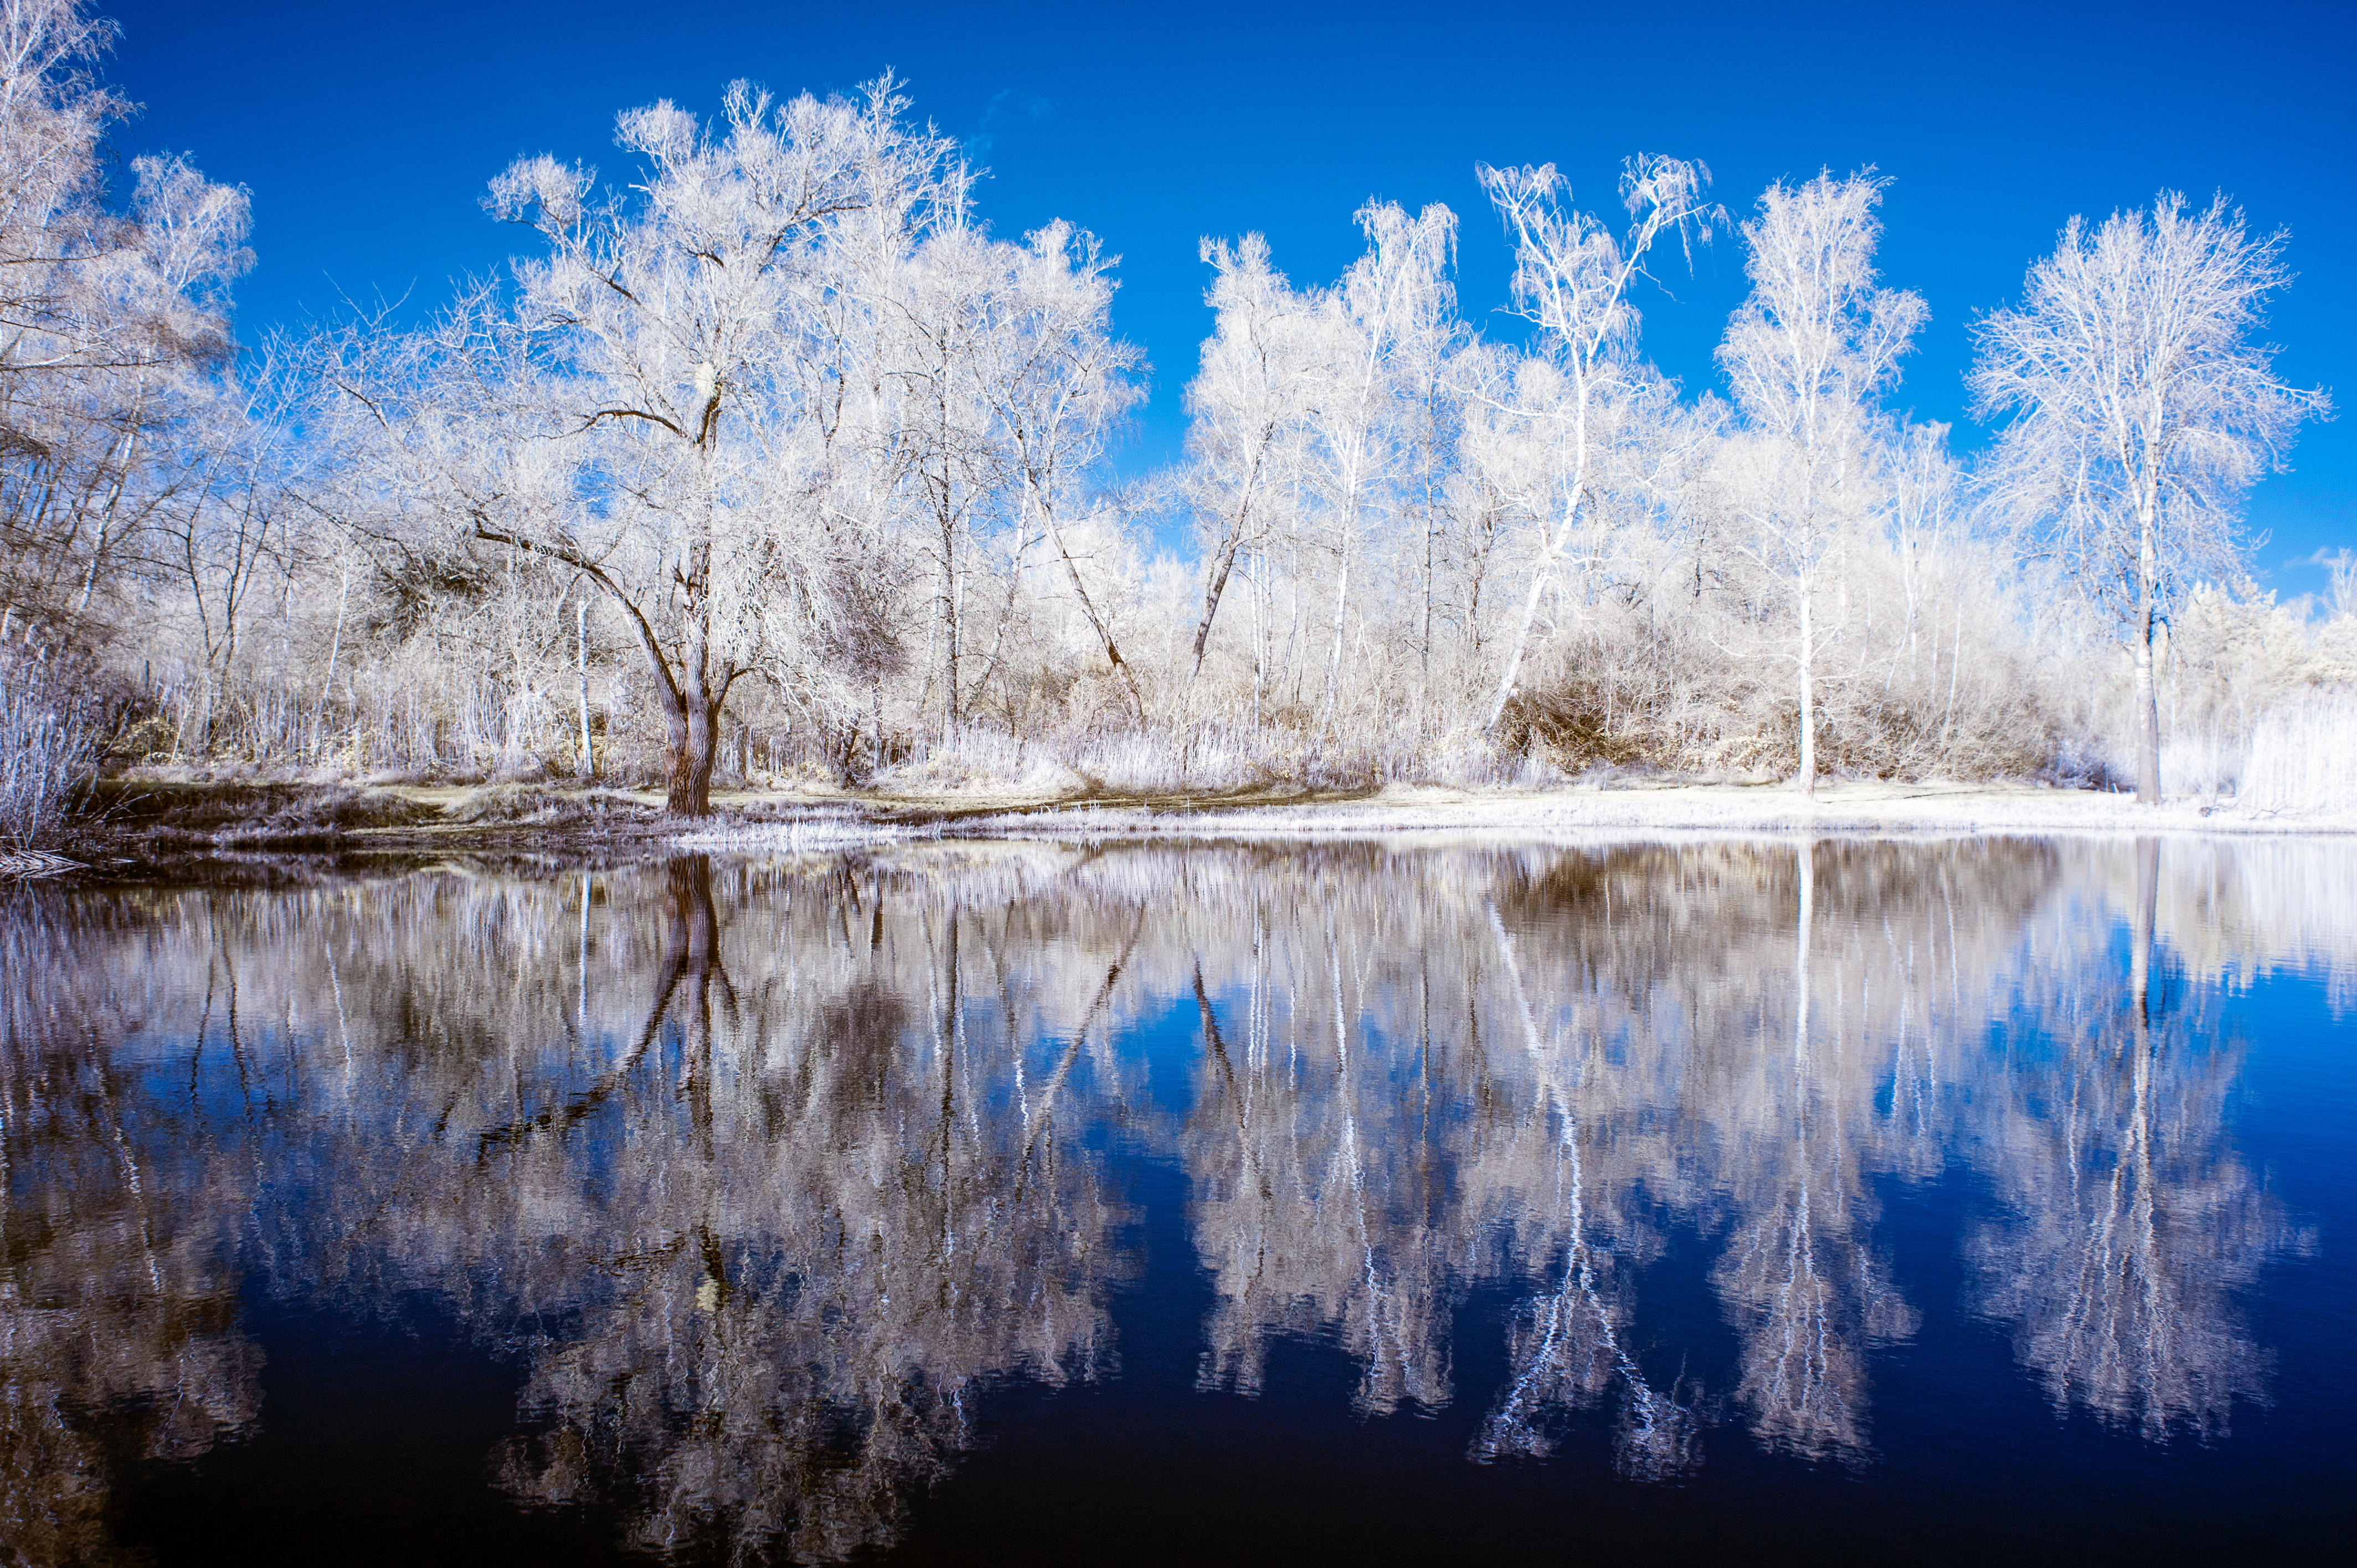
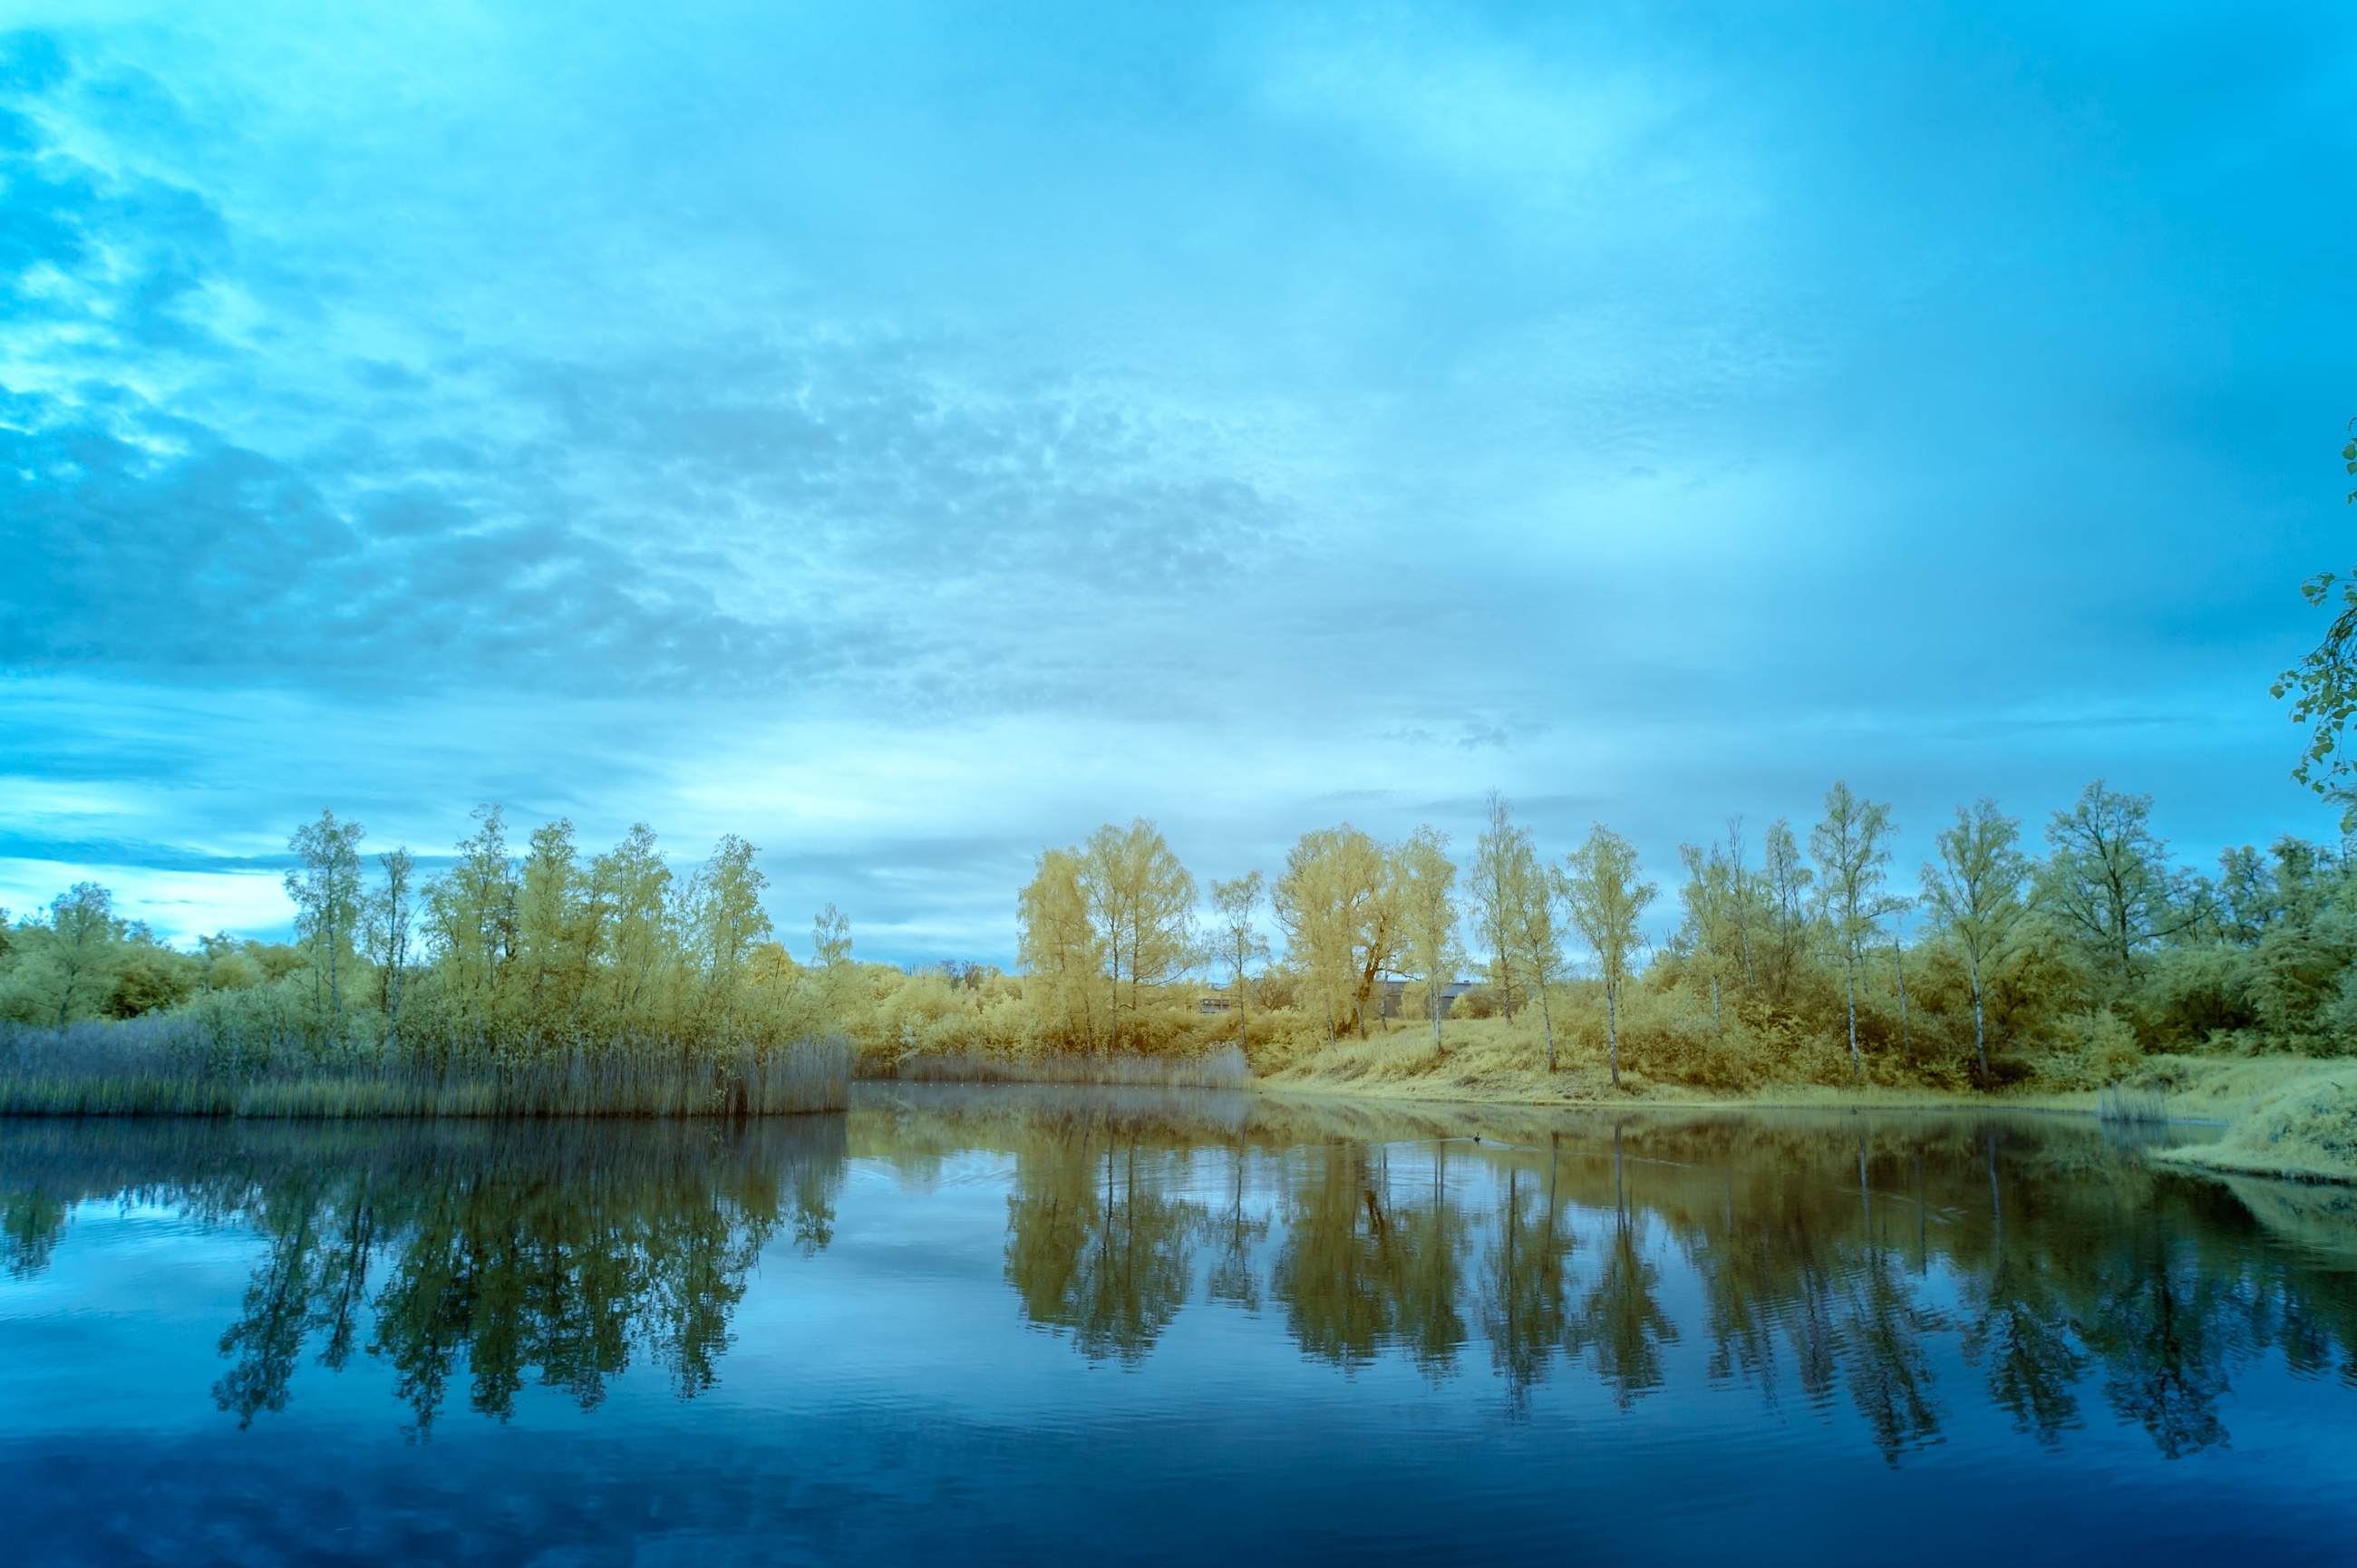
Here are a few words about the „Wood effect“: In 1919, the American physicist Robert Williams Wood described the phenomenon according to which green leaves appear white in infrared photography. The chlorophyll in the leaves is transparent in the near-infrared range. As a result, the water contained in the leaf reflects the infrared range and makes foliage appear white.
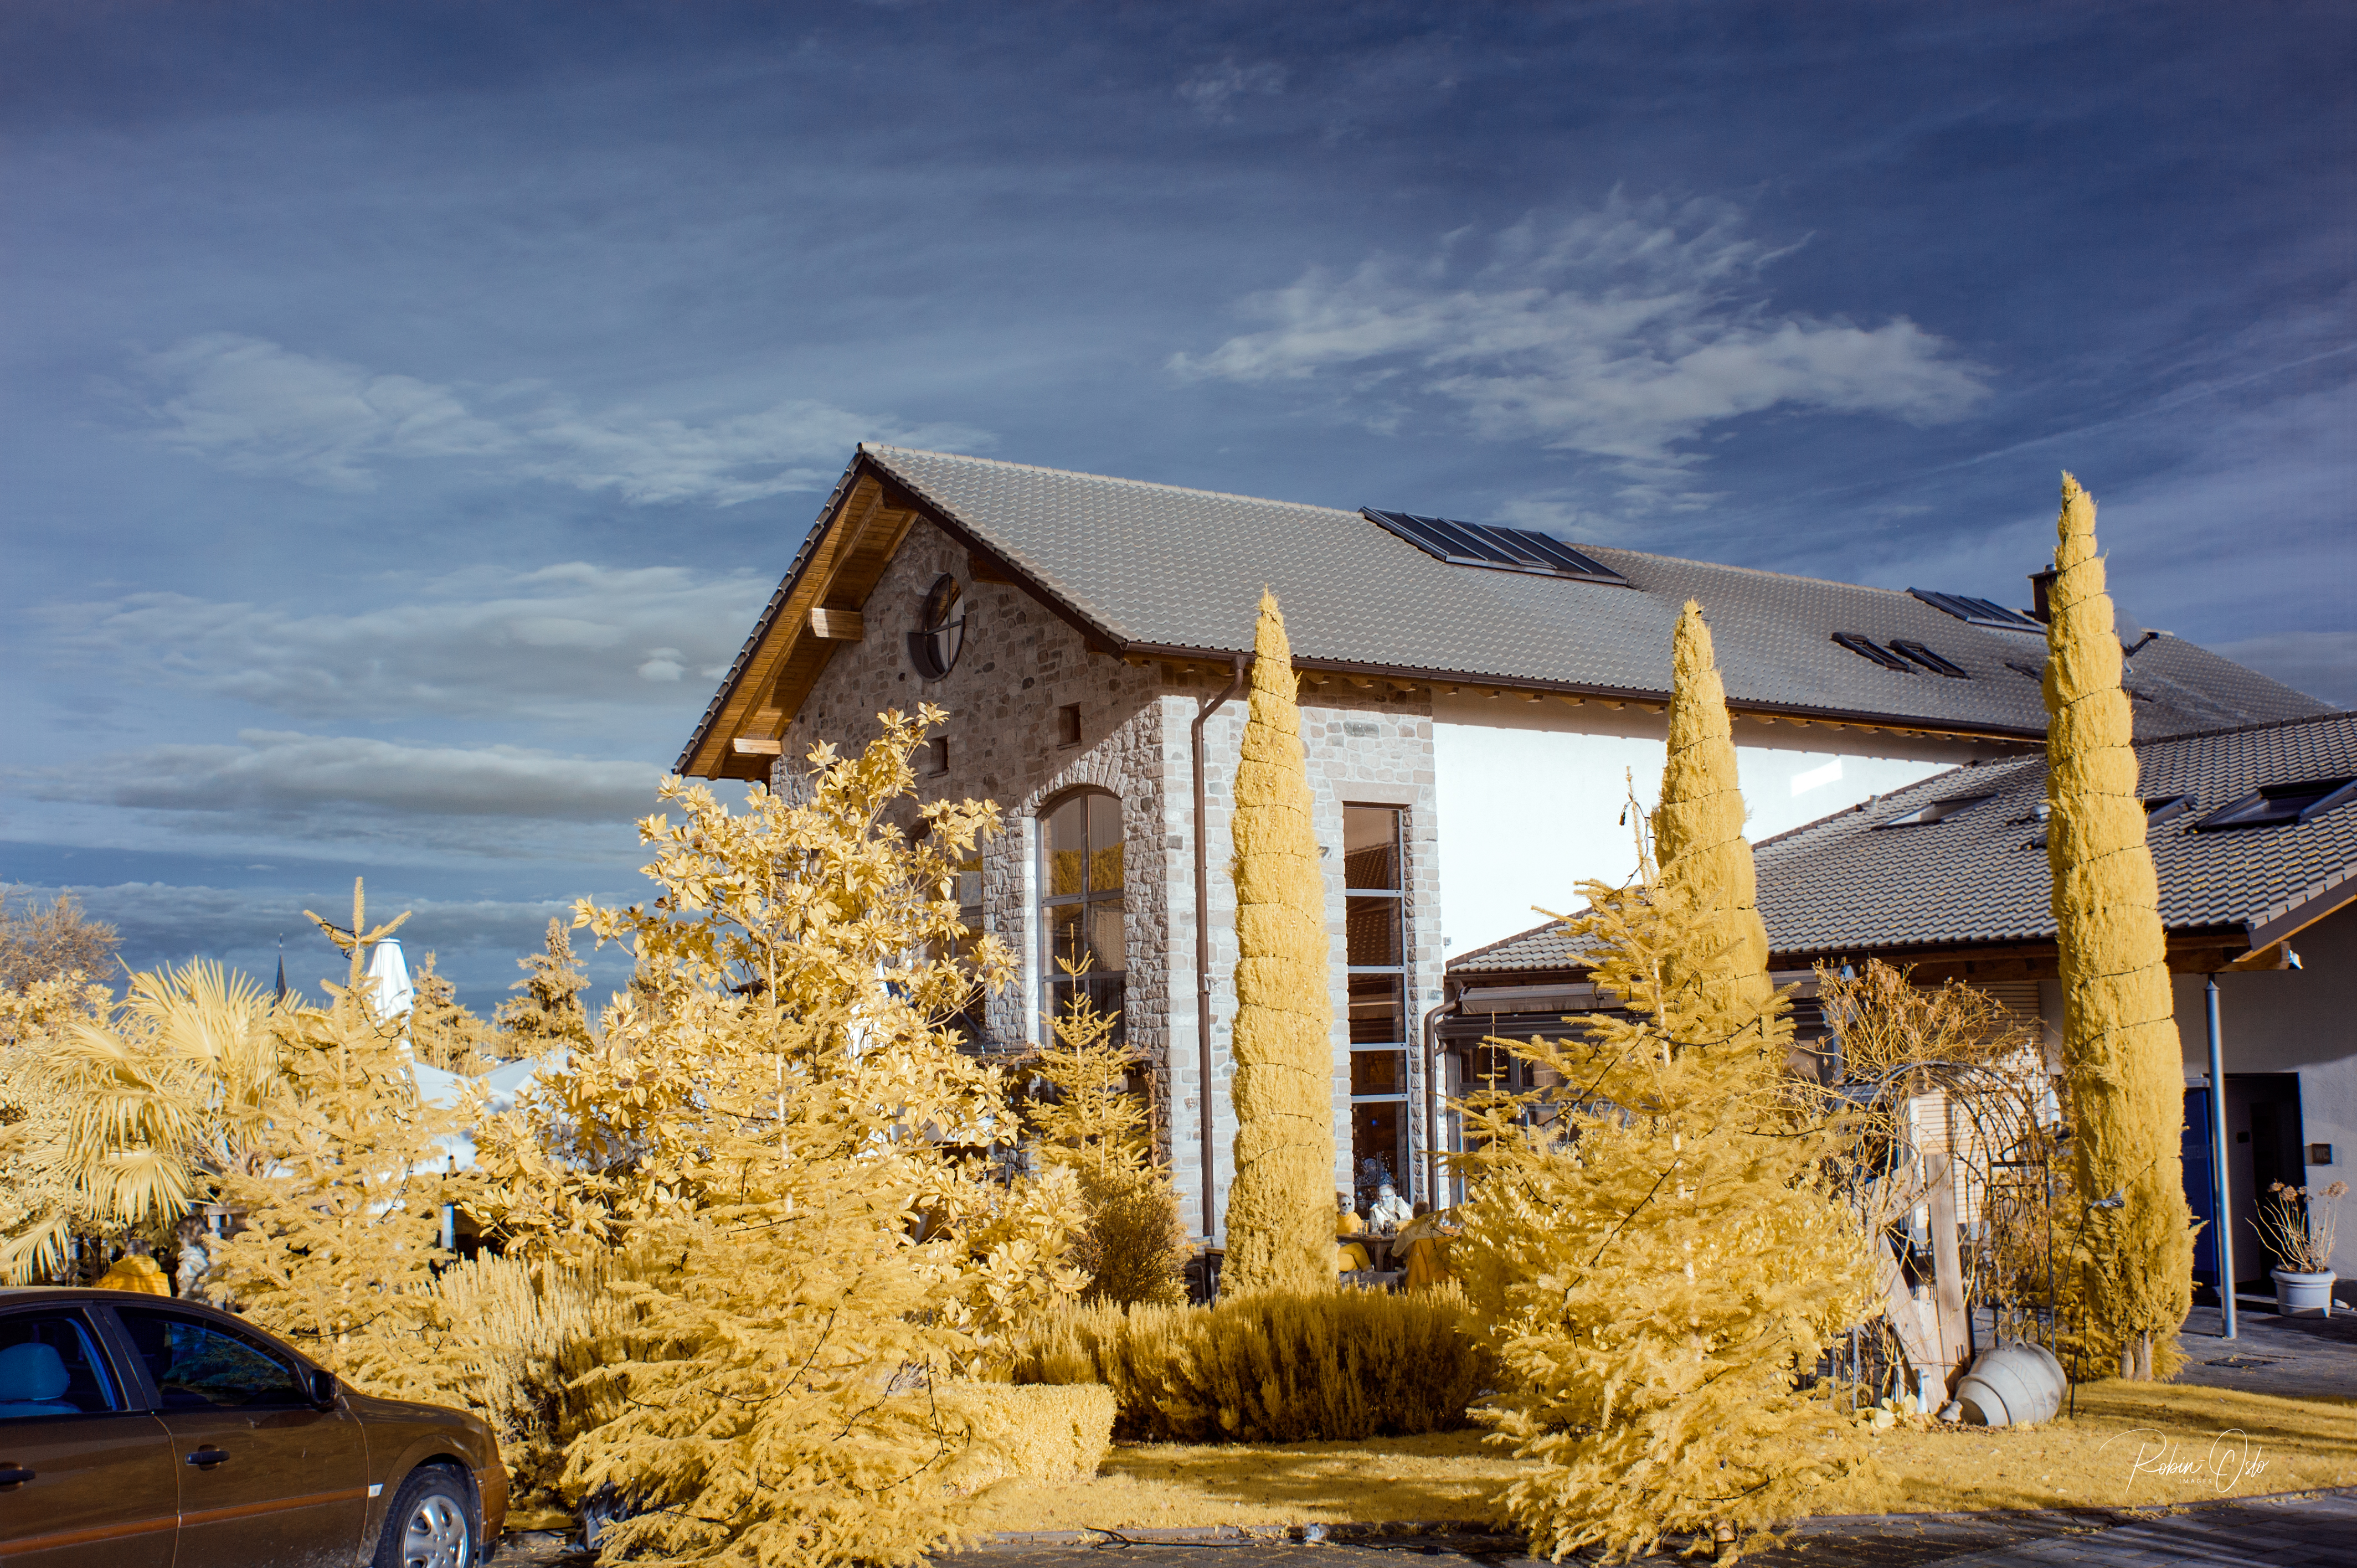
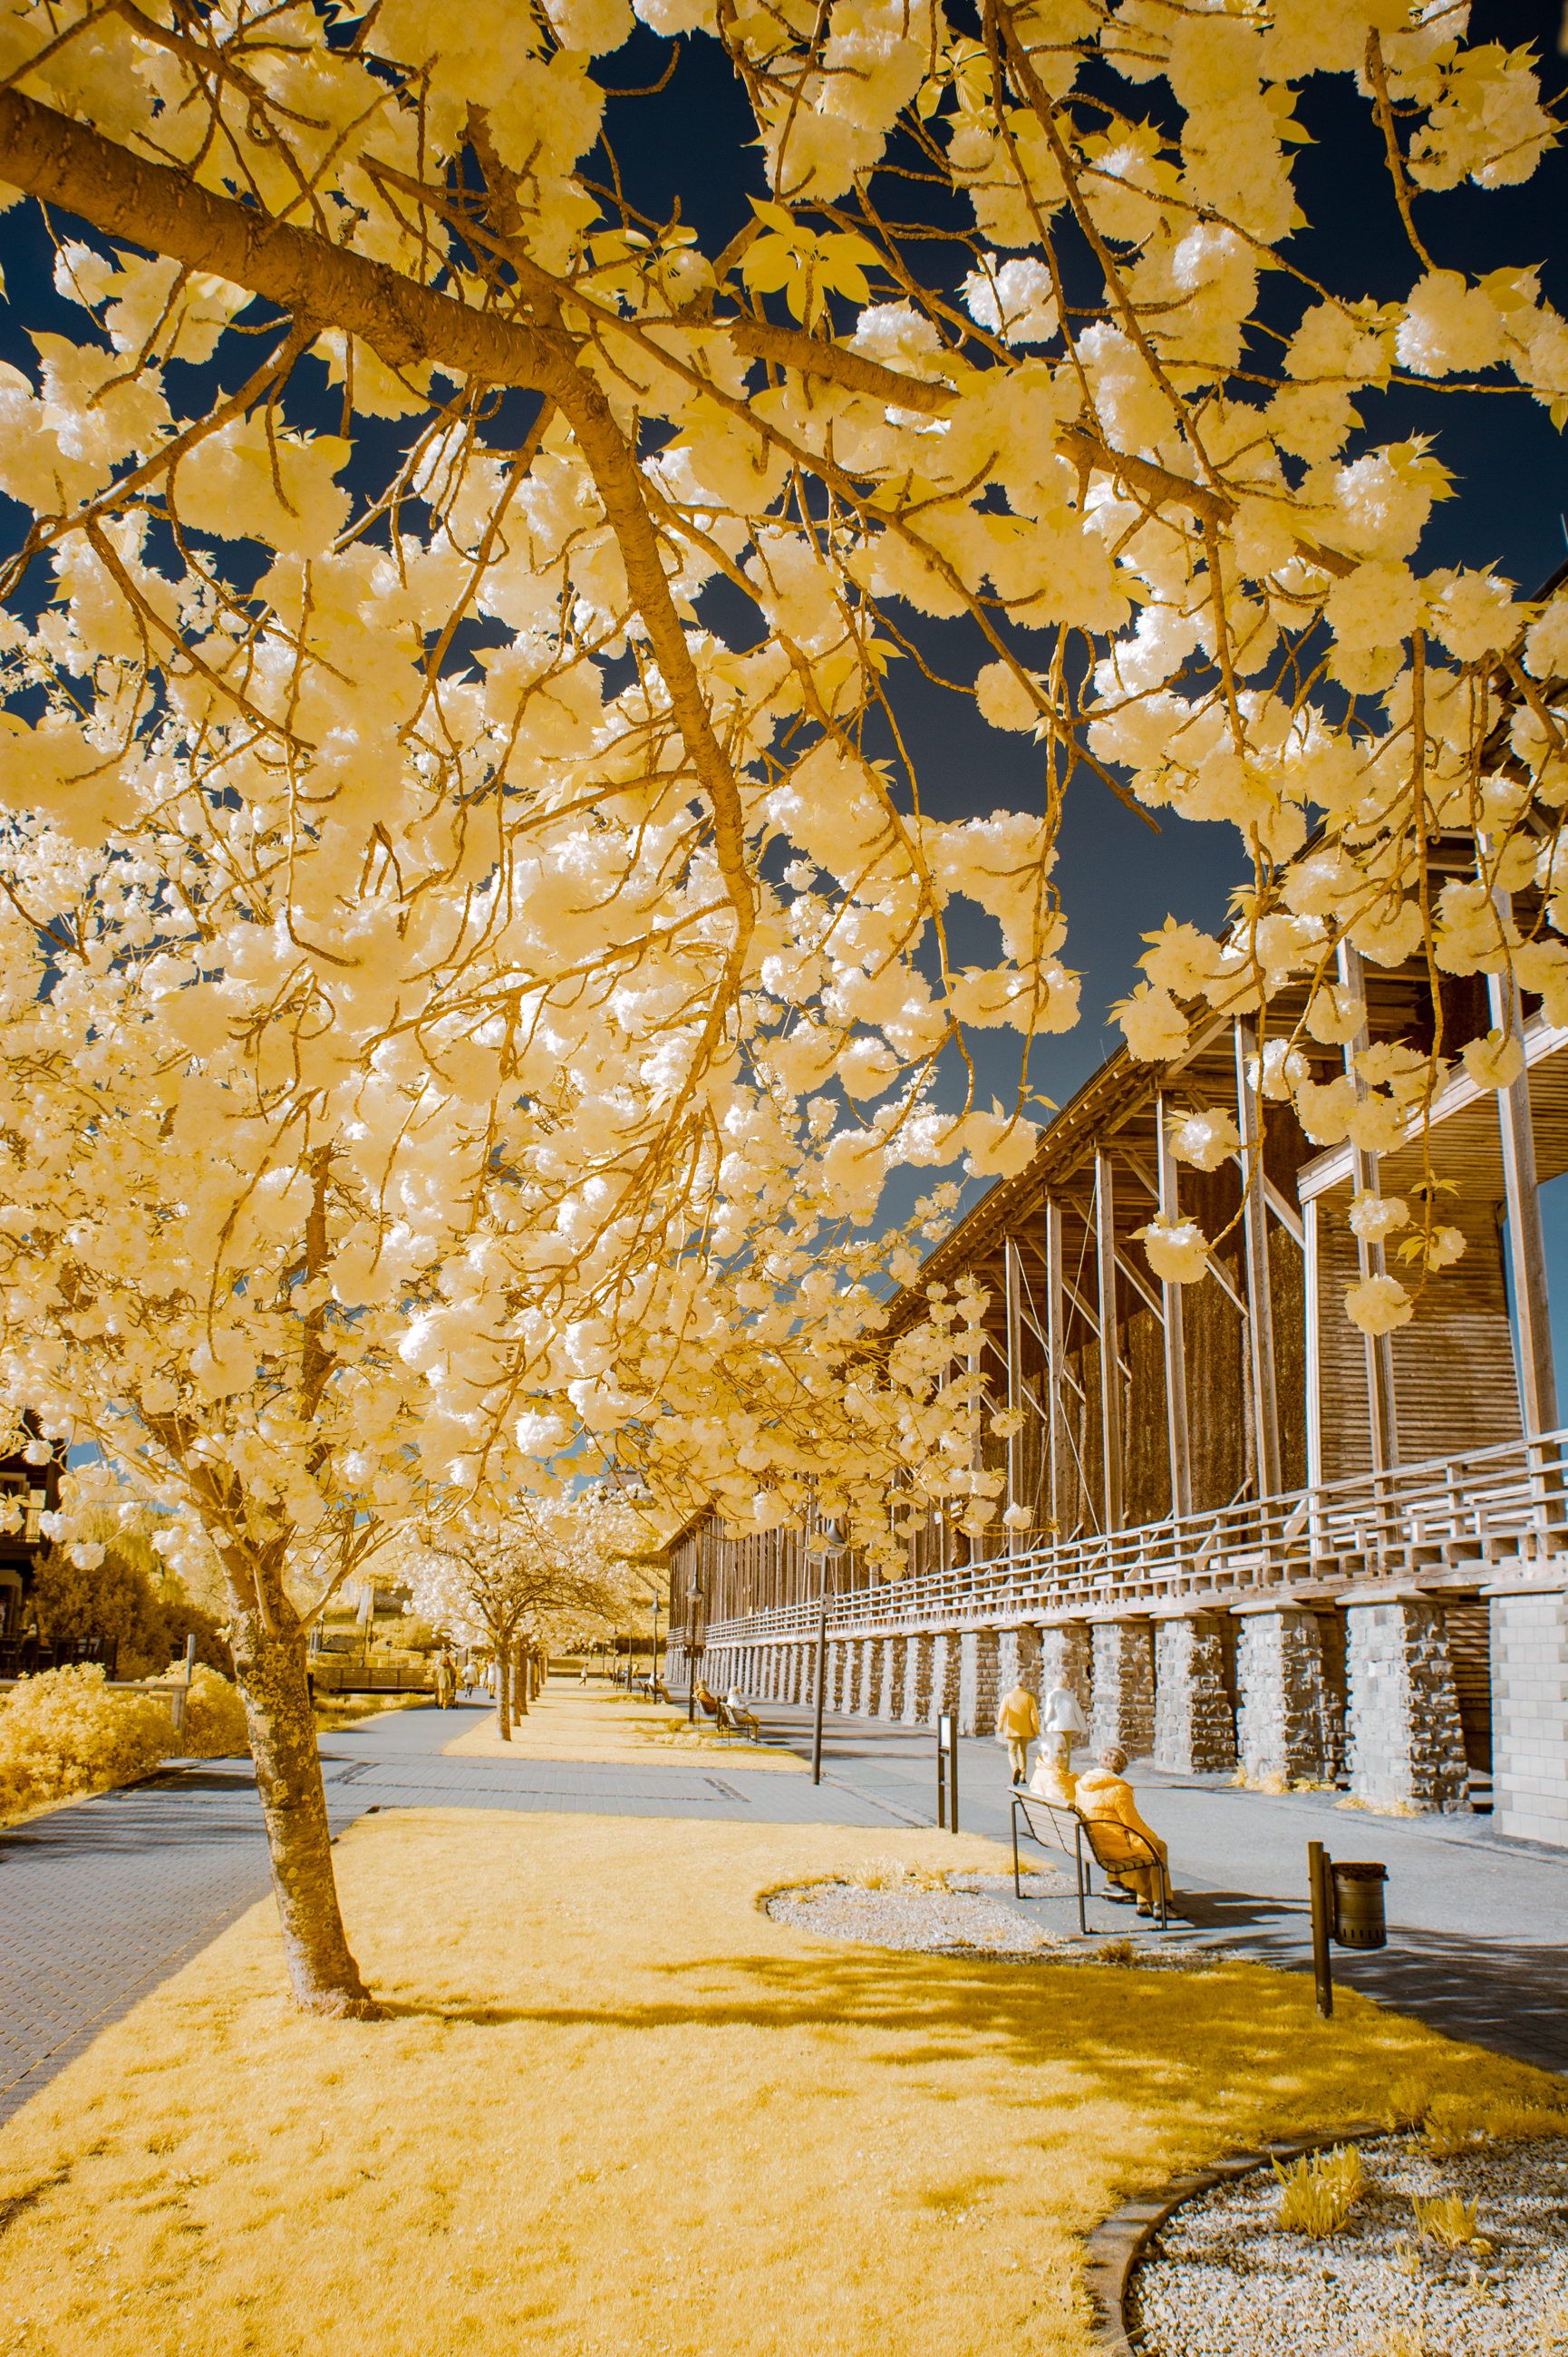
At 630nm, the foliage becomes yellowish.
Filters
In principle, digital sensors can capture a much wider spectral range. The compassionate manufacturers have built cut filters in front of the sensors that „lock out“ these unwanted wavelength as much as possible, to not end us photographers in despair during post-processing,
This is the keyword for the use of various screw-on filters. These only allow light above a specific wavelength to pass through. That would be, for example, 650nm, 720nm, etc. For the digital sensor, this means that only a small amount of light reaches it through its pre-cut filter. You photograph through a gray filter, so to speak. This takes you in the area of long exposure and I mean quickly 30s upwards, depending on the ambient light.
Furthermore, it should be as windless as possible so that no motion blur occurs, at least when photographing in nature. And that’s not all. Hardly any camera will be able to find a clever focus point. This, in turn, means that you only screw on the filter after focusing or use lenses that can be operated manually. Done? No … The focal point for infrared light is different from that of the visible one. With older lenses, you can often find a red dot on the distance scale. This would then have to be used.
Does that sound like fun? If I come up with such an idea, please have it checked whether it would not be better for me to be assigned legal care. My absolute respect goes expressly to the enthusiasts who do it this way.
Converting
What other possibility is there?
Sure, get rid of the blocking filter in front of the sensor … Did I do it myself? No!
My photo cabinet housed a Nikon D700 that had been unused for over 2 years. A sale would only have improved the pocket money a little. This led me to the decision to „sacrifice“ this camera and have it rebuilt.
My choice for this service was: https://irrecams.de/infrarot-umbauservice/ablauf.
As a newcomer to infrared photography, this was the best compromise for me. The D700 has a 12 MP full-frame sensor and is well known to me in the operation.
At Kolari, ready-to-use cameras can be purchased. The costs are not insignificant, and I’m not a professional who makes a living from it.
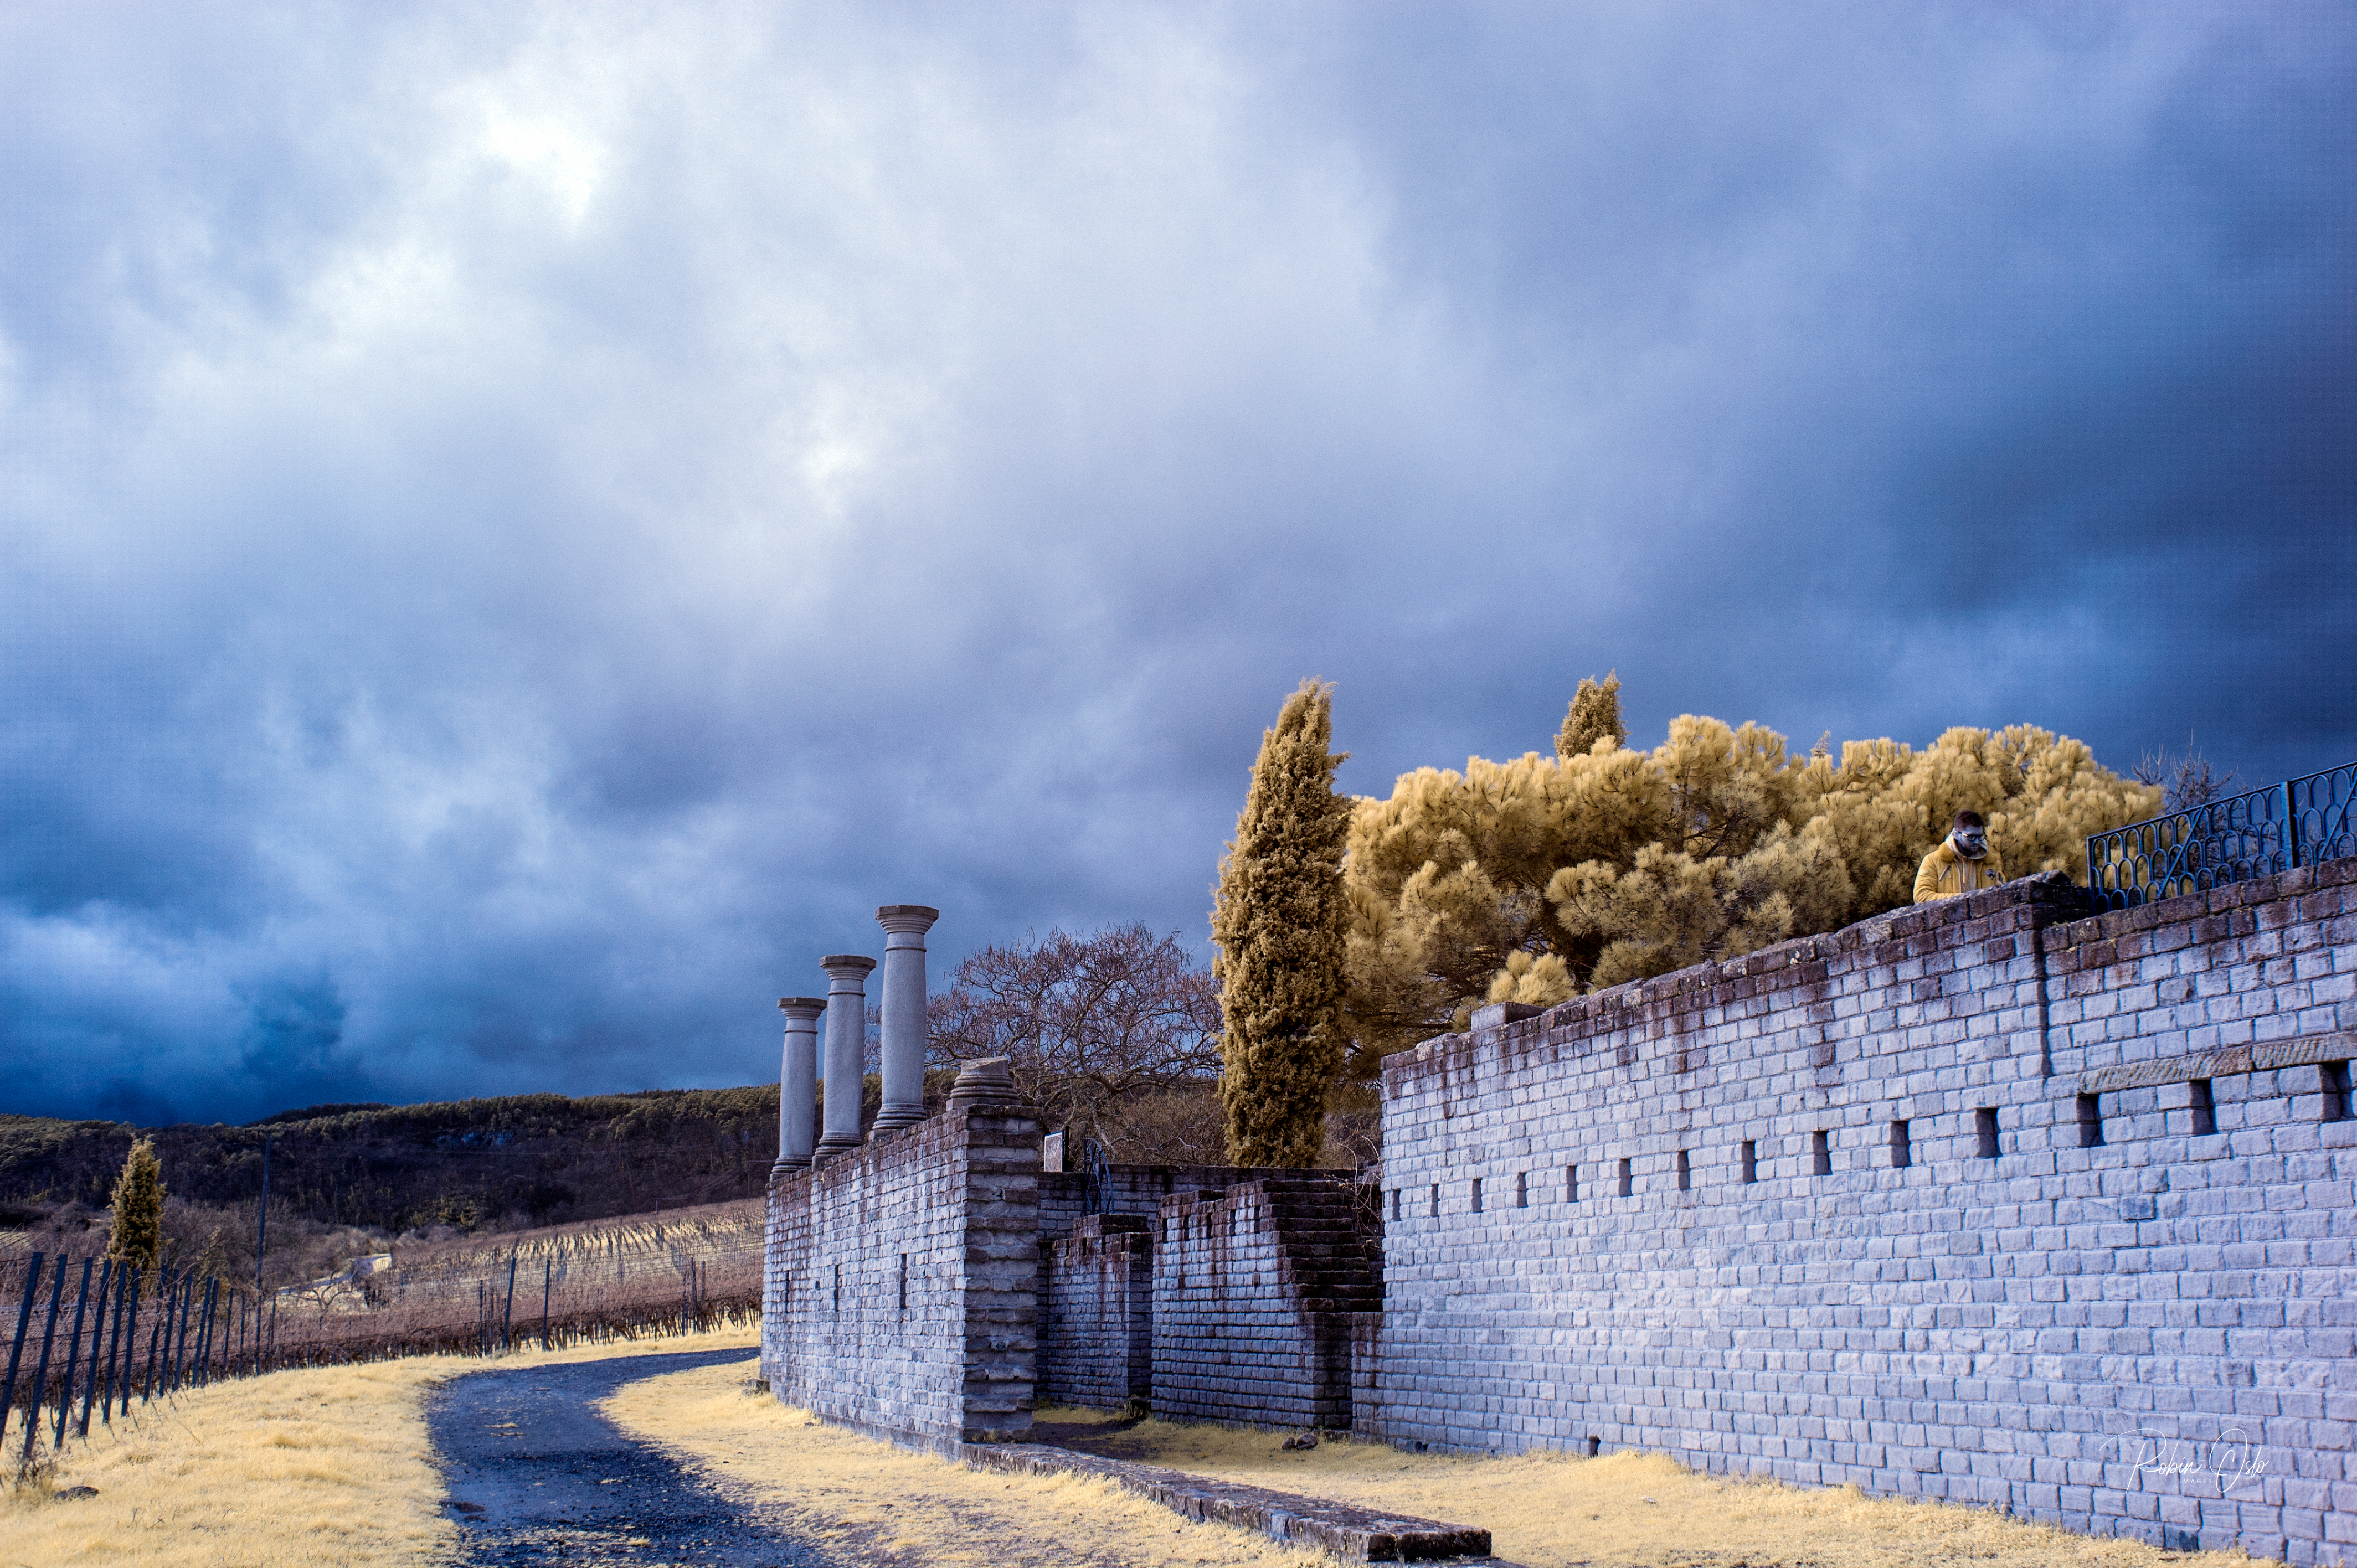
My D700 got a 630nm conversion, which means that the old cut filter was replaced by a 630nm filter. Said part allows light from 630 – 1200 nm to pass through.

Each wavelength of a new filter initially brings different color effects, until from about 830nm only black-and-white images are created, because no more color information reaches the sensor.

What is the advantage of a conversion?
The screw-on filter action described above is omitted. The camera can be used „normally“. By this I mean that you can shoot handheld with the usual settings.
The autofocus is readjusted during the conversion. It works in LiveView anyway.
Disadvantage? Dismantling is probably hardly possible.
And now everything is fine and dandy?
Of course not, otherwise the text would not continue.
What did I learn next?
Hot-Spot
There are plenty of lenses with an infrared hot spot. In the center of the image, an area is created in which more infrared light falls on the sensor than at the edge. If it were like a vignette, it could be removed if necessary, but no, it’s colored. I’m not a Photoshop professional who can do that, let’s say, with umpteen masks and editing steps.

Intensive vignette of the lens? No problem, I’ll just stop down. You can do it and you will find out that the hot spot can be worked out much more clearly in this way. My cherished Sigma 35 f/1.4 Art is such a hot-spot machine.
Lenses with a low hot spot tendency:
As just mentioned, the Sigma 35 Art is not one of the most usable lenses. Up to aperture f/2.8 it is halfway okay, above that the reddish area becomes uncorrectable. This wide-open aperture is not the desired burner for landscape photography.
The Nikkor 24mm f/1.8 AF-S ED works much better in this regard. This led me the idea to try my manual Nikkore. Lo and behold, the Nikkor 35mm f/2 Ai seems to be completely unproblematic. The legendary Nikkor 105mm f/2.5 AiS gave equally good results.

The 50mm will come at a later date. There has not been enough time so far.
In the meantime, the time has been enough. I used a Nikkor 50mm f/1.4 pre-Ai and got good results with it. However, I don’t know how later Ai or AiS versions of this lens perform.


The Kolari company, which does conversions in the US, maintains a list of compatible lenses.
Learning steps image editing:
The pictures are photographed. Now it’s time for post-processing. Short interjection: Please always photograph in RAW mode. You will soon see why …
After the import into Lightroom you see nothing but red, okay in certain gradations. Sure, the white balance … pipette on a bright spot, hmm that won’t work either way.
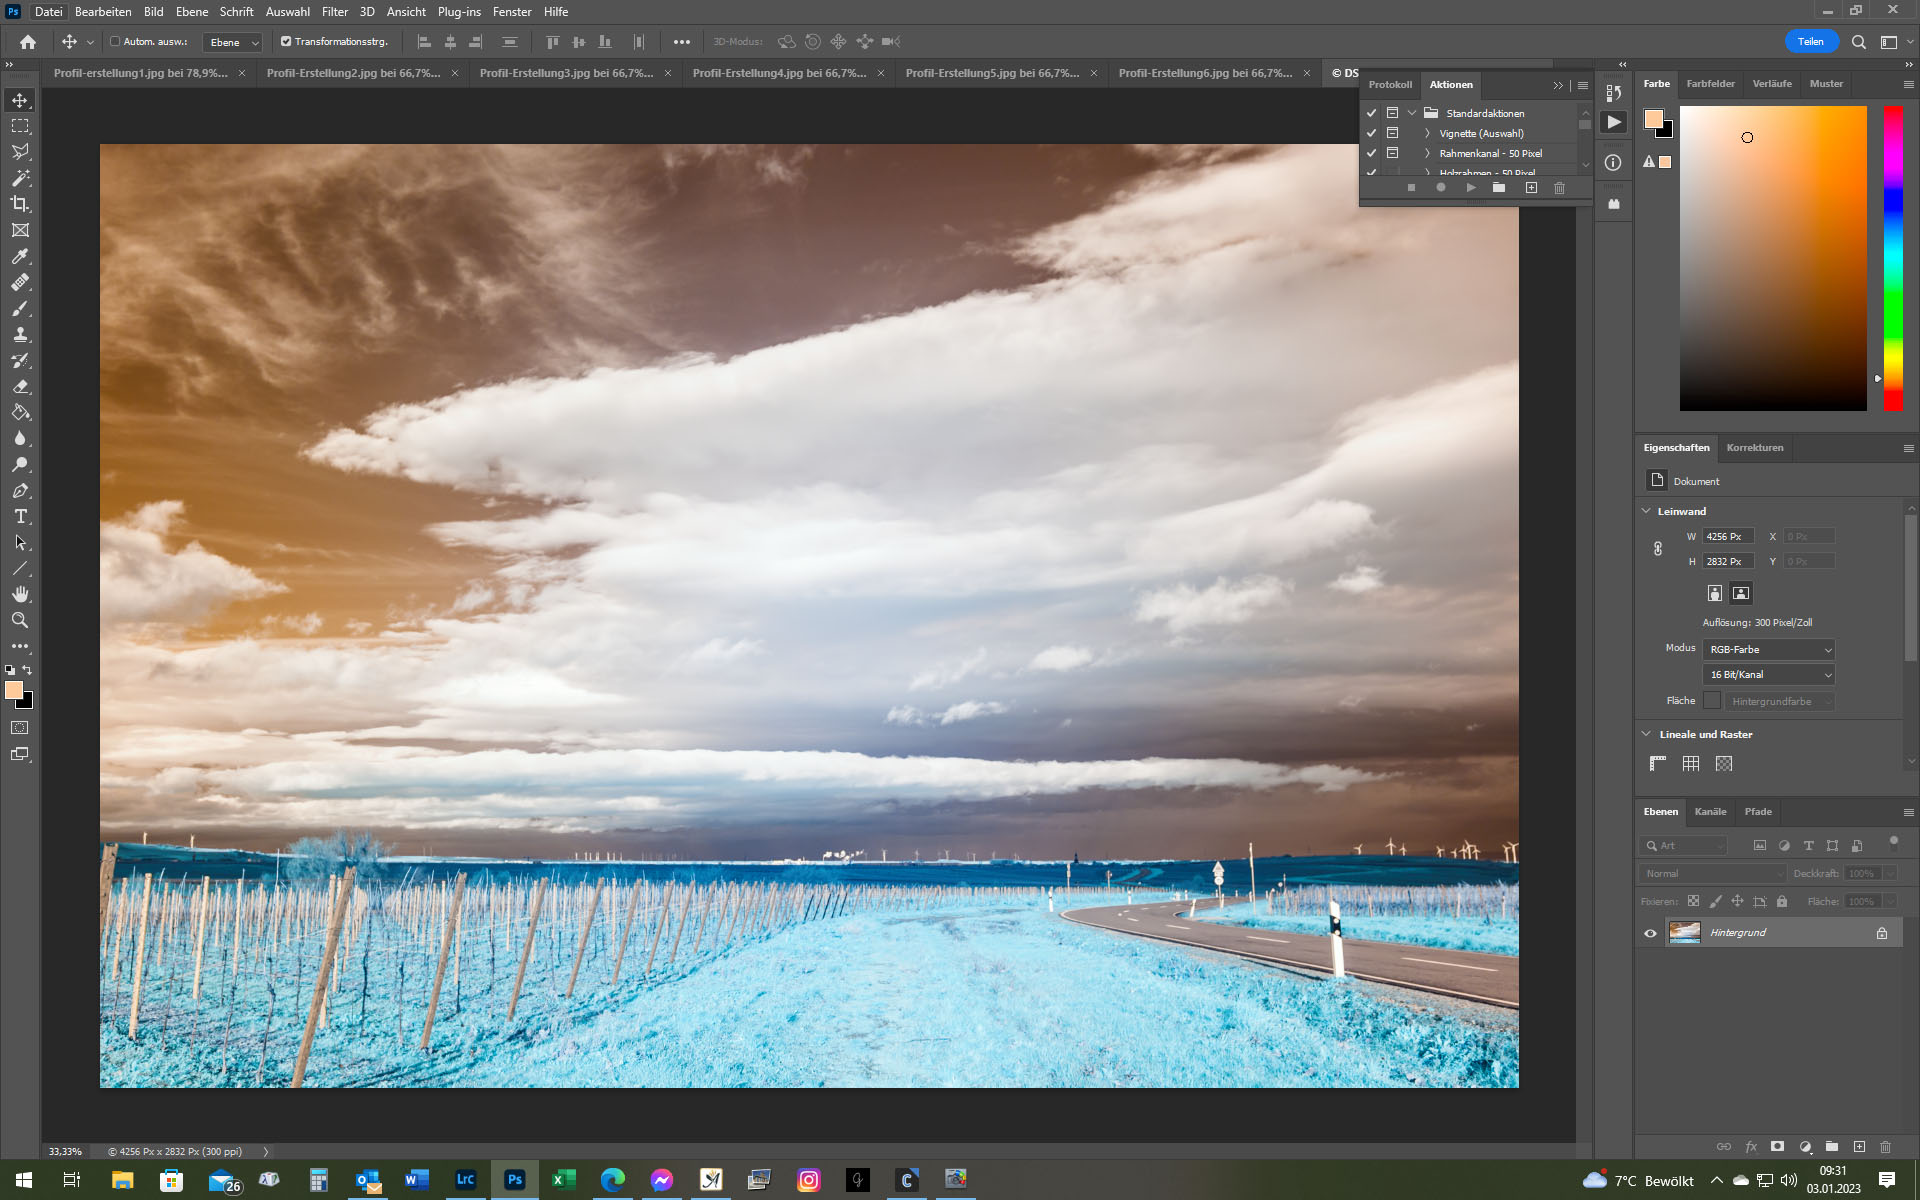
Afterwards one should do a channel swap of red and blue for a 630nm conversion. I did this in Photoshop, but the images looked totally messed up. The possible range for the white balance in Lightroom is many times too narrow.

Now what?
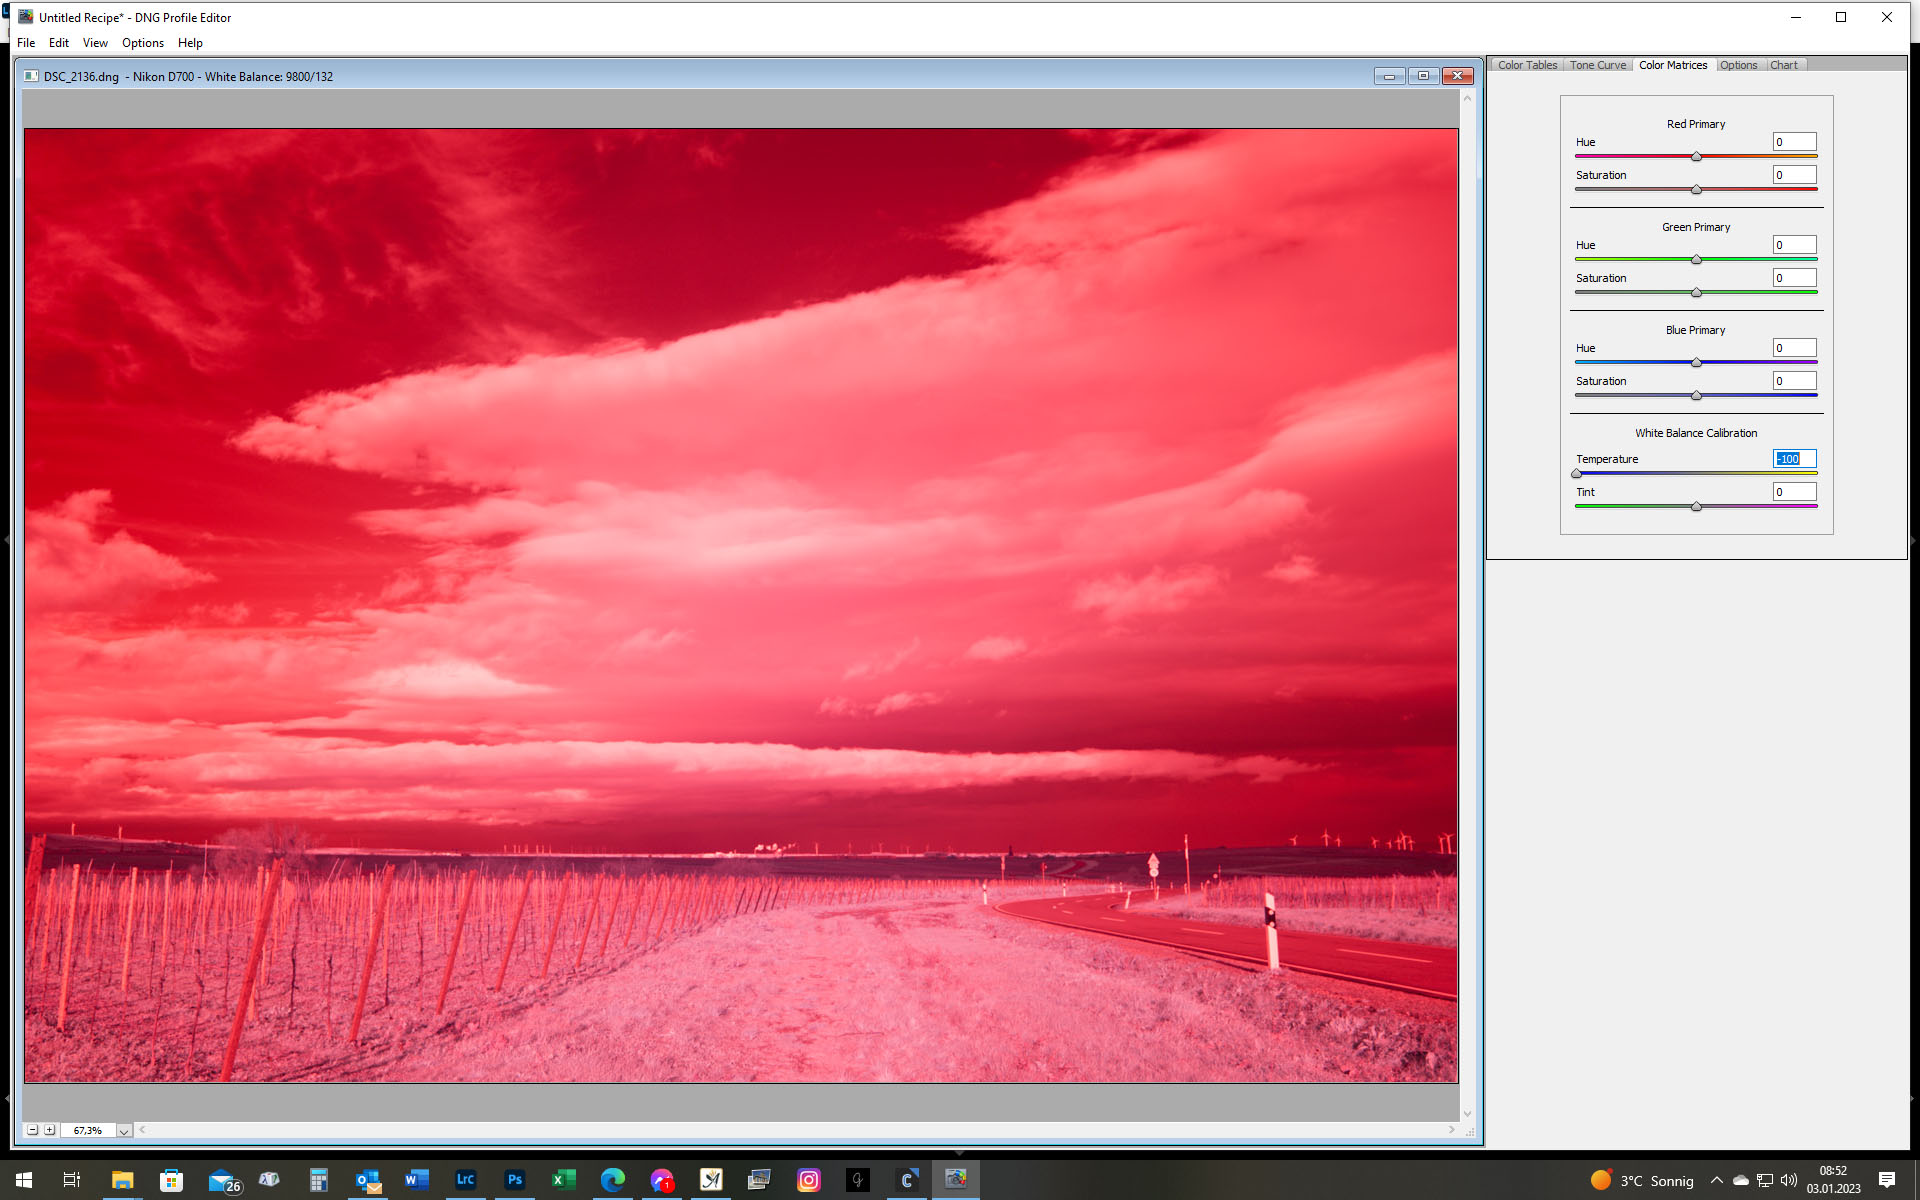
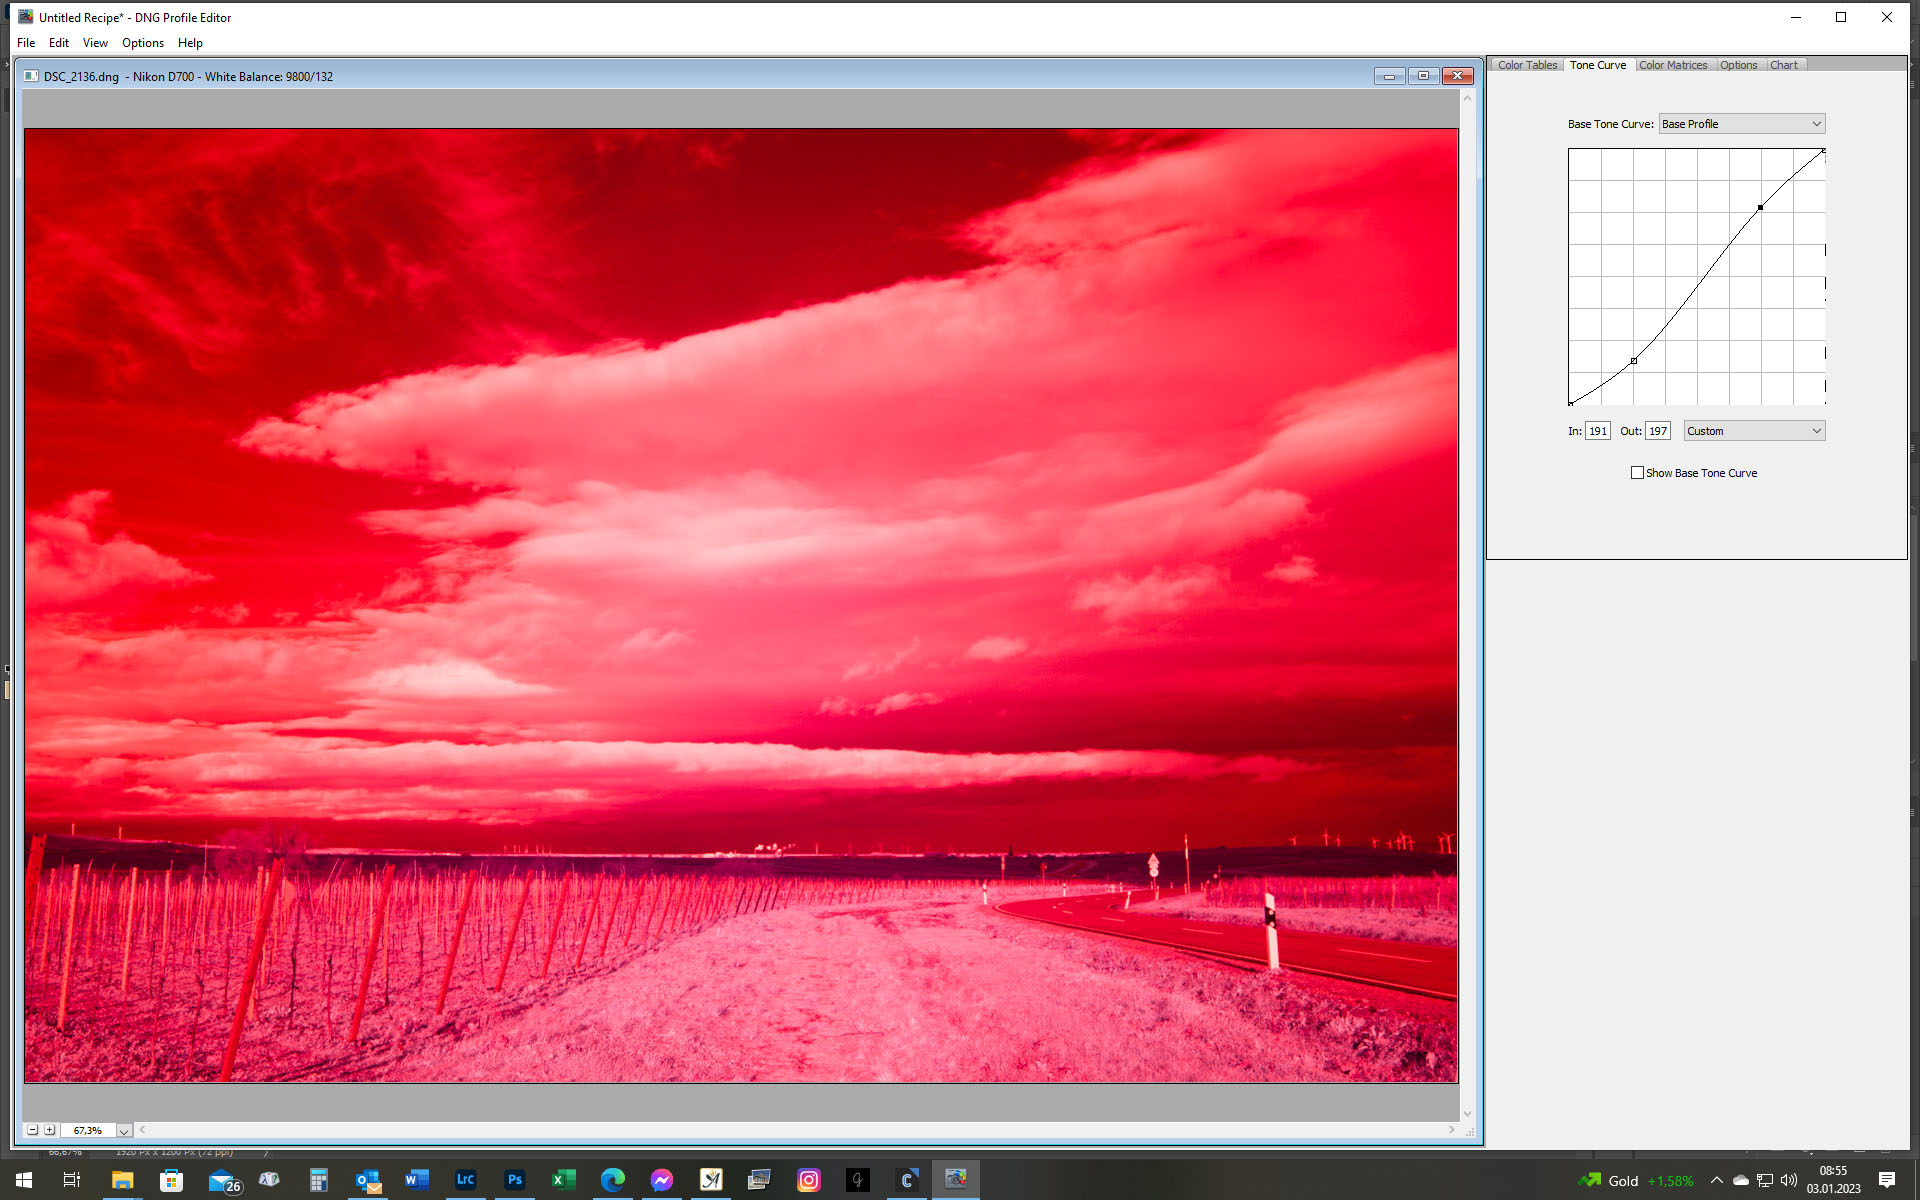
I downloaded the Adobe DNG Profile Editor and made my own profile for the camera.
This is one possible approach to solving the white balance problem. I’m sure you can find others.
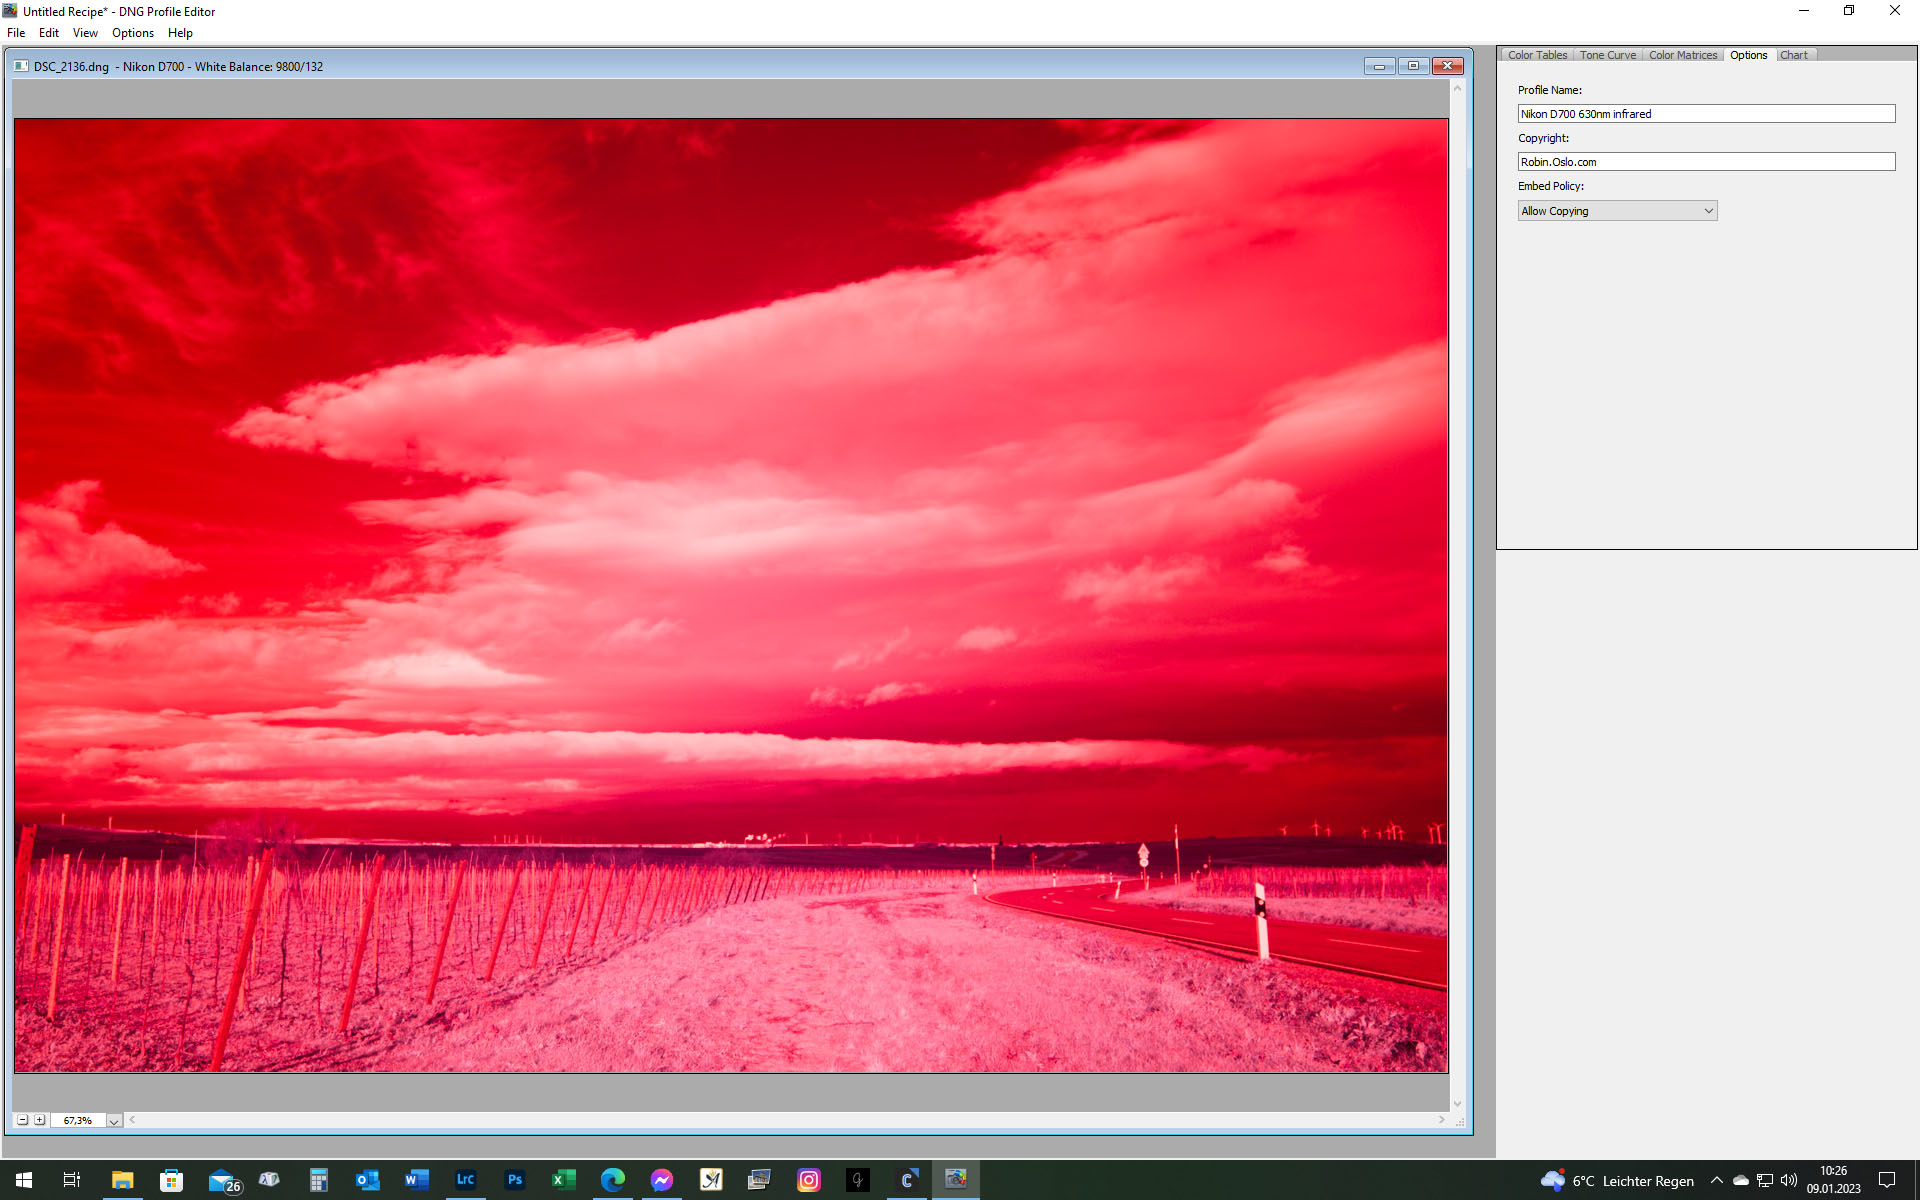
For this purpose, a corresponding photo is exported as DNG and called up in the editor.
Under Color Matrices, set the temperature of the white balance to -100. I have adjusted the „Tone Curve“ a little bit as well. Then the new profile is exported. I gave it a descriptive name to make it easy to find. In Lightroom it can be added to the Favorites.
For Windows, the following address applies when exporting:
C:\Users\%username%\AppData\Roaming\Adobe\CameraRaw\CameraProfiles.
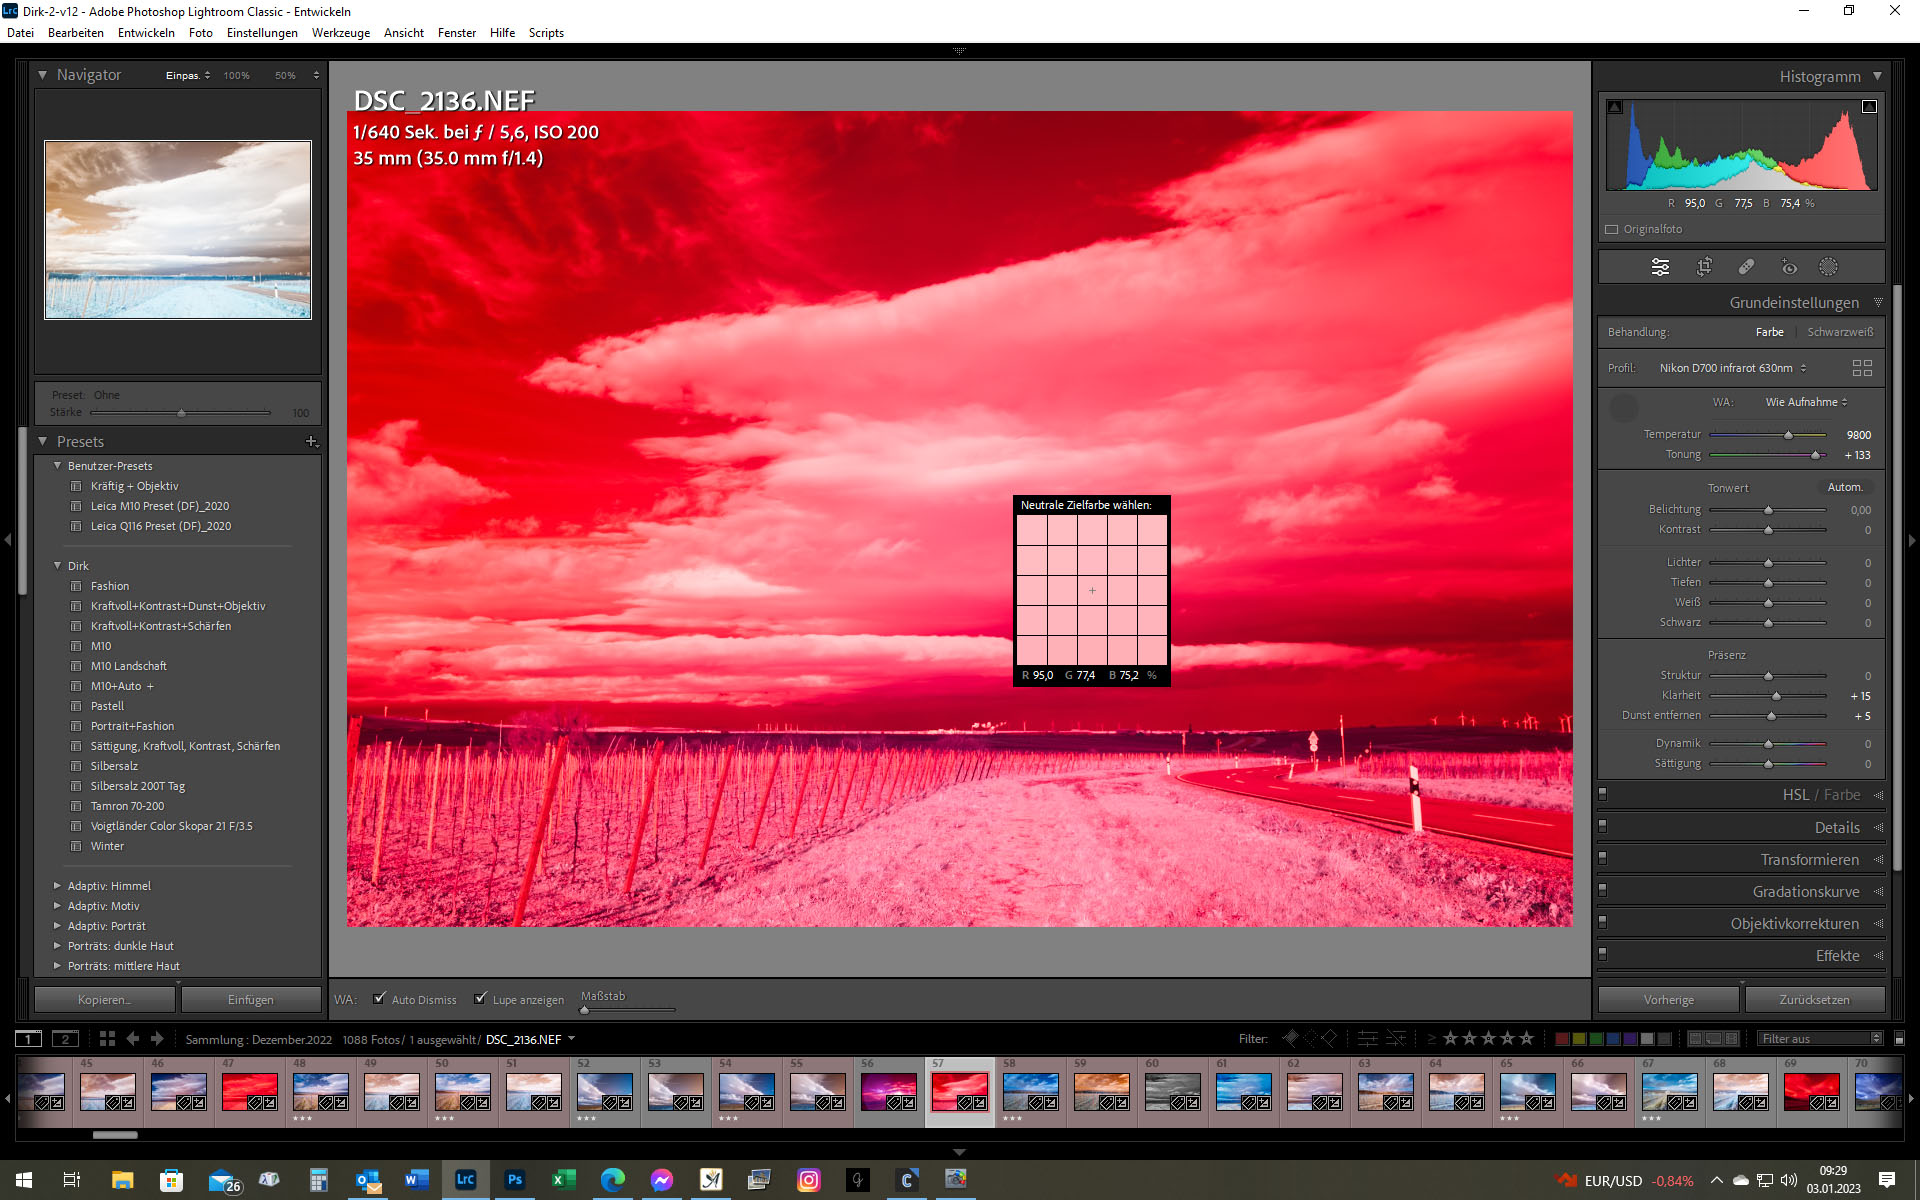
After restarting Lightroom, usable values can be set for the white balance. All you need to do is apply the profile you just created to the image you want.
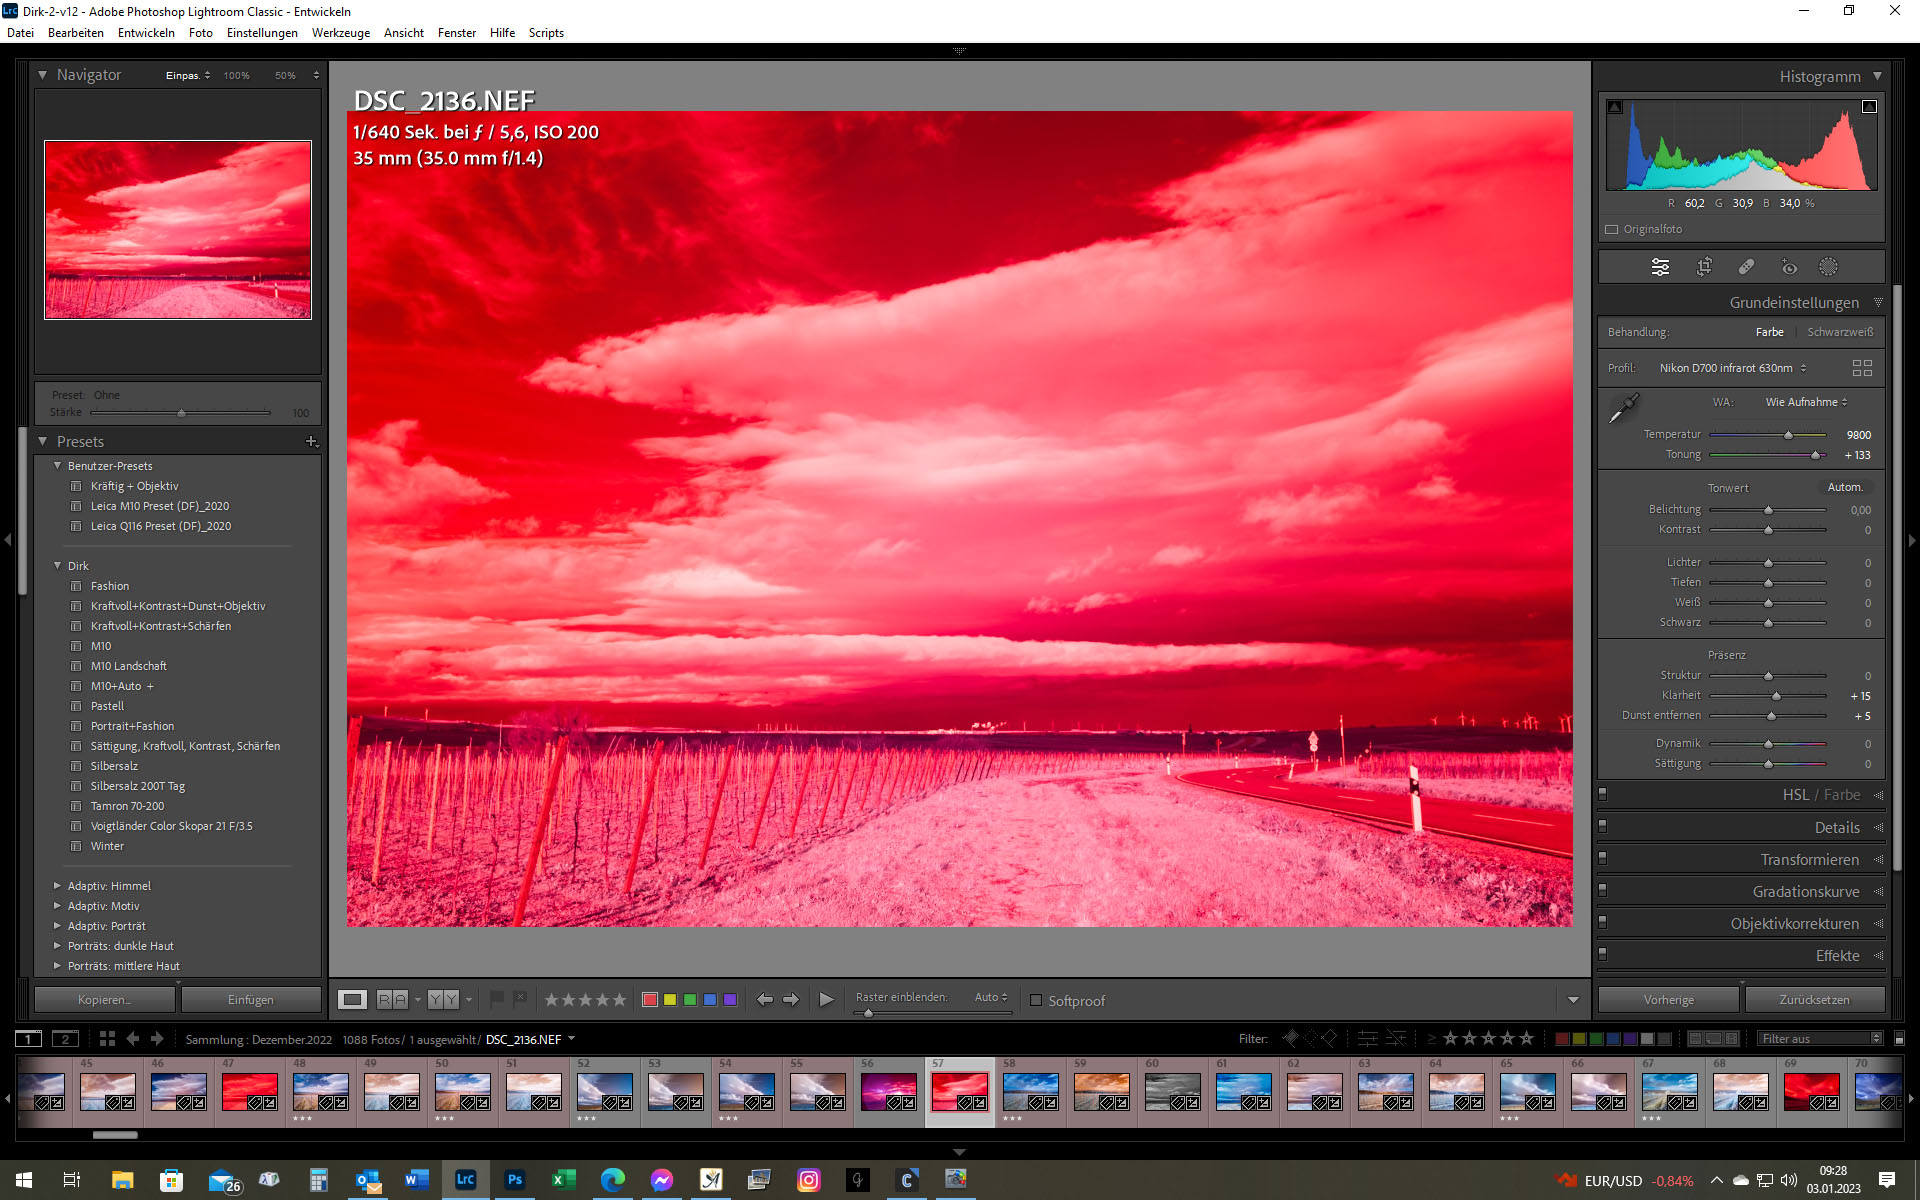
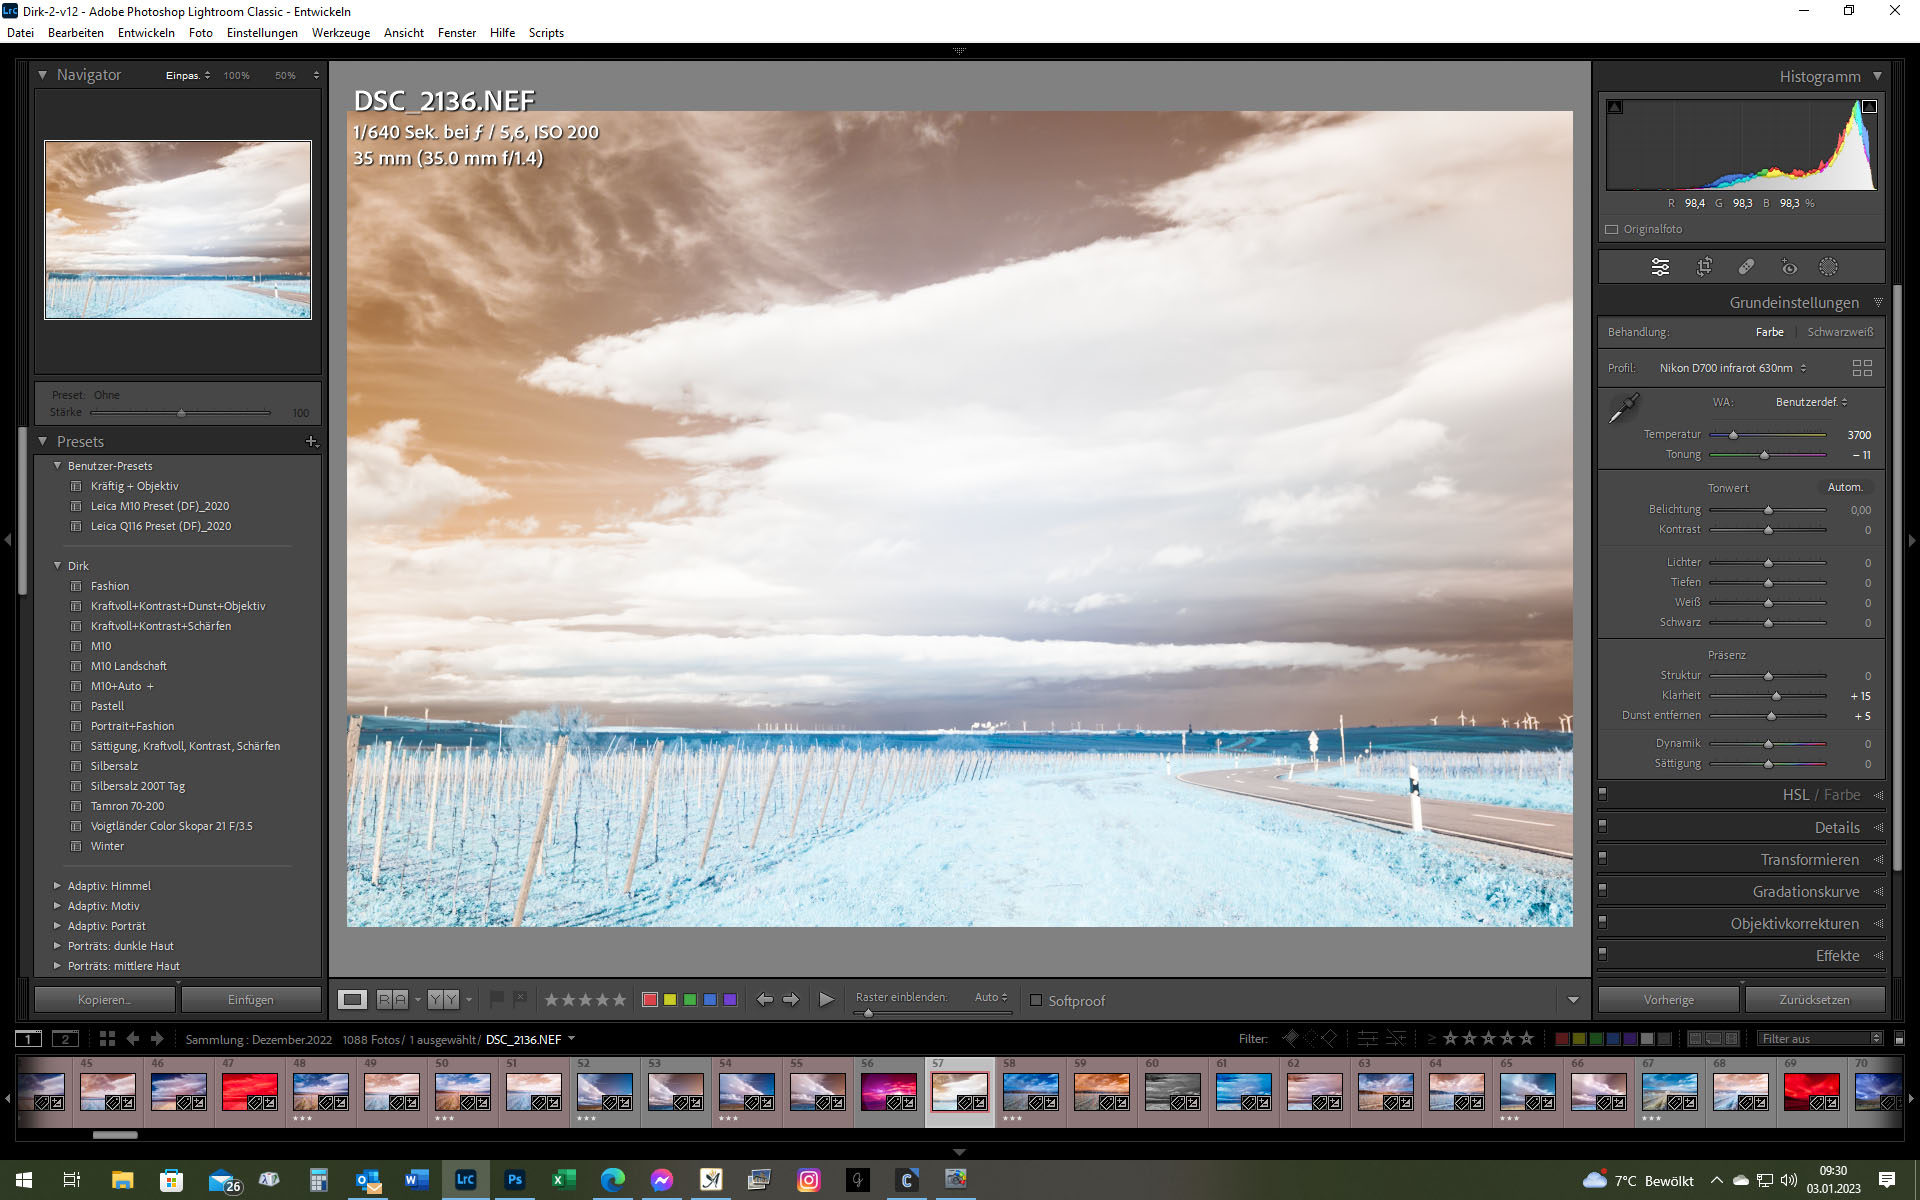
If the profile is lost, LR makes the image red again, see above …
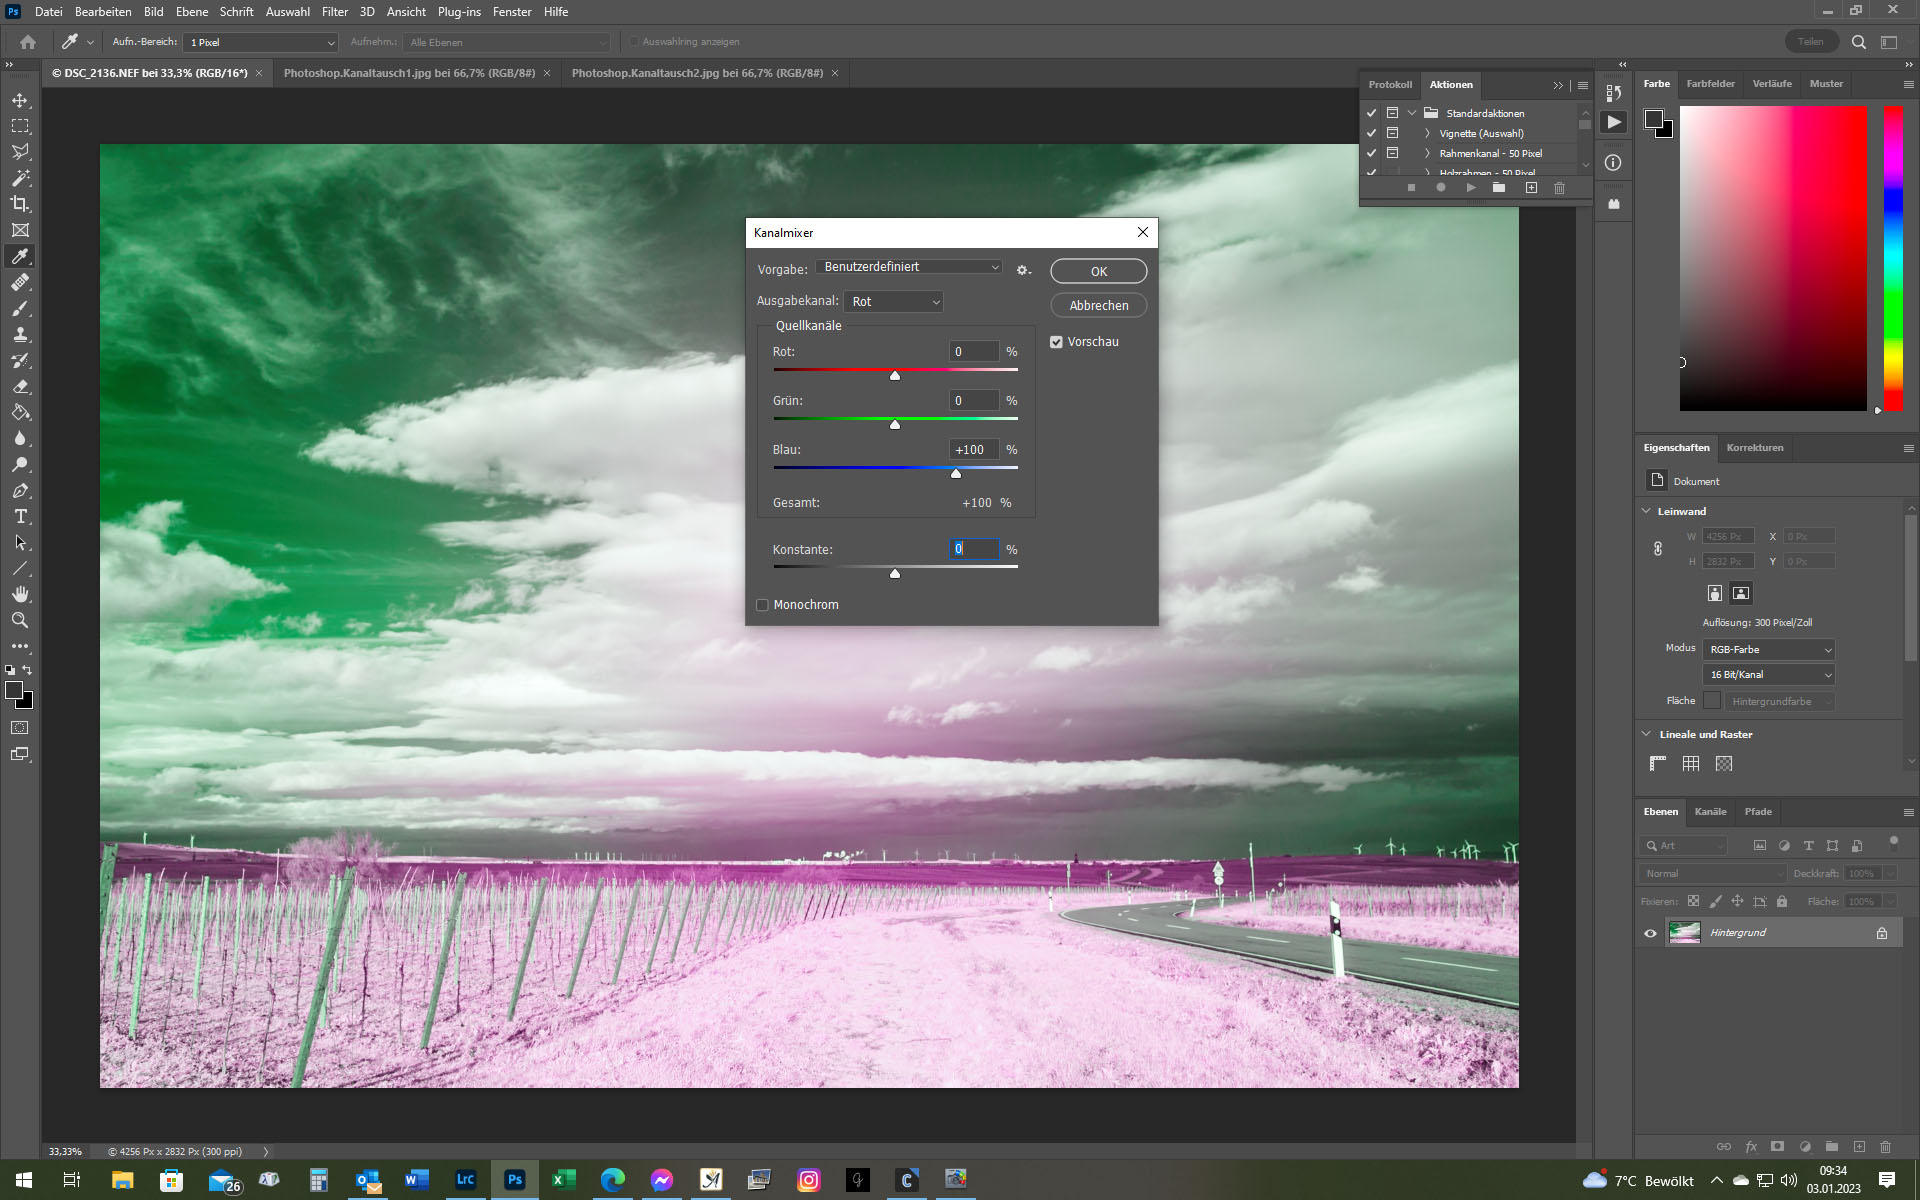
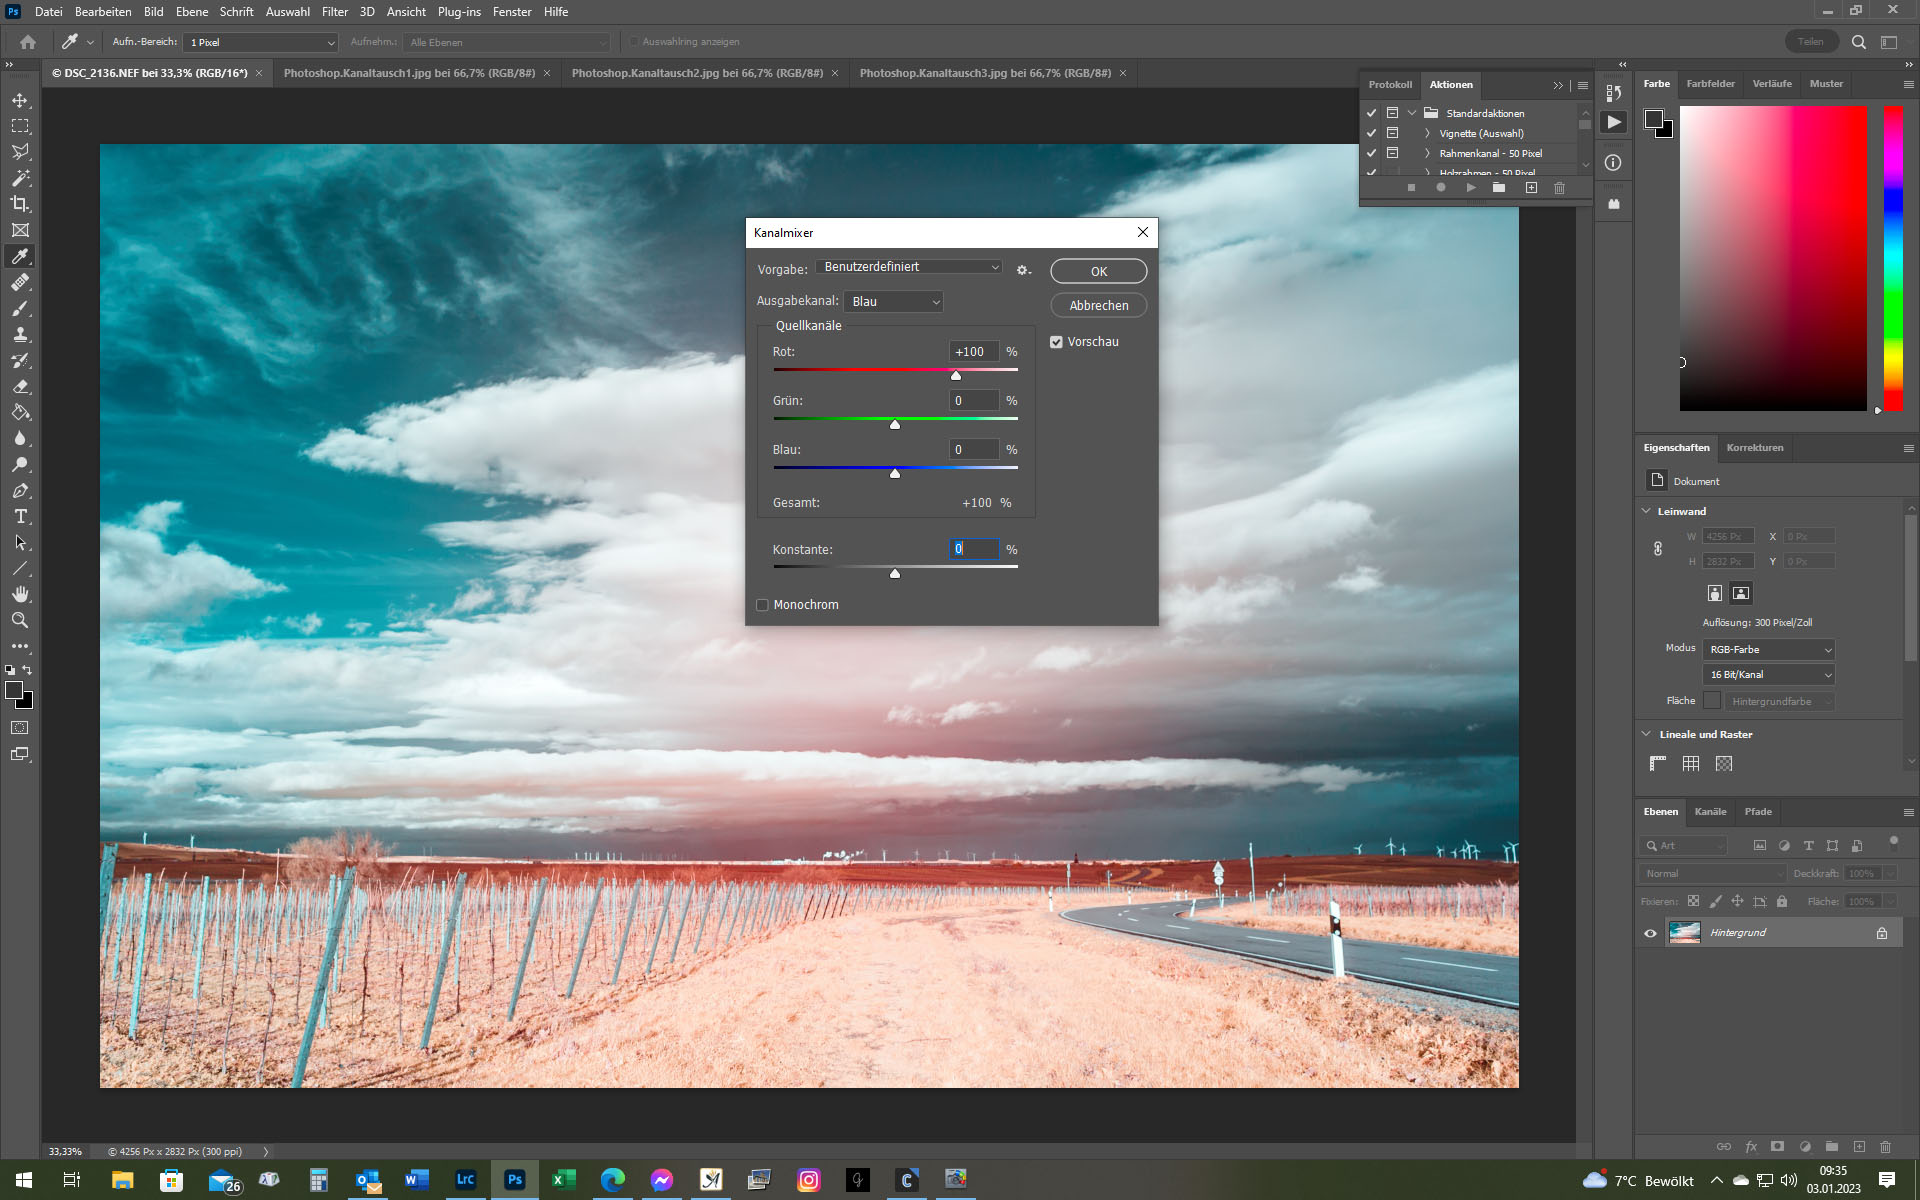
Next is the channel swap at 630nm. For this I pass the image to Photoshop. By means of the possibility to record recurring actions and to assign them with a function key, the swap runs in fractions of a second. For the red channel, red is set to 0, blue to +100. For the blue channel, red is set to +100 and blue to 0.

Note the hot spot of the 35mm Sigma
After saving, the image appears in other colors in Lightroom and can be further changed there, „made worse“. This is left to individual taste.
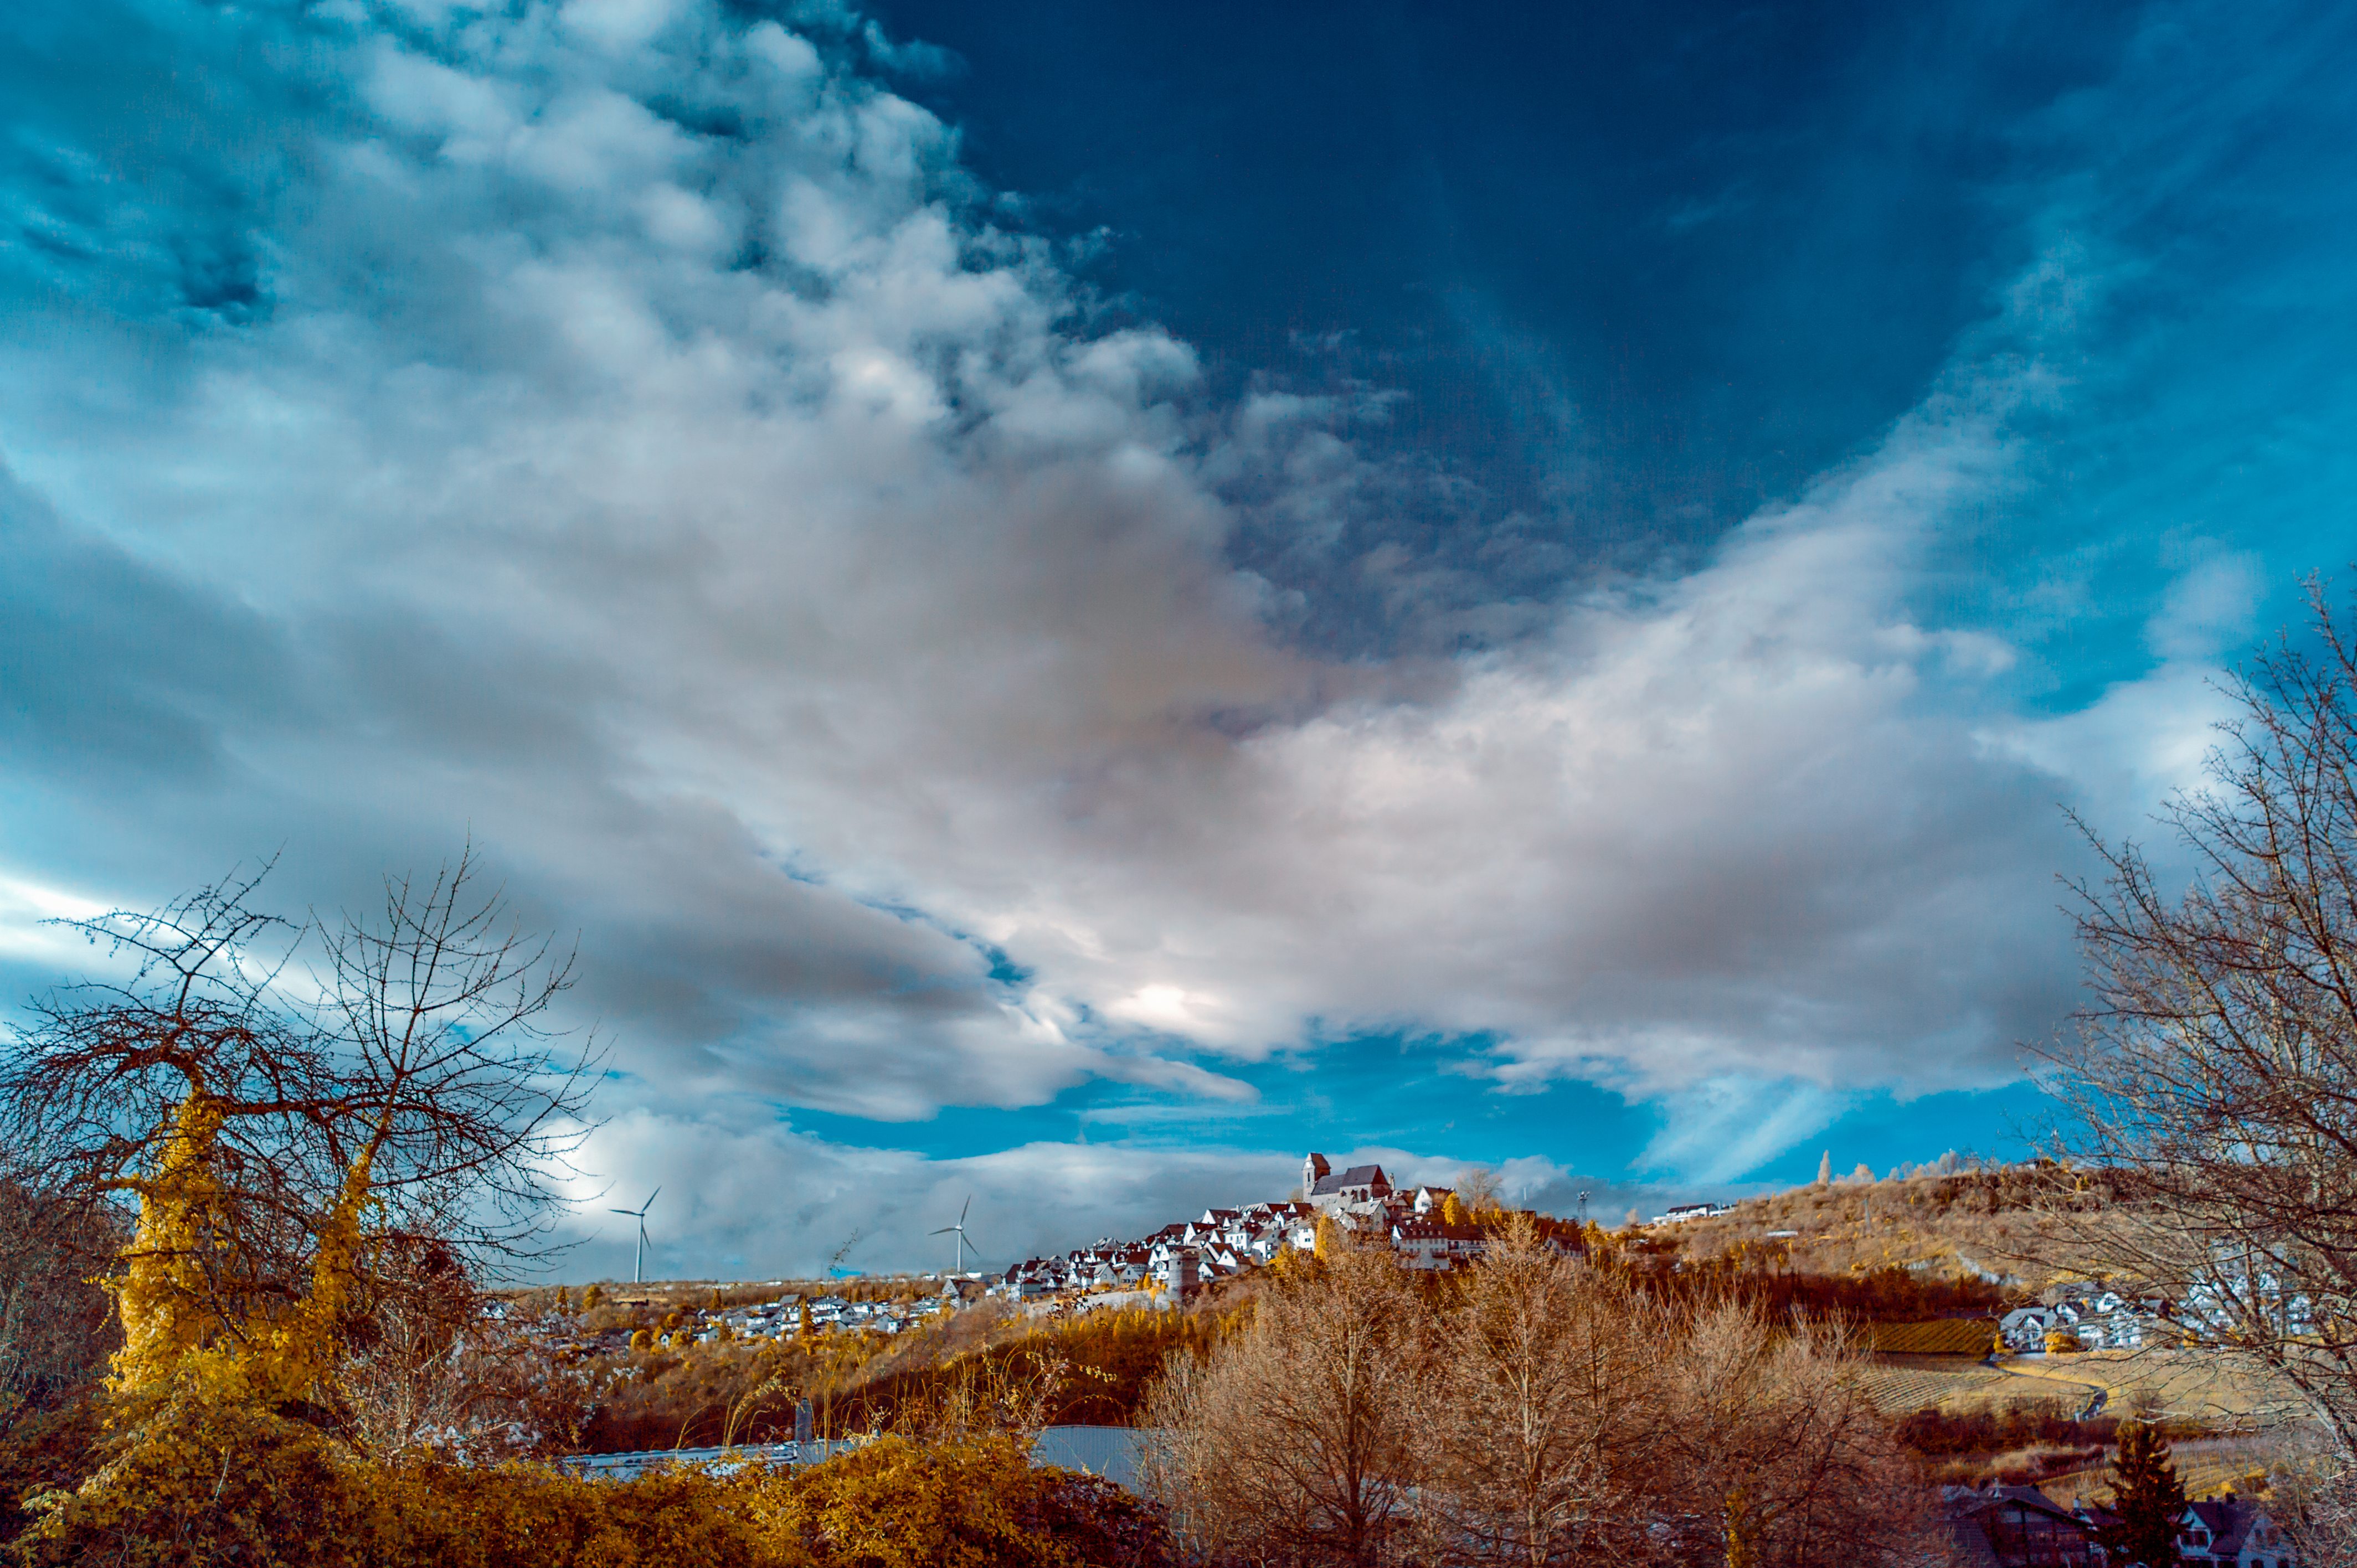
The white balance in LR determines the colors after the channel swap. Here is the opportunity to experiment a little. For example, you can click with the pipette on a bright cloud or select the grass. Just experiment …
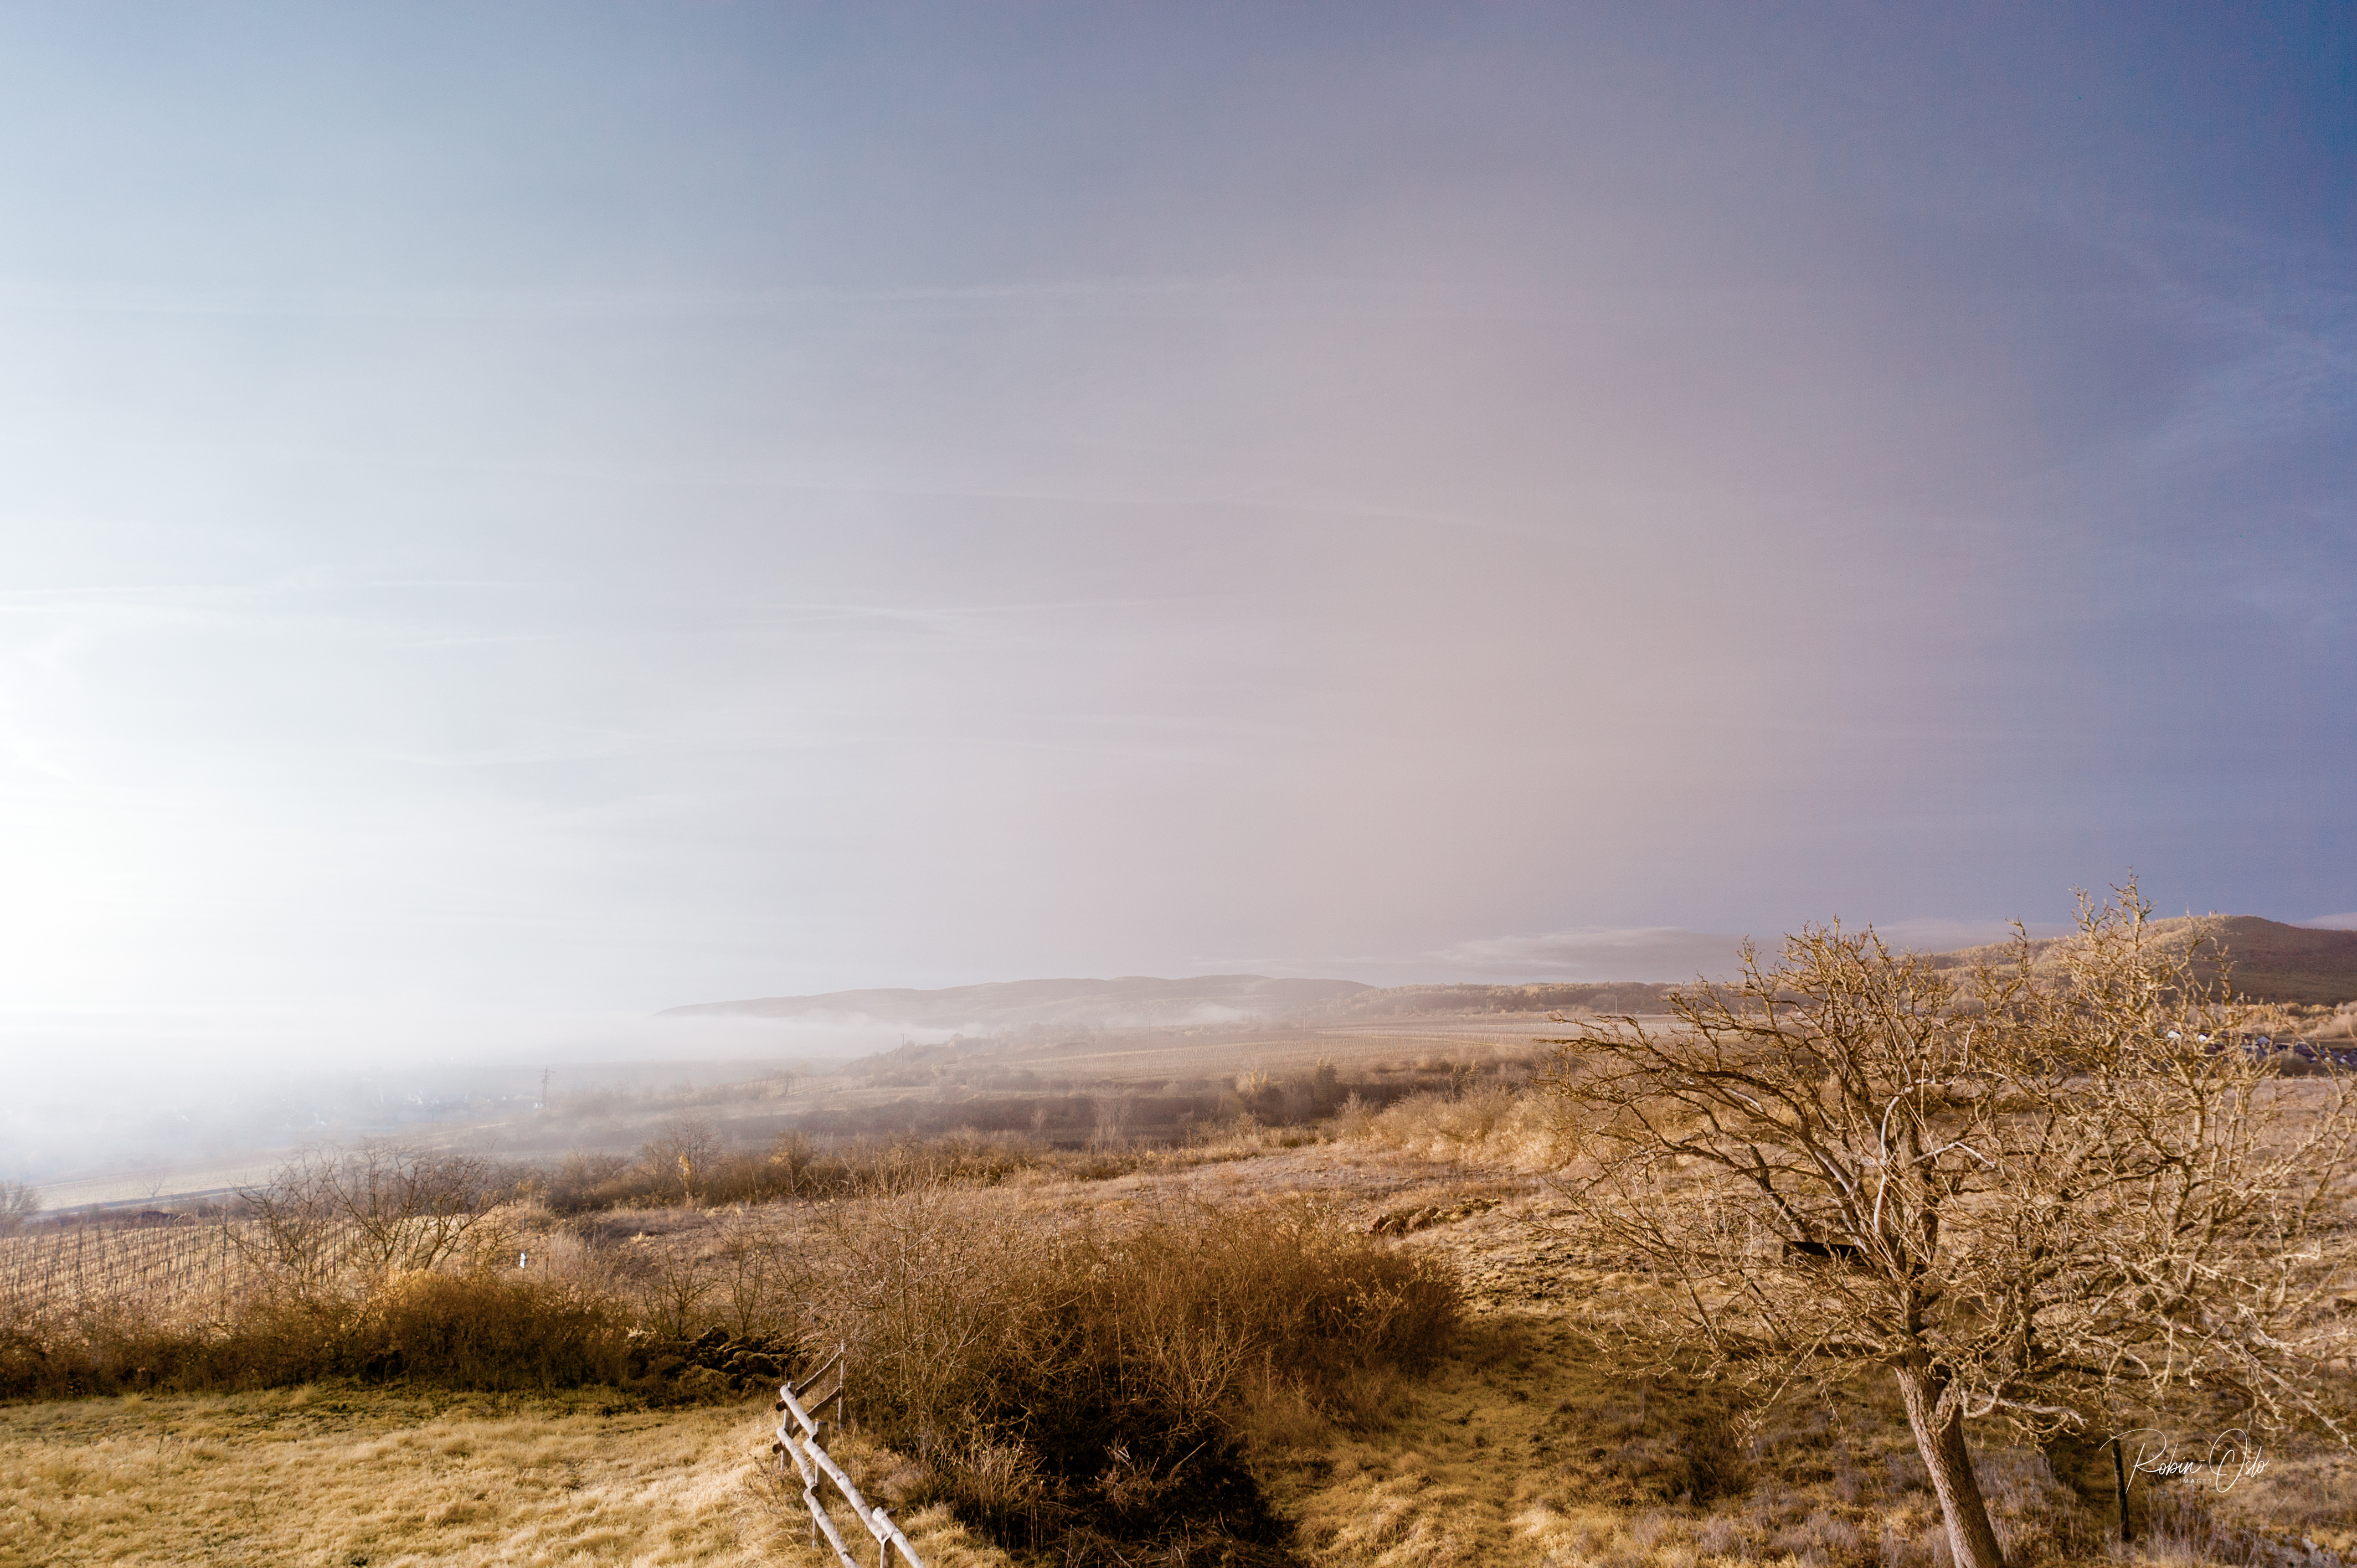
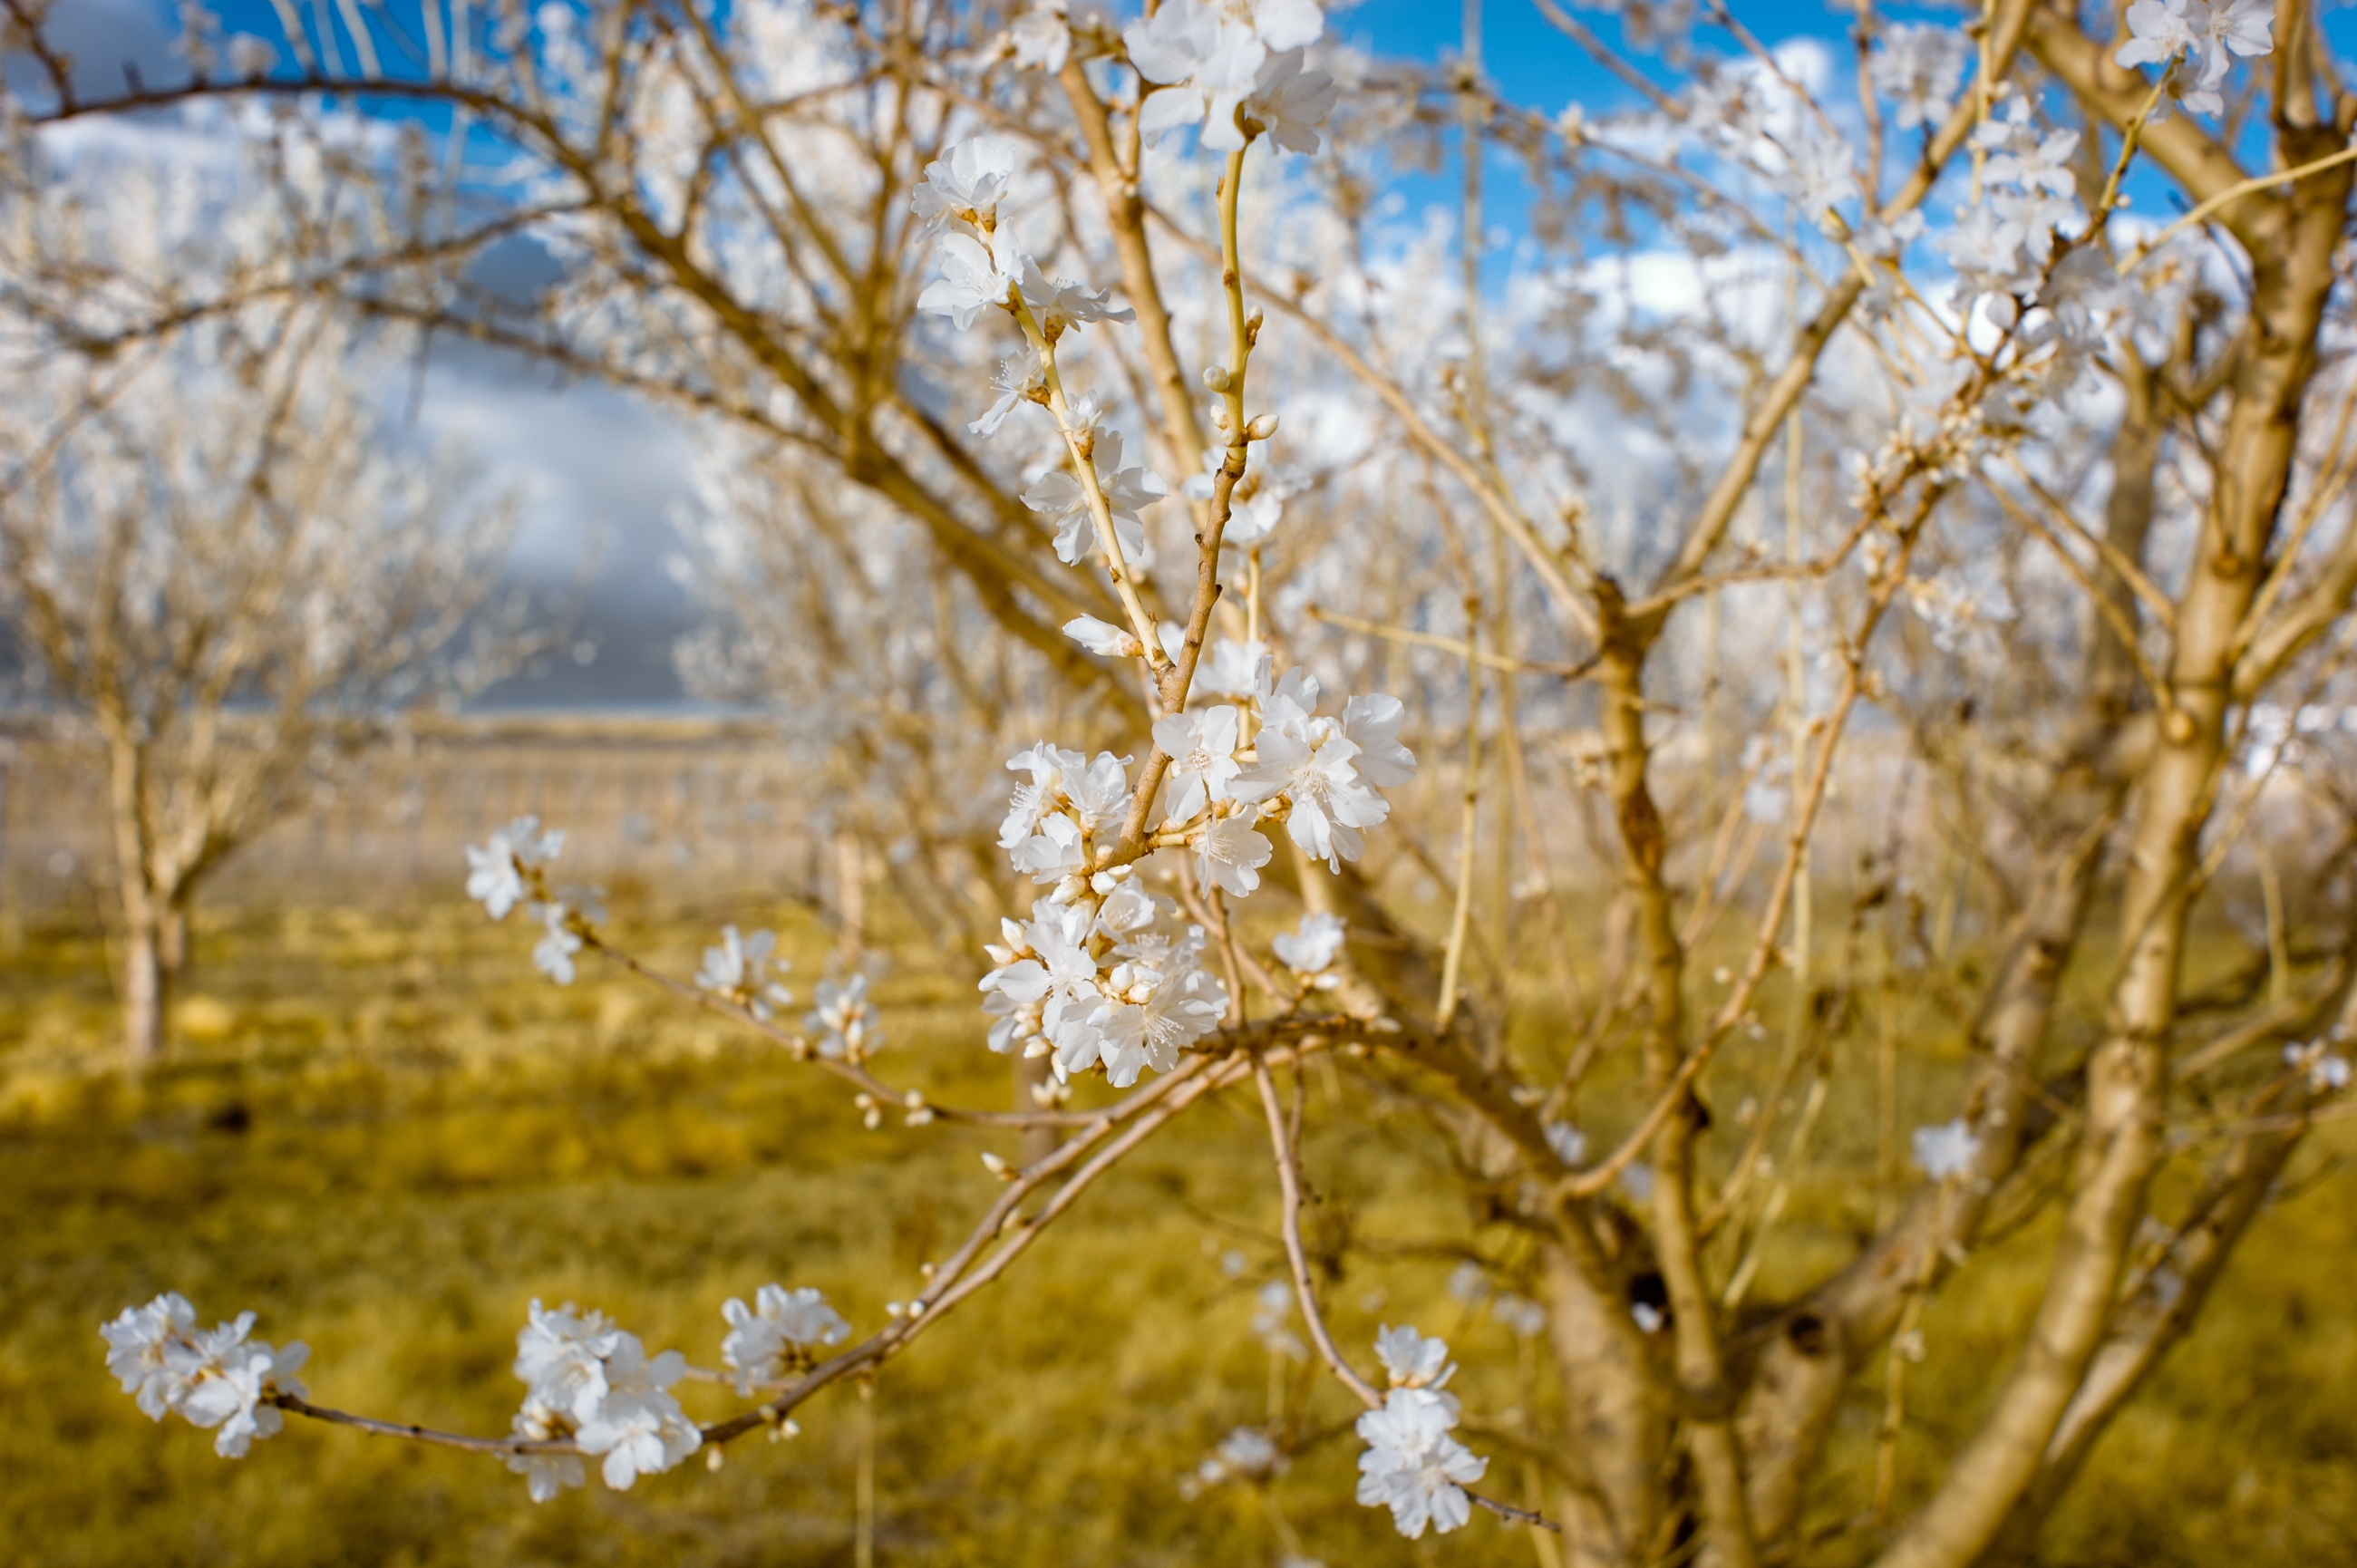
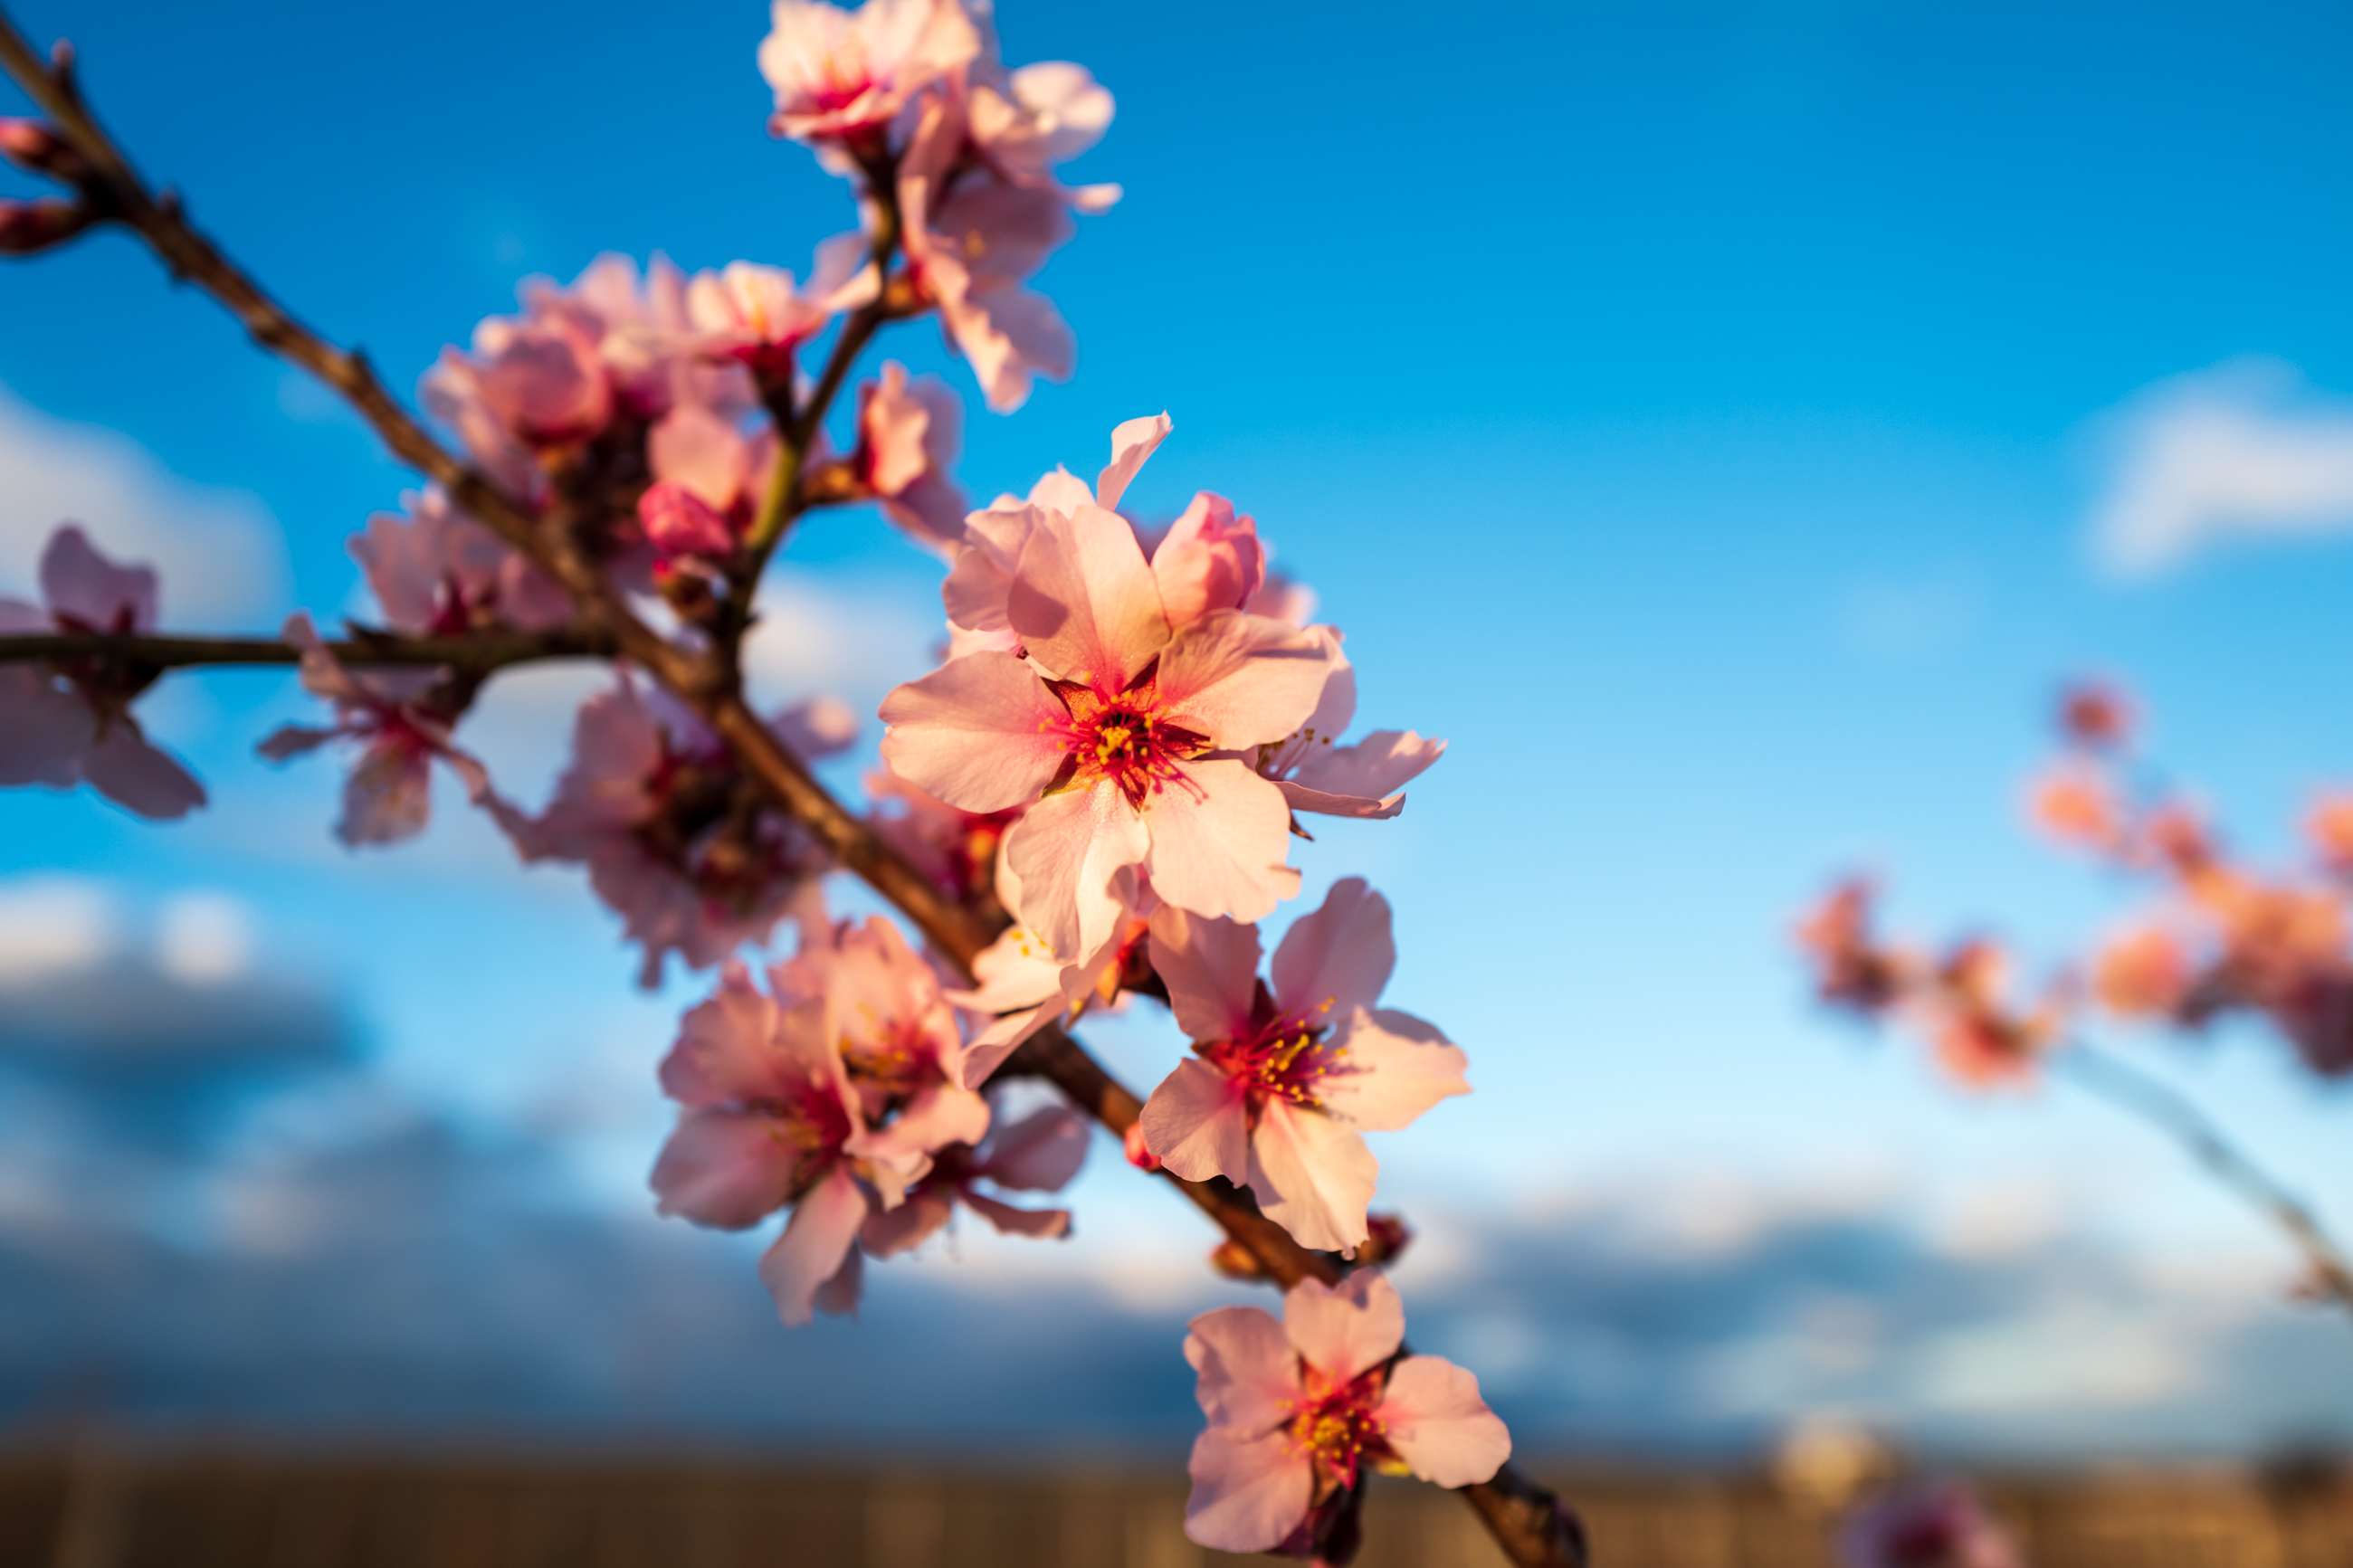
February
I added the following paragraph and its pictures on Feb. 27th, 2023.
In the meantime a breath of spring can be felt in the Palatinate. The trees have not yet reflective leaves, but there are the first delicate flowers on early blooming almond trees.


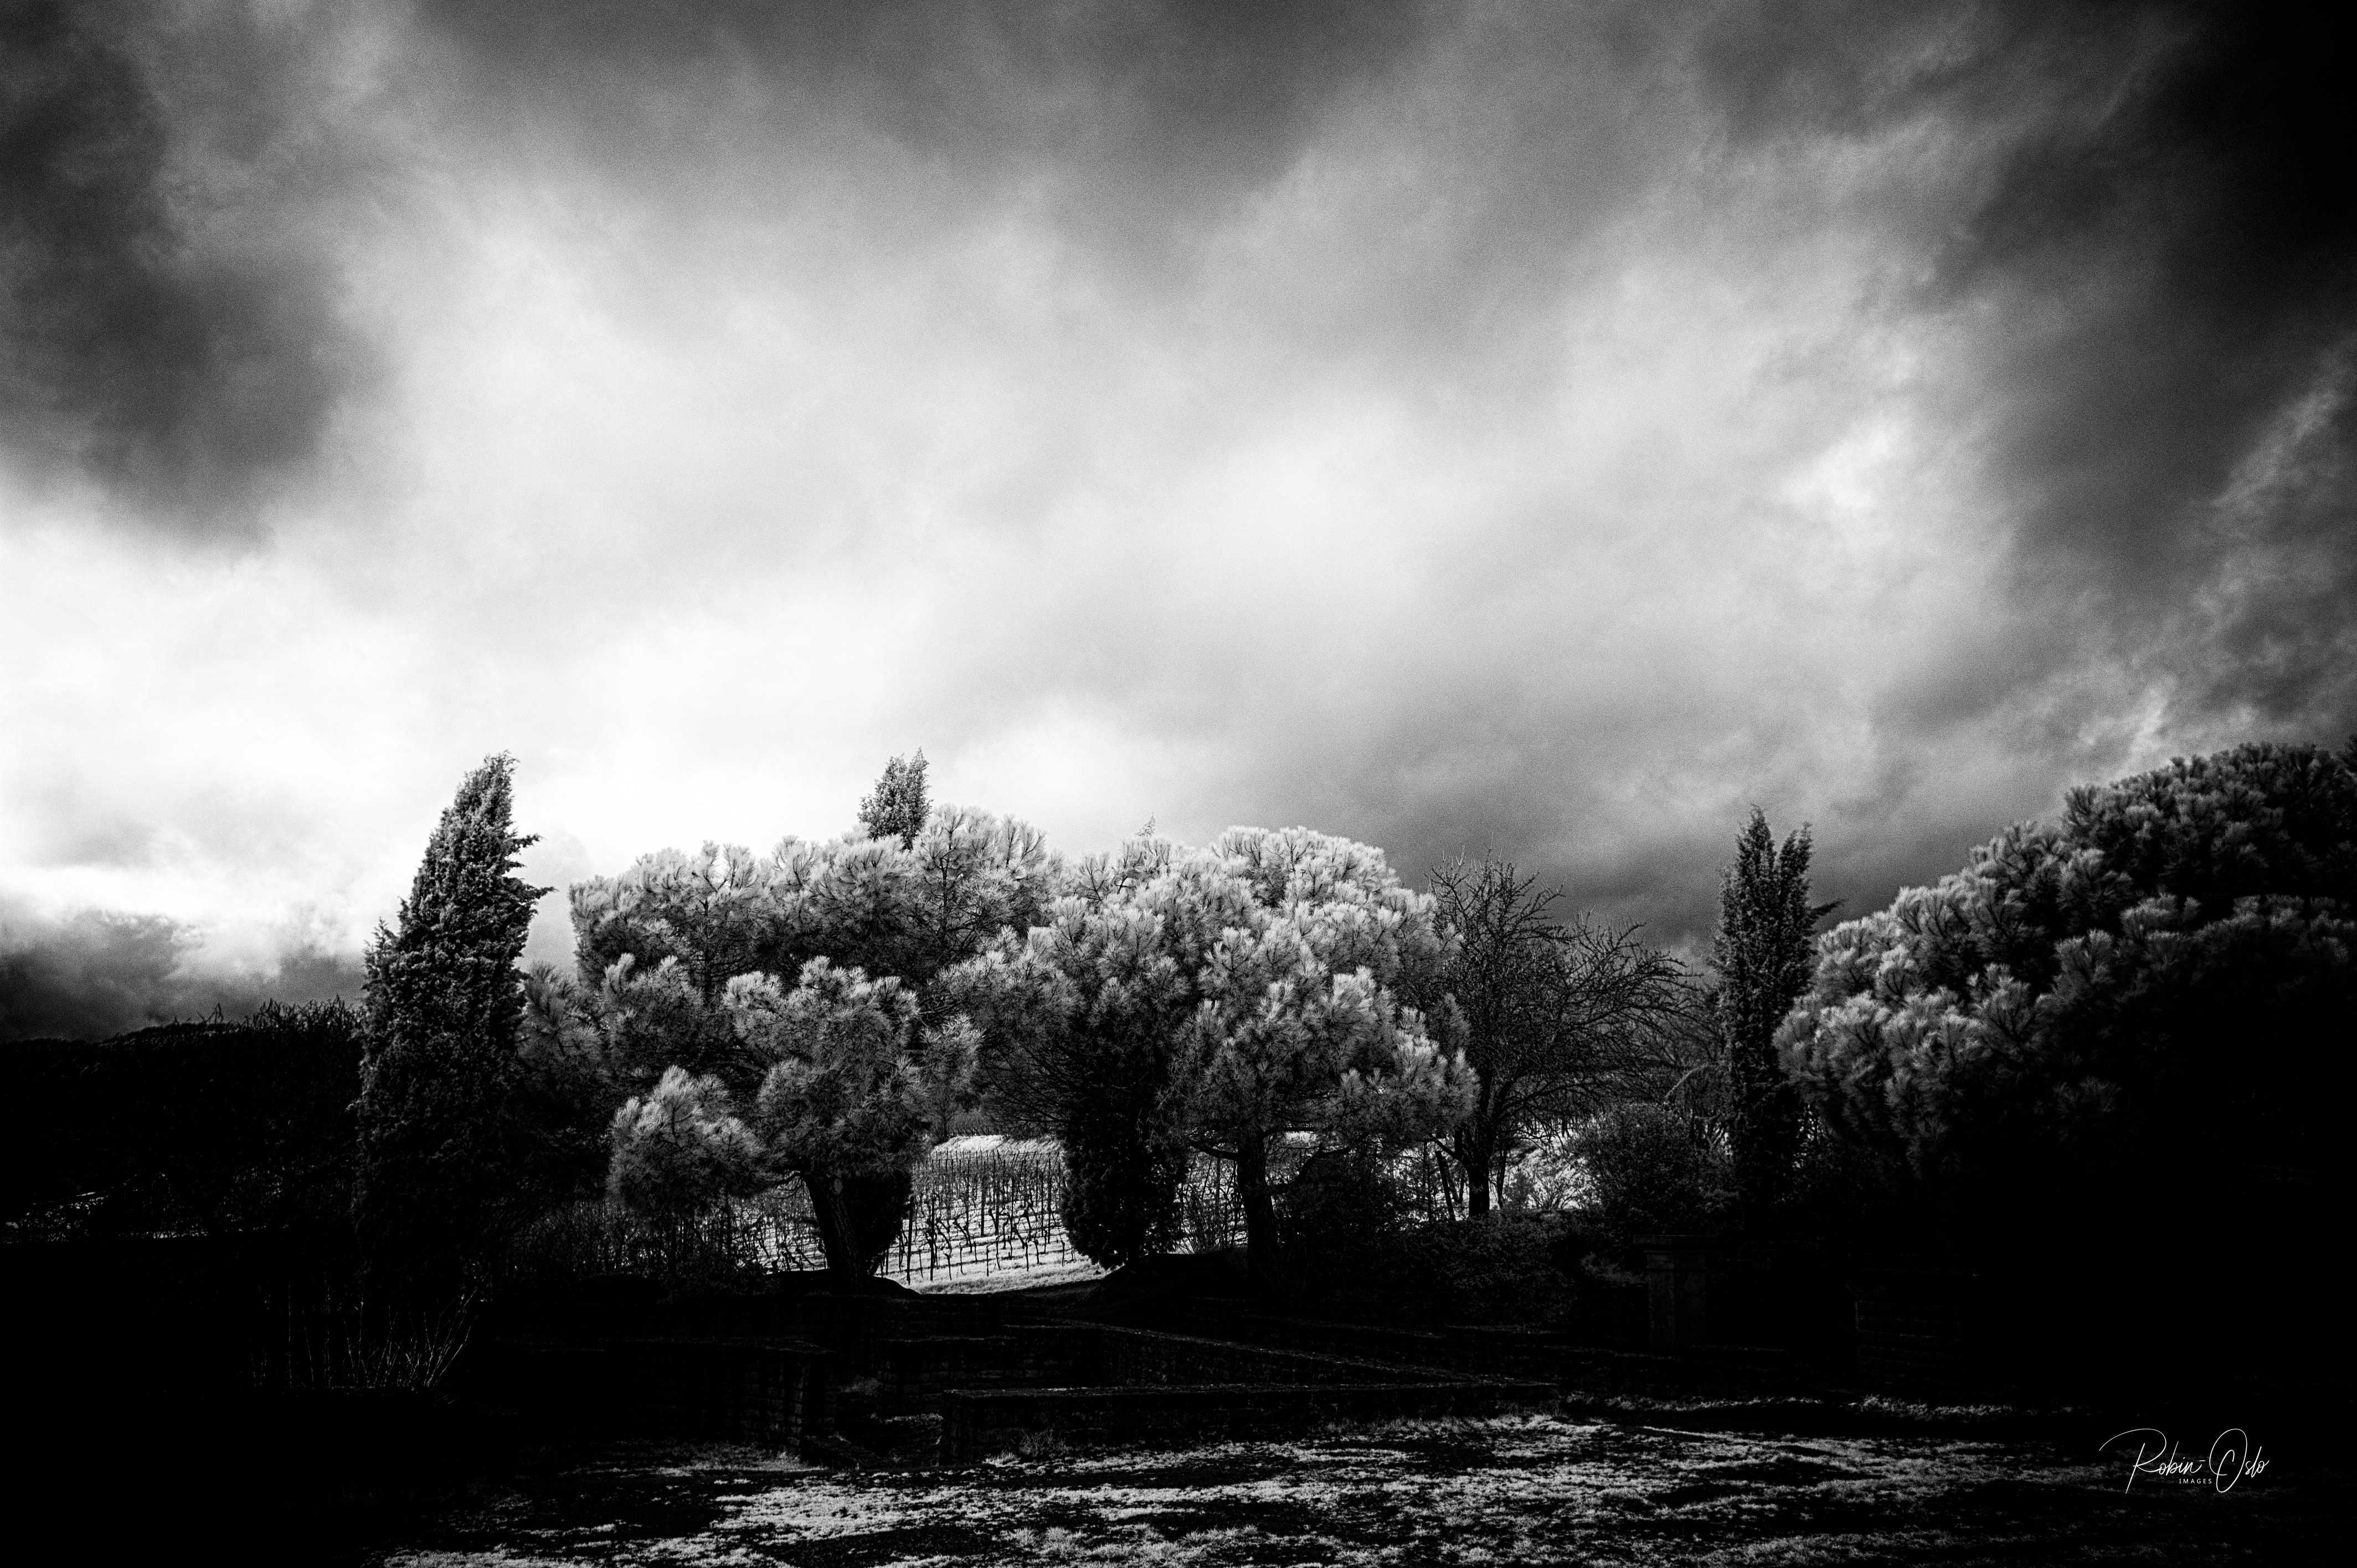
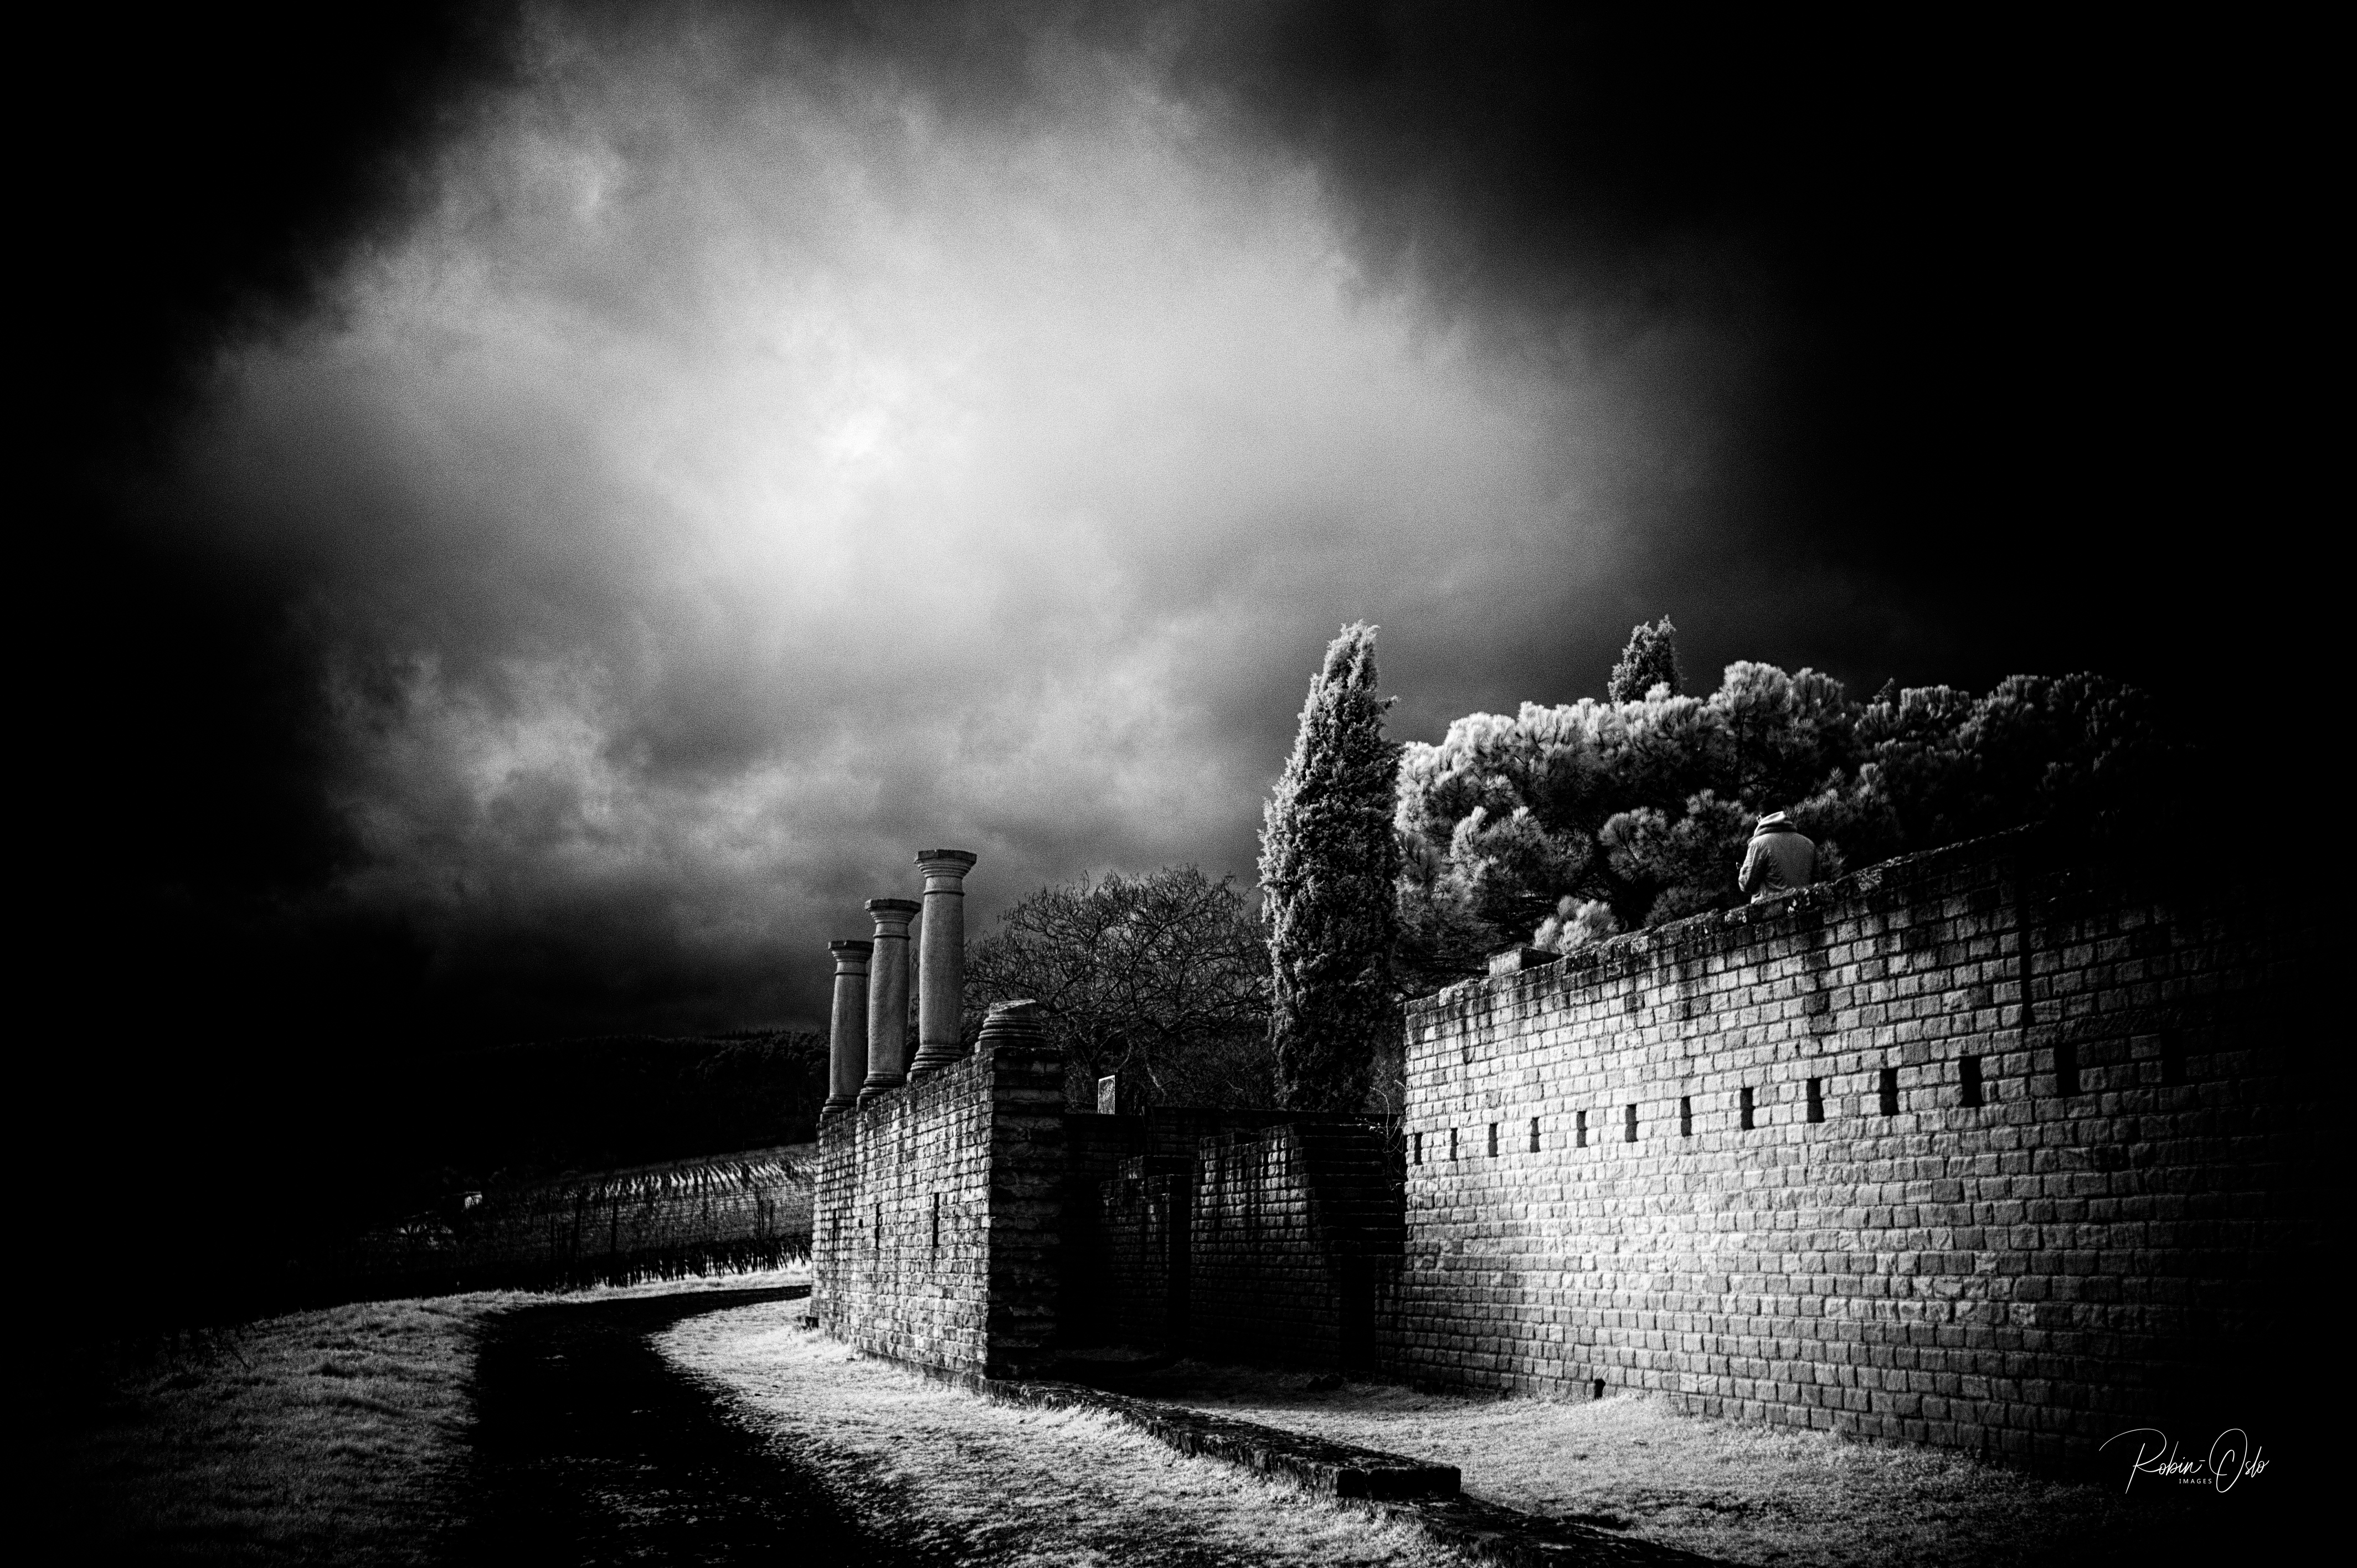
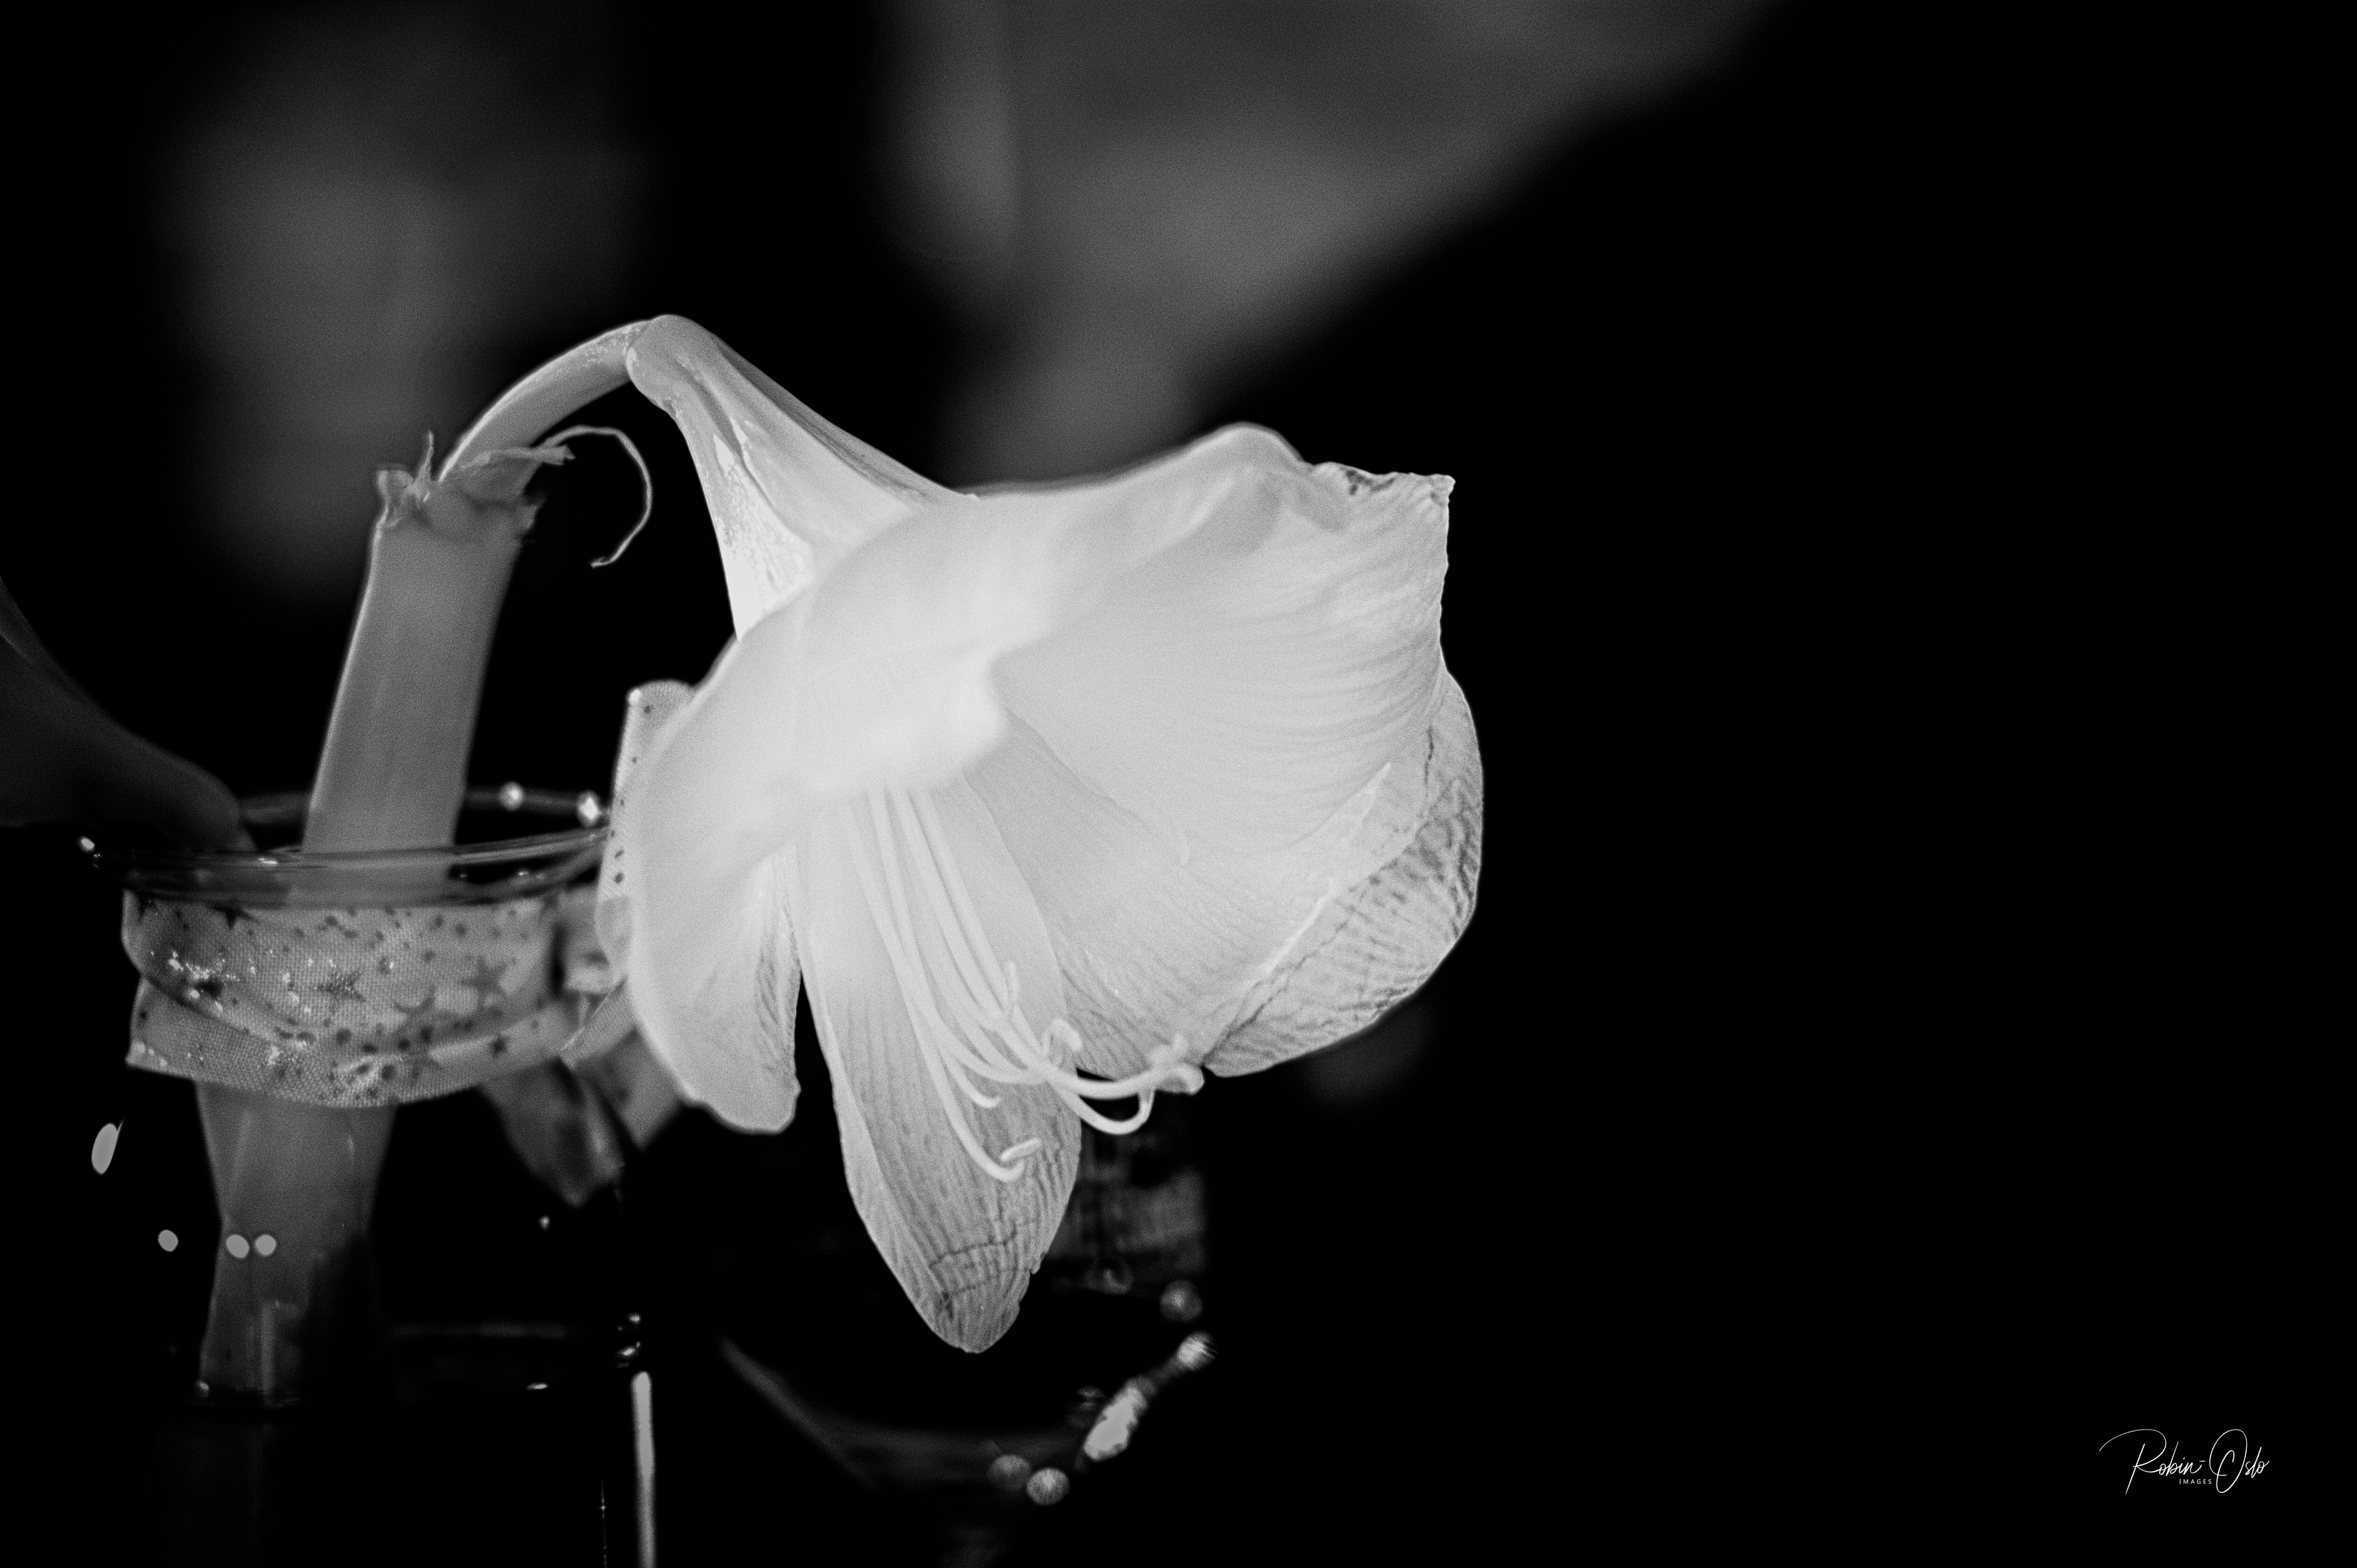
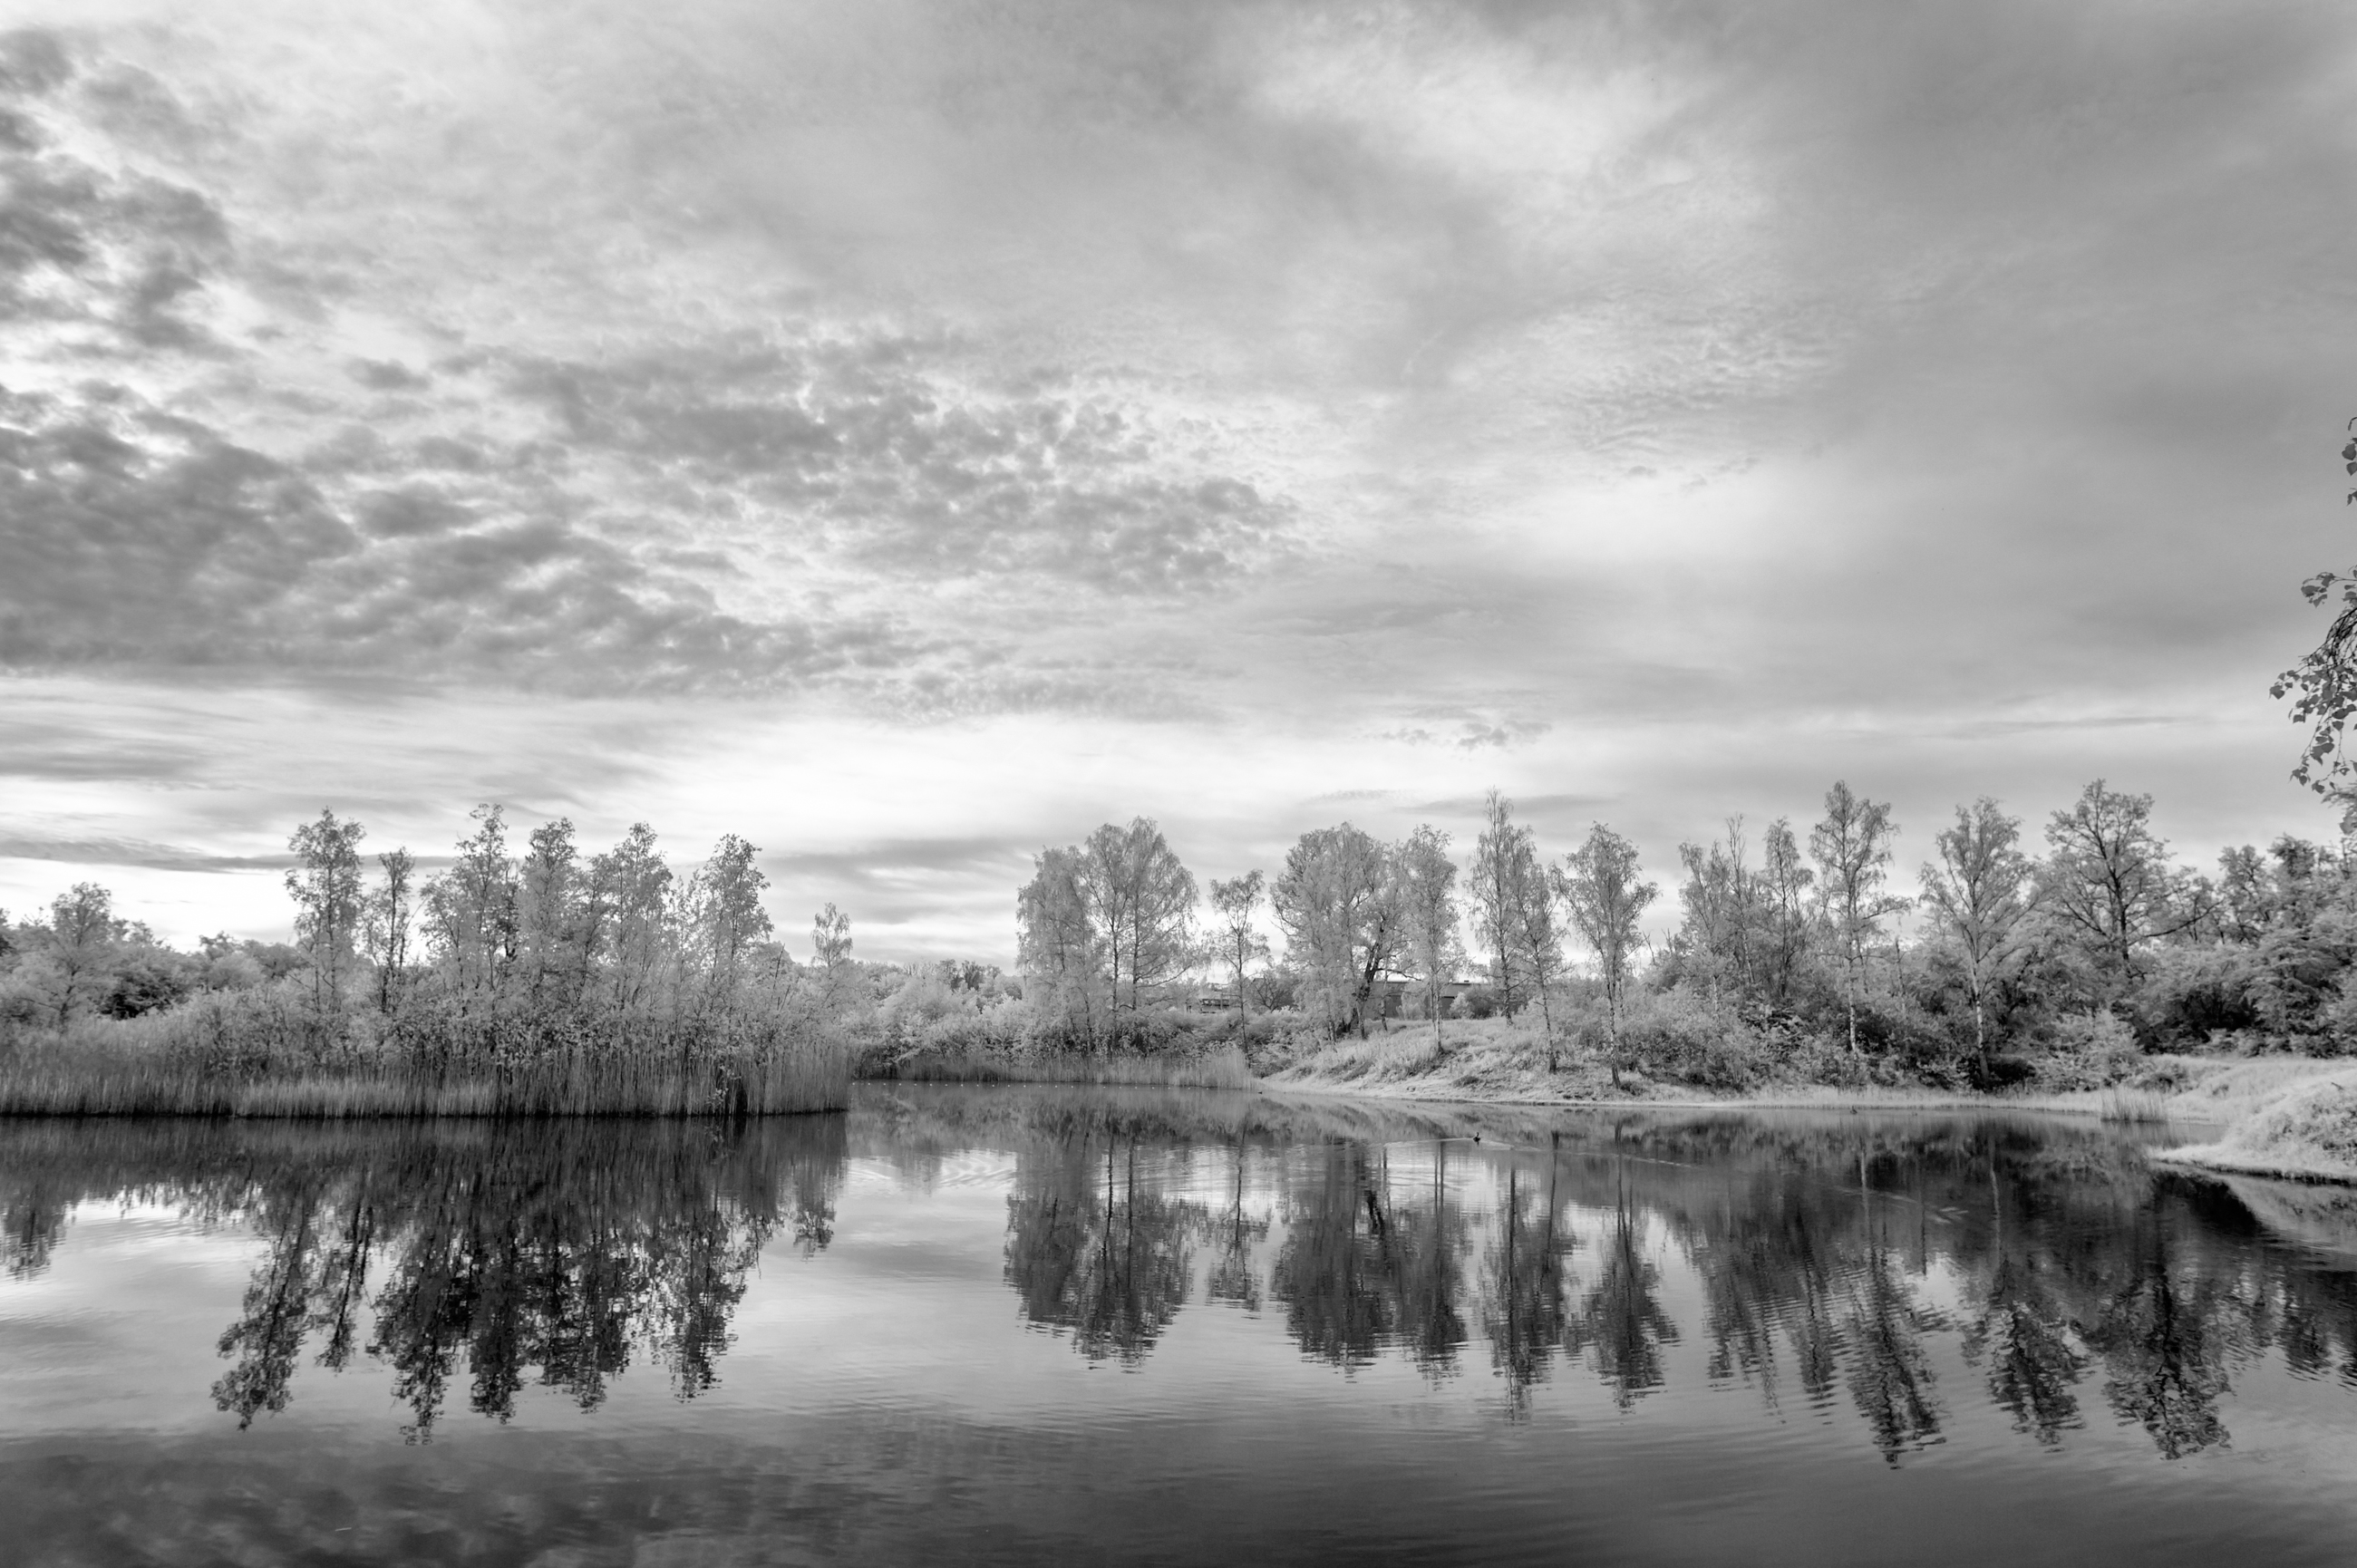
Conversion to black and white using Silver Efex Pro 2
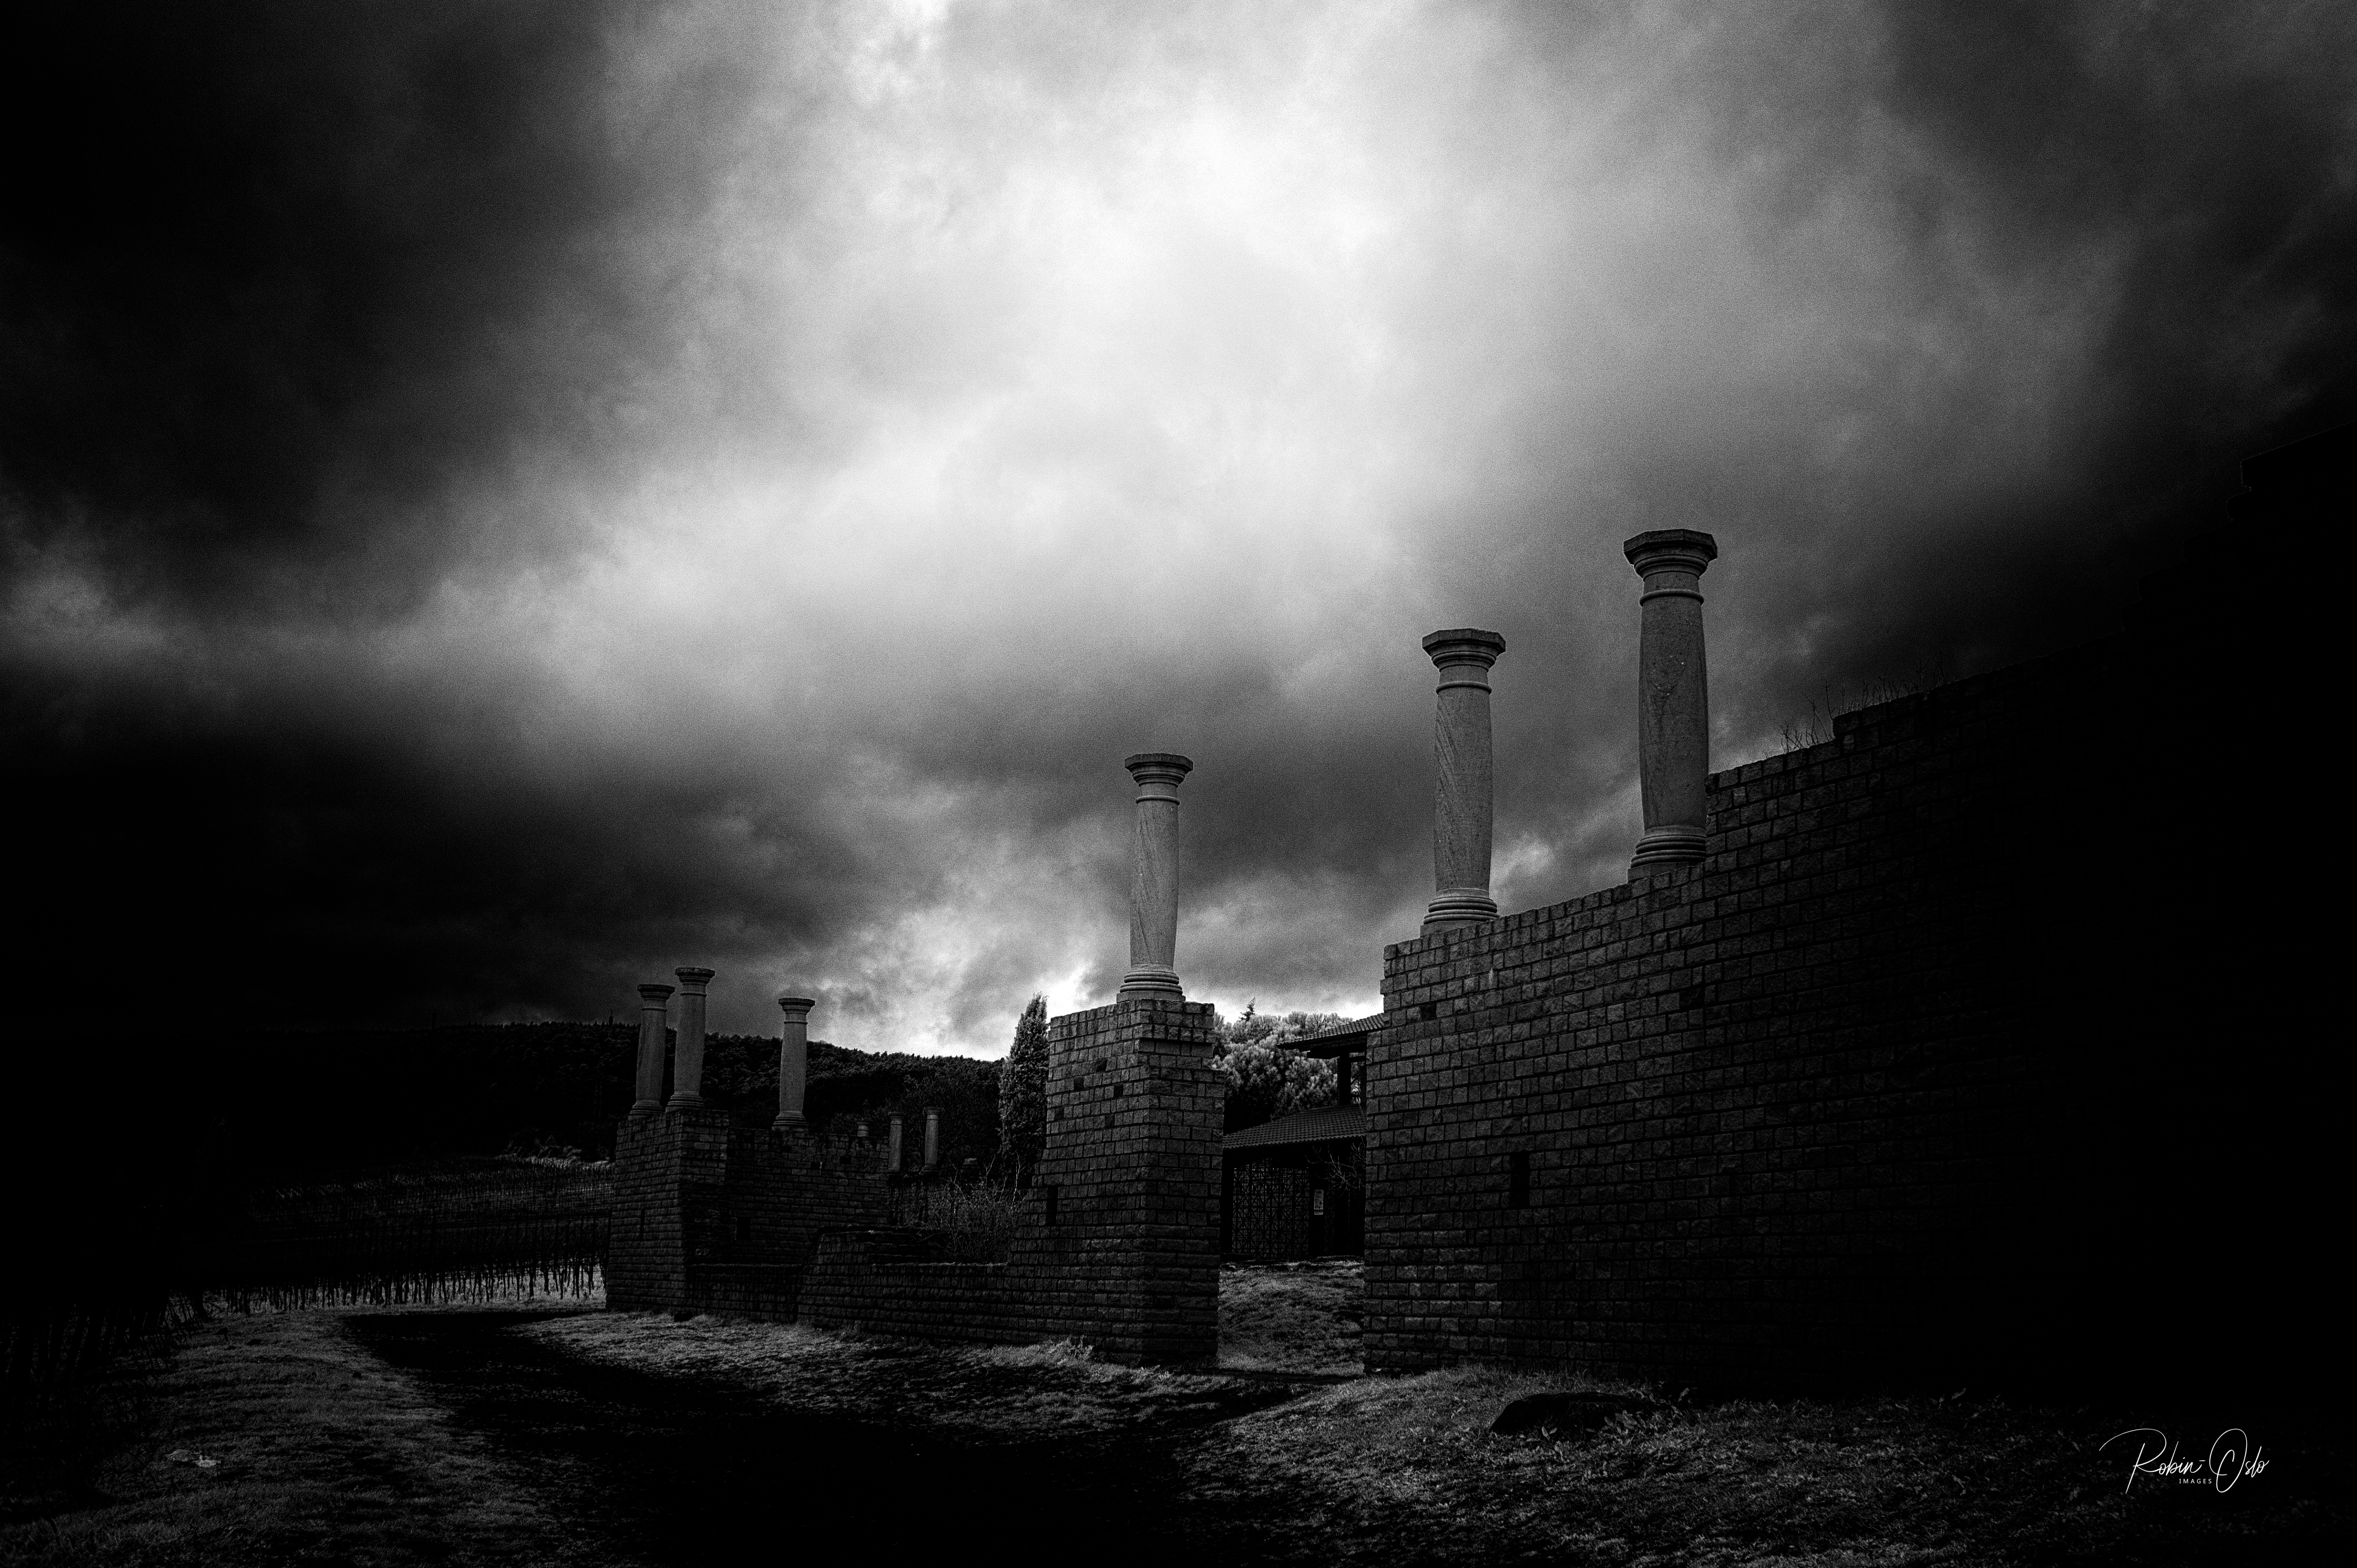
The conversion to black and white images can be done in Silver Efex Pro after the channel swap. I have subjectively noticed that many images seem to have a finer drawing. Maybe I’m just imagining it. In any case, darker image effects can be achieved that are probably not to everyone’s taste, but from my point of view are well worth seeing.


What is further to be noted?
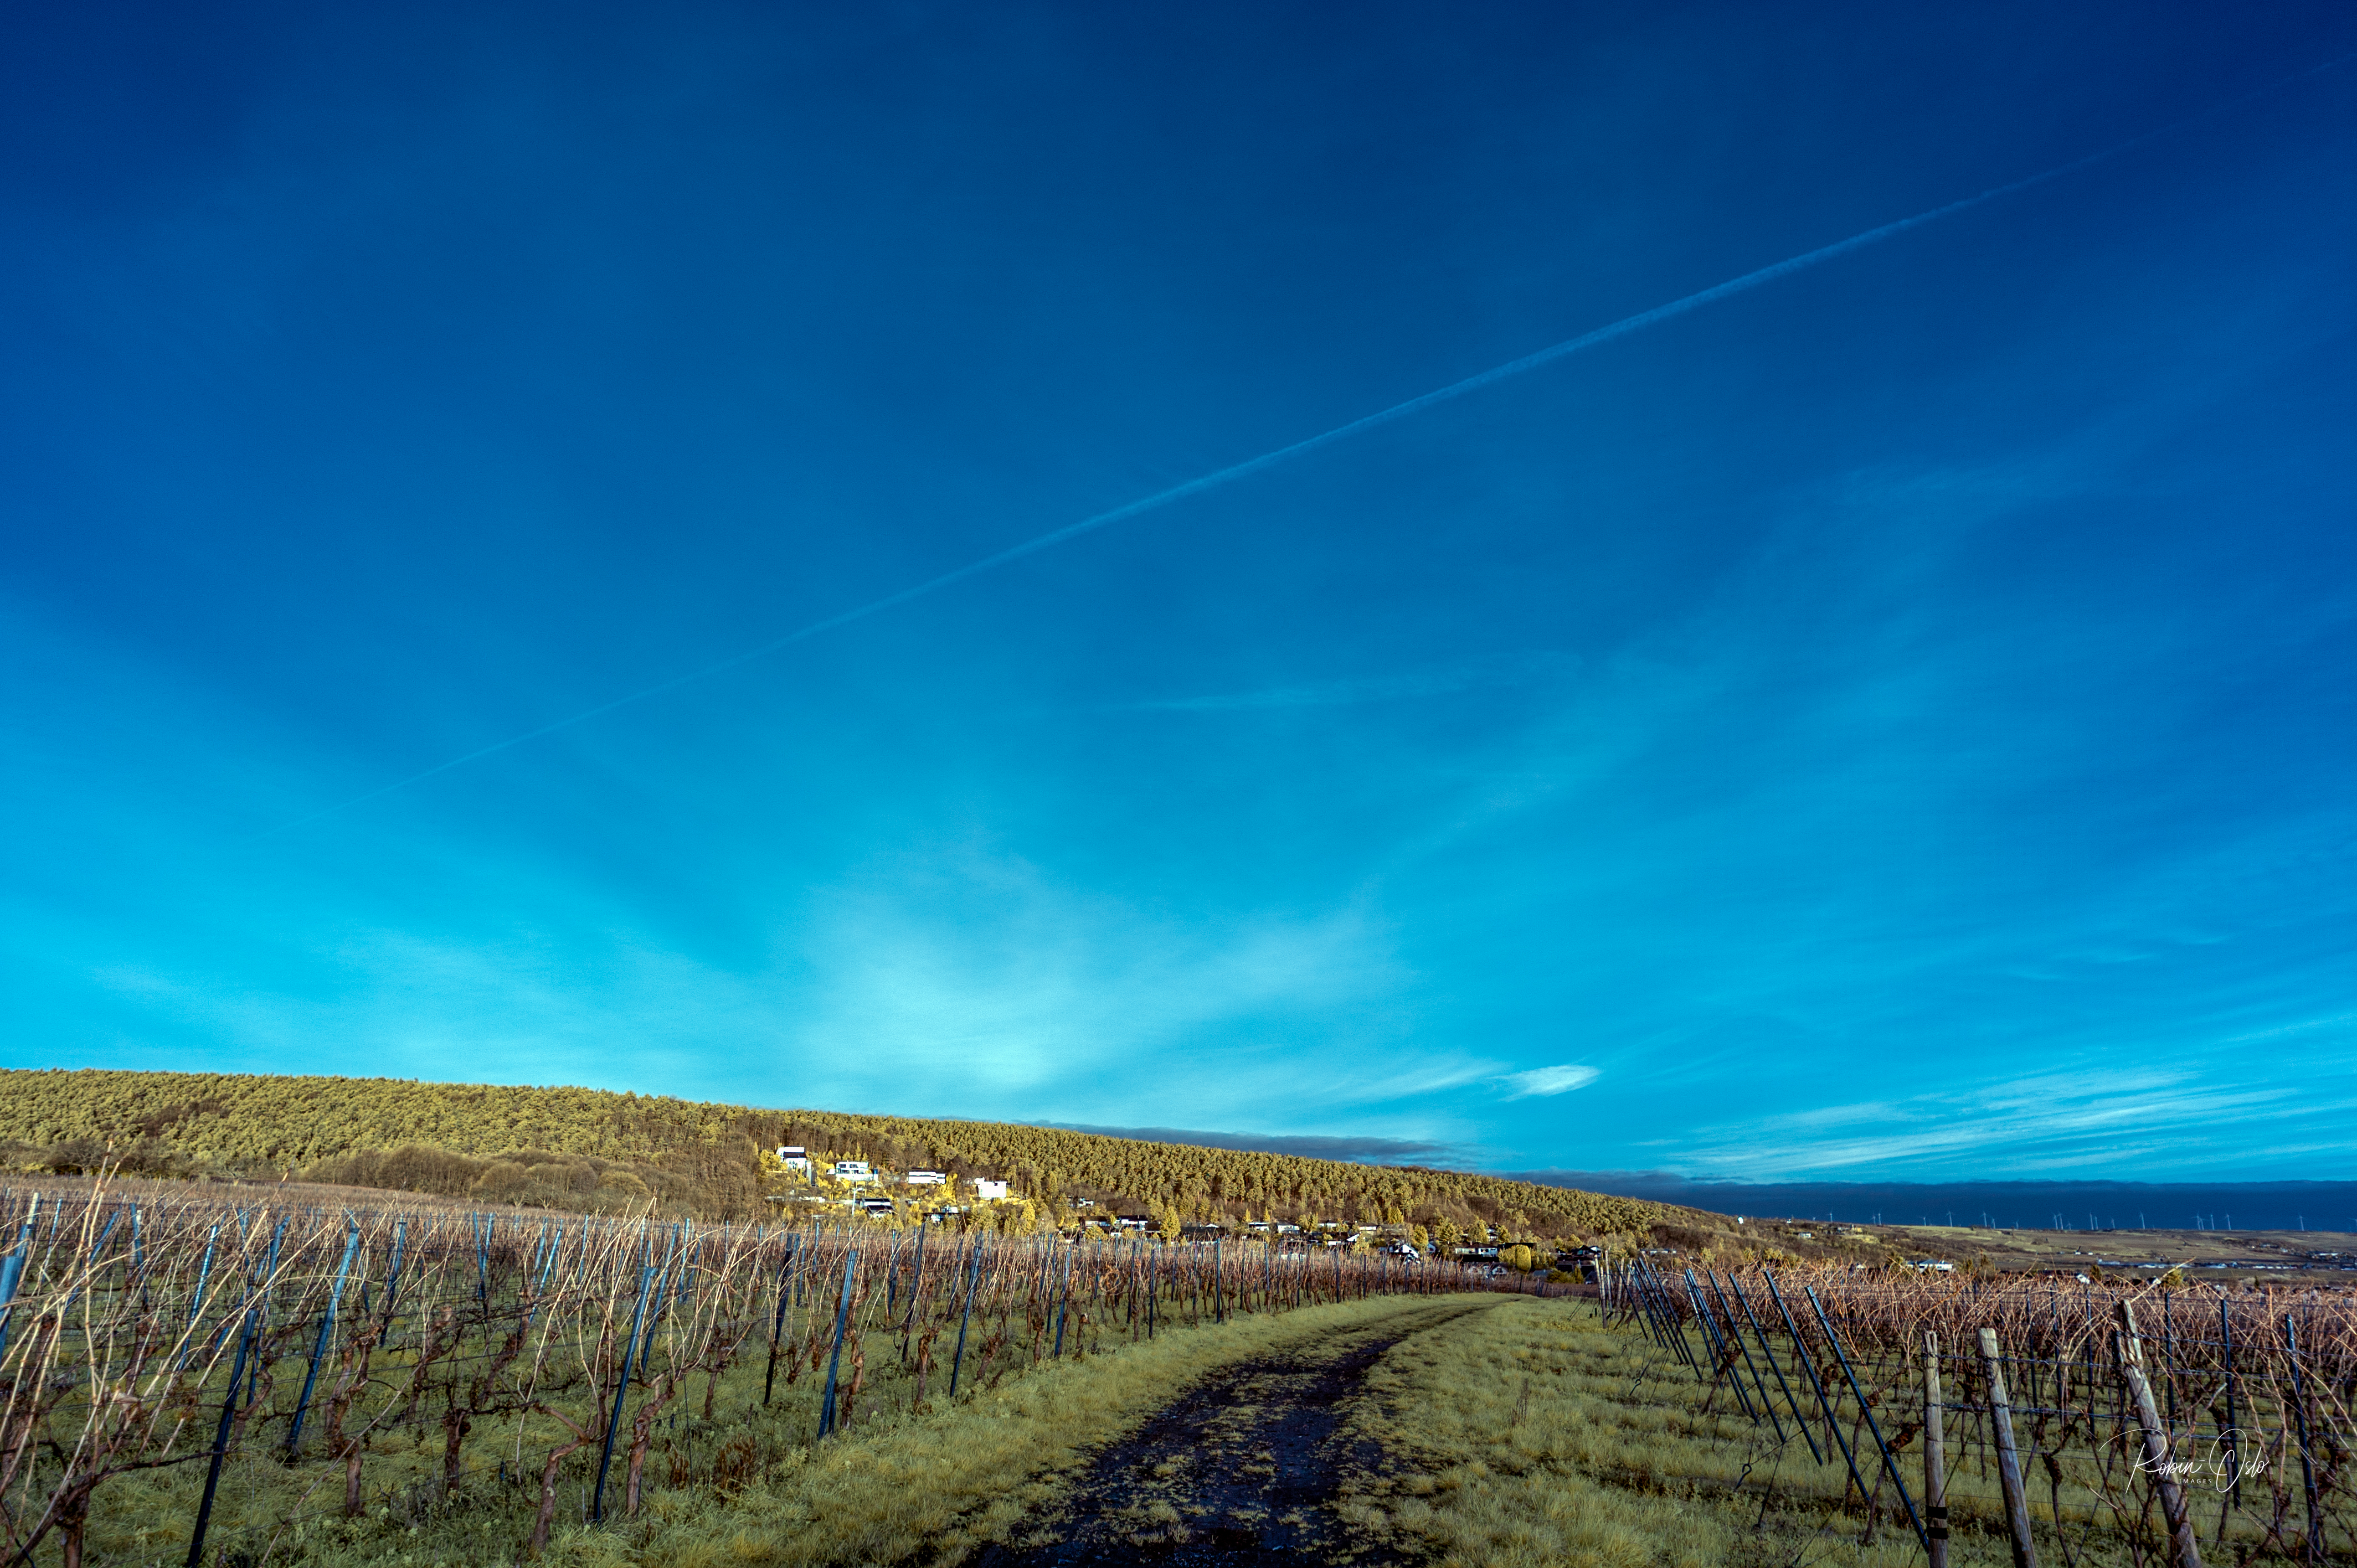
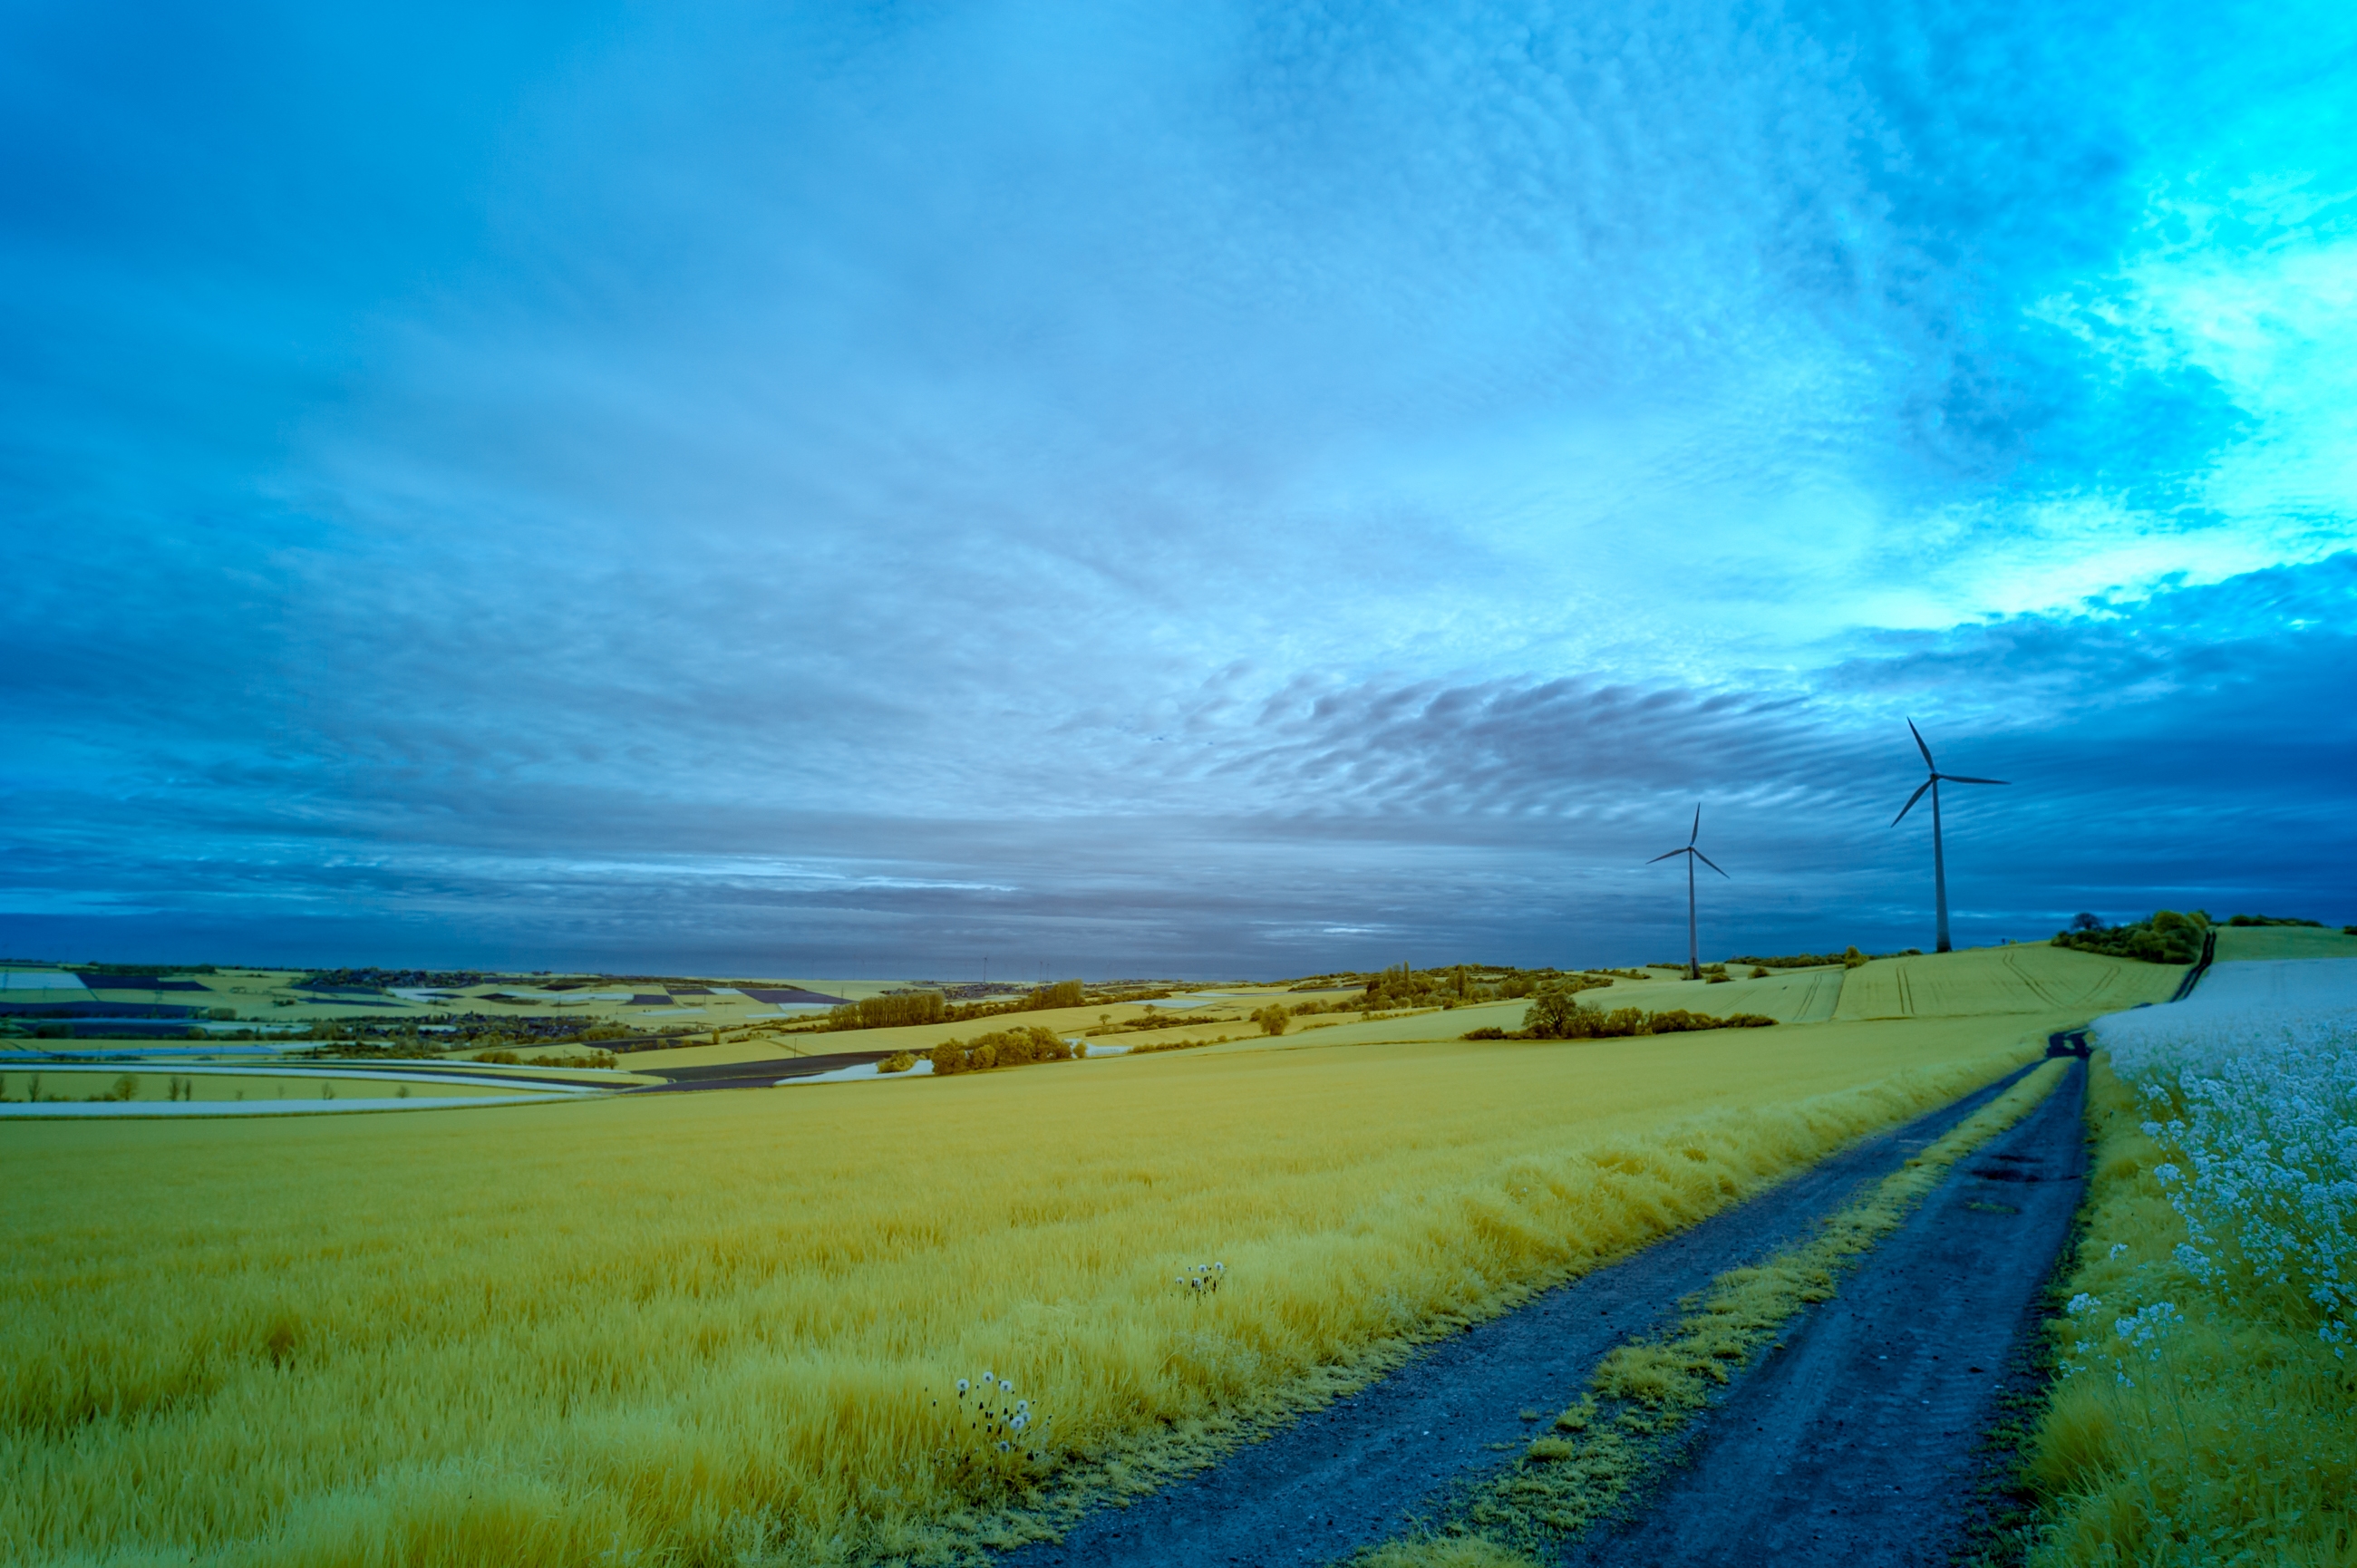
The excuse of not taking pictures in full sun has thus become obsolete. Sorry …
The sun slams down on deciduous trees at midday and the subject offers good lines?

Go ahead, create enchanting, dreamy images, images that are unthinkable at this time of day with any other camera.

The sun should be at your back to achieve the maximum result.
My tests with about 90° to 0° to the sun produced violent flares. The cause is probably the removed blocking filter, which would reduce the errors of lenses.

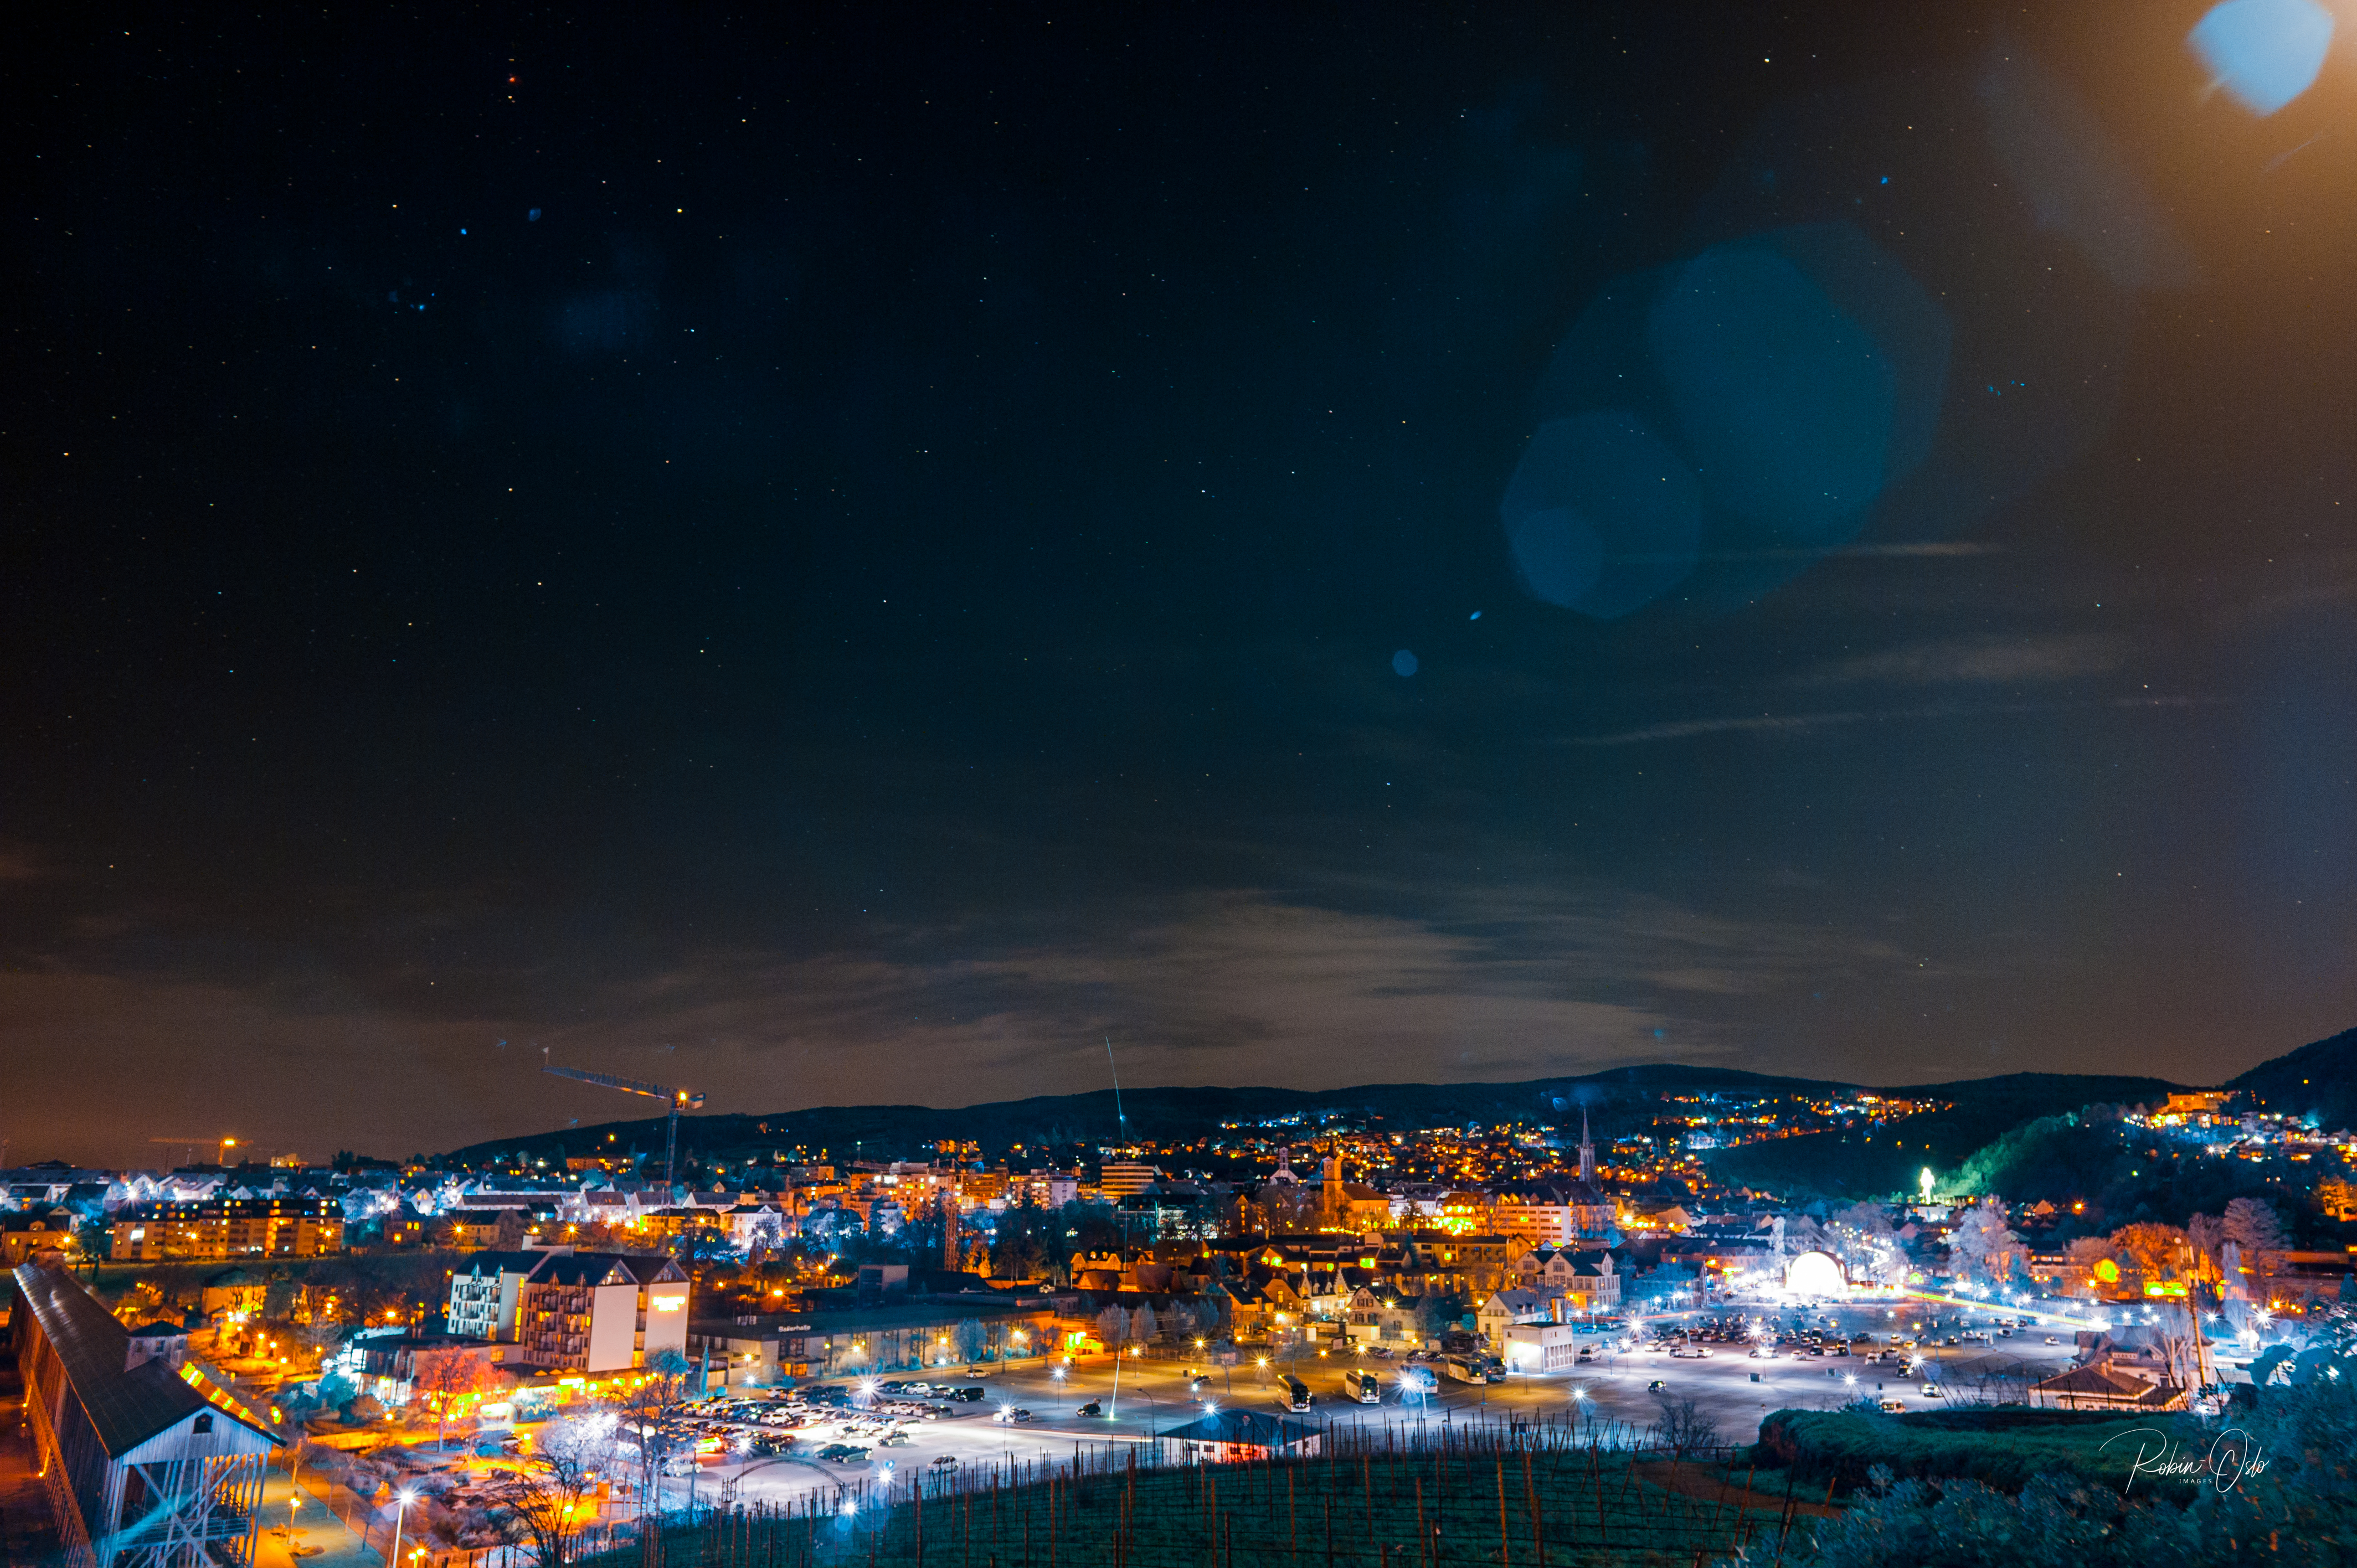
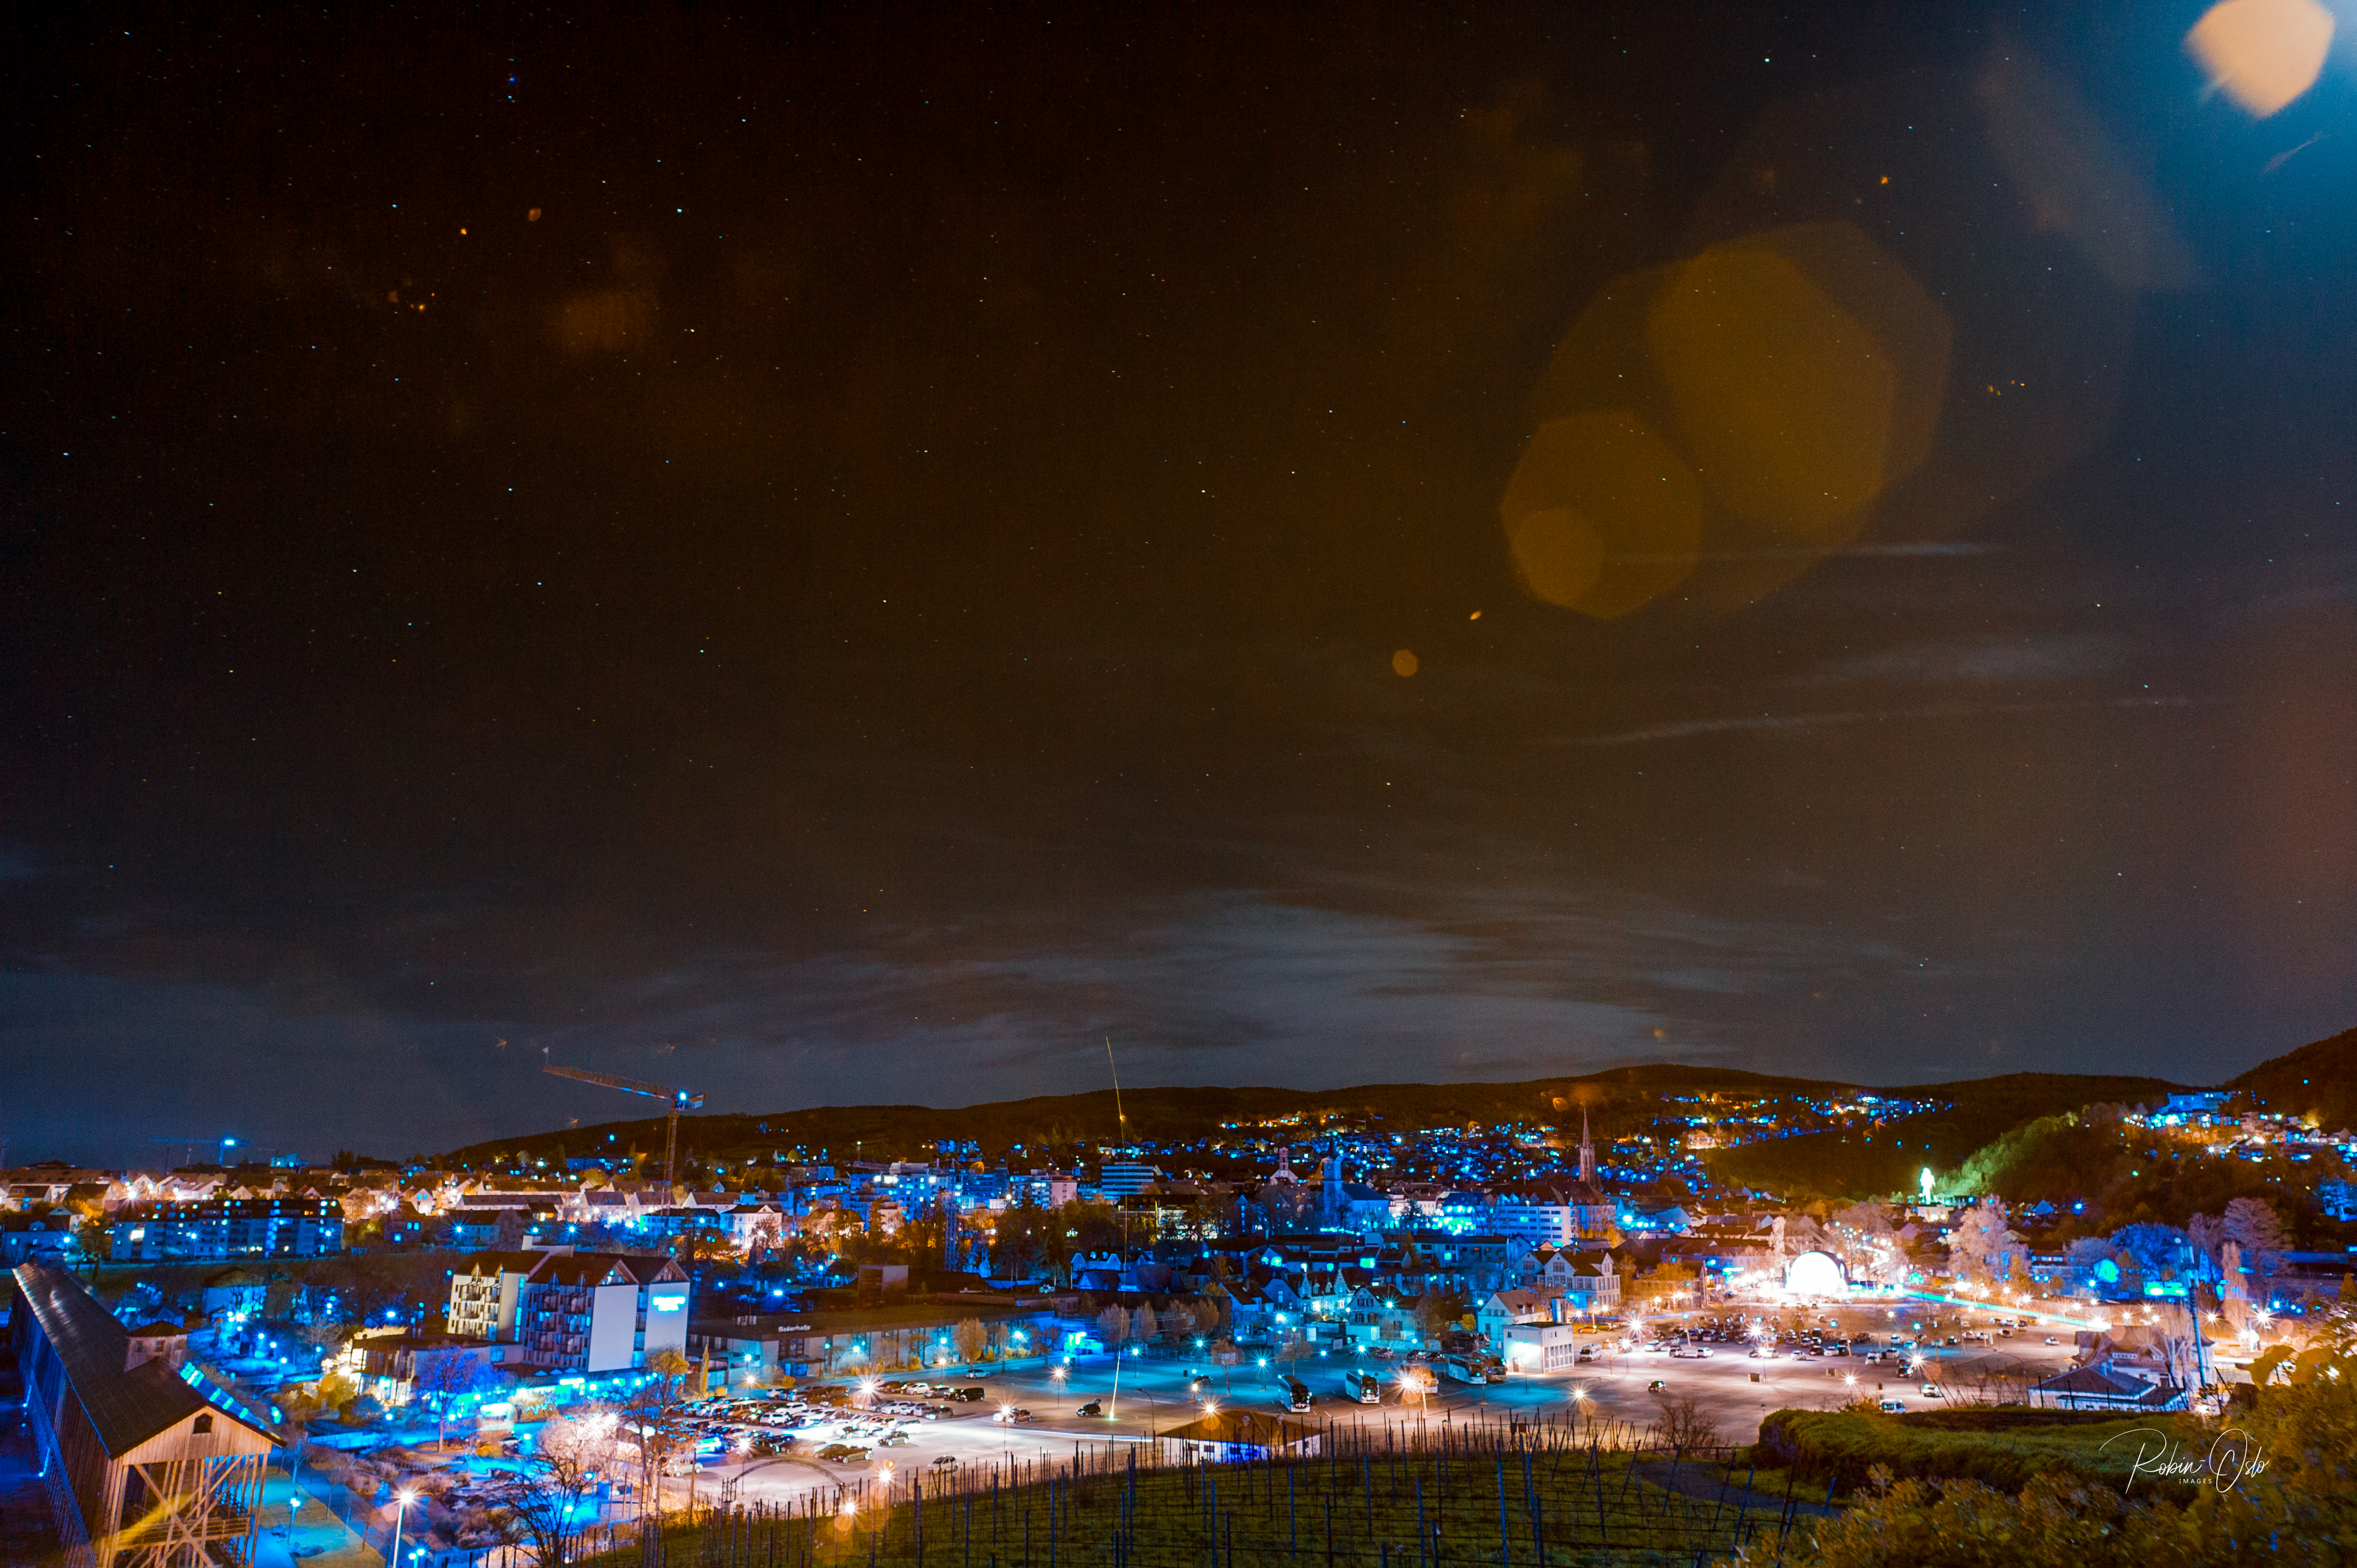
You can photograph anything with a converted camera.

I tried fireworks, among other things, only to find that they had no effect except for big flares. The cause was the moon in the upper right of the picture.
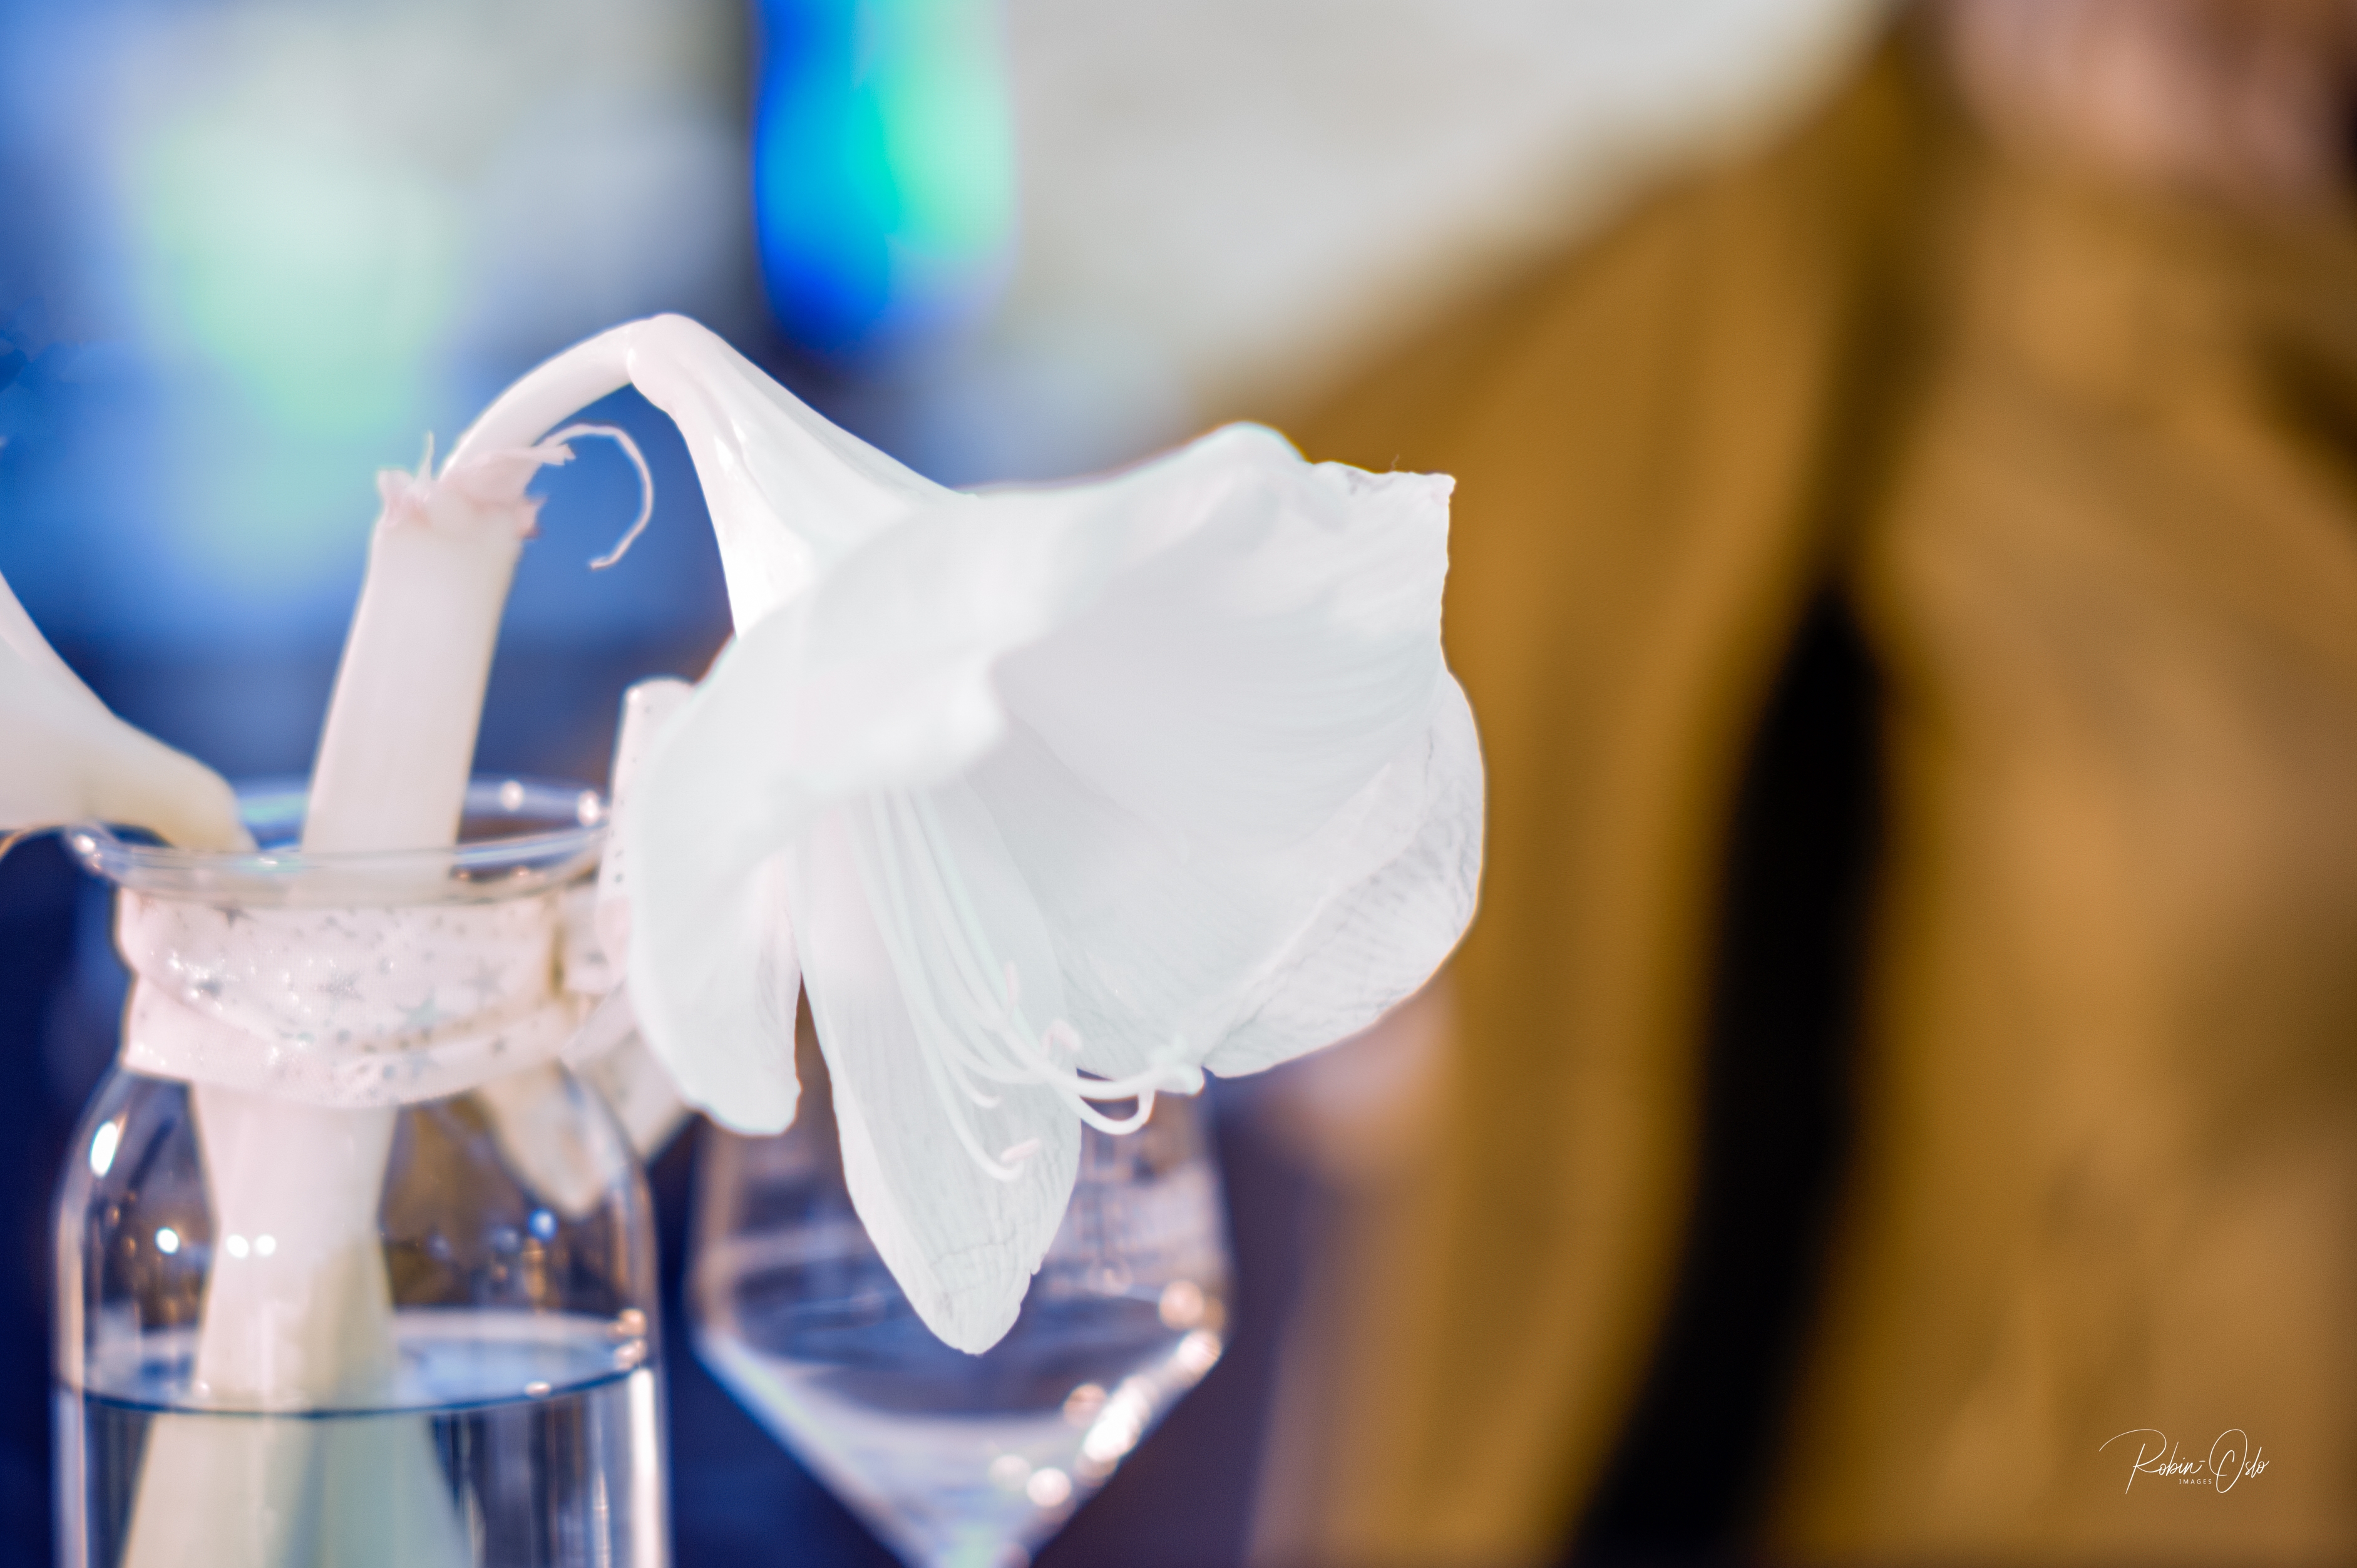
Portraits get a completely different touch. Our skin reflects quite a bit in the infrared range. Thus, after conversion to black and white, fine, soft skin tones are created that are sure to please any lady.

She will find less pleasure in a frontal portrait up close if she looked into the camera while doing so. The eye area will be simply creepy.


I wrote this post in January, because it occurred to me much too late that I could have a camera converted. (It got translated by me in June.)
My thanks go to Sven Lamprecht from IRRECams.de at this point, the super work and the quick remedy to the problem with the memory card slot, including sending back and forth again.
I’m looking forward to spring and summer and the associated motifs.


Another lens I have tried in the meantime is the Sigma 20mm f/1.4 Art, Nikon F-mount.
In contrast to the hopeless 35mm of the same company, I was pleasantly surprised.


One Comment
Geoff Byrns
Just briefly looked at some of your website, English pages, and I have to say there are stunning images. Congratulations.